Above is the latest Fusion Card Challenge. I just love those wooden hearts! I couldn't wait to make a card using the photo as inspiration. I decided to make a series of cards using two files of my own creation.
You cut the heart balloon overlay several times and simply layered the remaining pieces into the overlays like a puzzle. Here is a closer look at the individual cards.
Once put together I ran the entire card through a SU texture plate which helped integrate the heart balloon pieces better. I added some glossy accents to the sentiment to give it some body and shine. This set of cards came together soo quickly! I think I might design a file with regular balloons. I would love to make up a masculine set of these to have on hand for birthdays.
Thanks soo much for stopping by! Please come back again!
Welcome to day 3 of the Heart Hop. If you missed day 1 please click here to see it. If you missed day 2 see it here. After you get done visiting my blog at the bottom of this post you will see links to the other "More Team" designers who are participating in the Heart Hop!
It's snowing outside. Ordinarily I'd be sad to see the snow but not today...I'm in a lovely mood because Valentine's Day will soon be here! To celebrate this upcoming holiday I have put my whole store on sale! Click HERE to find something special for your Valentine! WAIT...before you go shopping visit with me a little while longer. I have some inspiring projects and a freebie to share with you!
First up Kelly showed just how creative she is with her version of my Perfect Match card. Kelly is a whiz with the embossing folders. I just love how much texture and interest those embossed hearts add to this card!
If you would like to purchase this file please click on the preview below:
Next up I'd like to share with you the latest file added to my store. It is a Nugget Treat Purse. These make wonderful quick treats for the little Divas in your life! Super fast to cut and wrap around a chocolate nugget shaped candy bar.
If you would like to purchase this file please click on the preview above. I love that simply by changing the heart into an egg this will work well for Easter baskets too. You can also use the shapes alone on scrapbook pages and cards.
Oh and here is side view so you can see how the nugget sits in the purse:
And now for the other part of the freebie I promised you. Today you get the buttons and sentiment. In case you missed the rest of the card you can find it in yesterday's post...but hurry it will be free only for a limited time.
Freebie No Longer Available! It contains 7 formats including AI, KNK, WPC, SVG, MTC, Studio, and GSD . Please do not share this freebie. I ask that you please send them to this blog to download on their own.
Here are the rest of the ladies participating in the Heart Hop stop by their blogs..
Welcome to day 2 of the Heart Hop. If you missed day 1 please click here to see it. After you get done visiting my blog at the bottom of this post you will see links to the other "More Team" designers who are participating in the Heart Hop!
I love Valentine's Day and have put my whole store on sale for a few days. Click here to find something special for your Valentine. The discount will show up when you place the items in your cart. STOP! Before you go I have a few things to share with you and a freebie too!
First up we have some lovely projects from creative design team member Kelly Stone.
I love how Kelly enlarged the photo corner and attached it to the front of a card to hold her great little tag! Those jewel hearts finish off the border from my Valentine Set quite nicely.
The above card by Kelly combines my Valentine Set with Card Base 1 file and also some iris folding. Once again Kelly blew me away with her awesome bling filled card. Great job Kelly! I just love iris folding! It is a great way to not only add interest to a card but also use up some paper scraps. A heart pattern similar to the one Kelly used alone with instructions can be found at Circle of Crafters.
If you would like to purchase either of the files Kelly used please click on the previews below.
To finish up I have one project I made using my Valentine Set. I used my Turning Paper into Metal tut on the hearts. I embossed the background cardstock..sanded until the white core showed up then colored the embossed areas with Copic markers.
Okay now on to that freebie you have been waiting for. Please note: I have broken the freebie into two parts. Today you get the card base including the frilly rectanglesand tomorrow you will get the buttons and sentiment.
Freebie No Longer Available! It contains 7 formats including AI, KNK, WPC, SVG, MTC, Studio, and GSD . Please do not share this file. I ask that you send them here to download the file themselves.
Here are the rest of the ladies participating in the Heart Hop stop by their blogs..
Ahh It's Feb and despite how cold it was at the bus stop this morning...I do believe love is in the air! I am in such a lovely mood that I am putting my whole store on sale for a few days. Click here to find something special for your Valentine. The discount will show up when you place the items in your cart. STOP! Before you go I have a few things to share with you and a freebie too!
After you get done visiting my blog at the
bottom you will see links to the other "More Team" designers who are
participating in the Heart Hop!
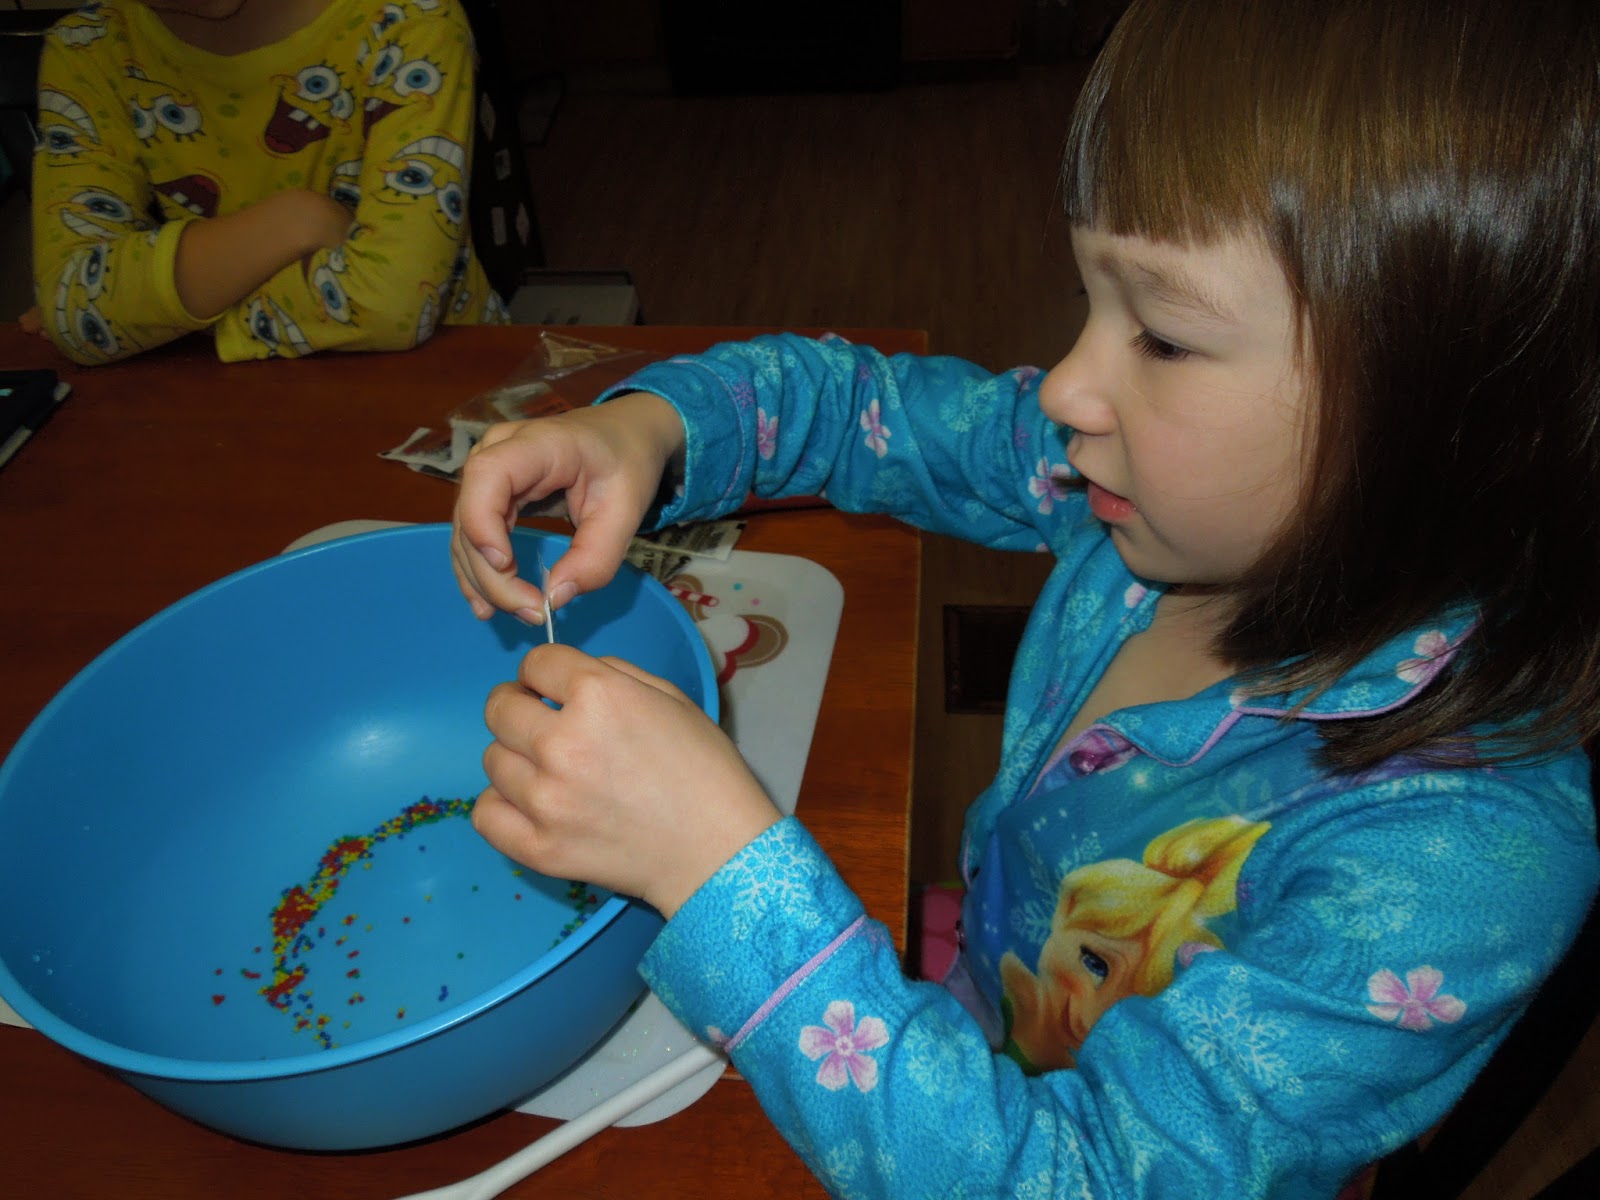
Oh my gosh! Look at my cute baldy! If you have been following my blog you might remember I have had problems with my daughter pulling out her hair when she was younger. I totally put that time period out of my mind until I saw this these photos. Not to worry though she is 5 now and has a good amount of hair.
See.... (getting her Orbees ready)
Anyway, I made the layout above using my latest digital kit...Be My Valentine. If you're like me and have oodles of pictures that aren't scrapped then please keep digital scrapbooking in mind. Now is the perfect time to try it out since my kit is super cheap with the Valentine sale and I bet there is a coupon floating around too that will save you even more. Digital scrapbooking is kind to your wallet as the elements can be used over and over again...whereas with traditional scrapbooking once you use a flower it is stuck on the page never to be used again. With Digital scrapbooking you can just copy and past and put several flowers on one layout or several different layers. The supplies last an eternity! Gotta love that!
If you would like to purchase my kit please click on the preview below.
Say you have no desire to do digital scrapbooking. Remember my digital papers can be printed on your home computer. You can even make your own double sided paper to use to on your cutter file stash. Click on the preview below if you would like to purchase the digital papers.
Just in case you want to try your hand at digital scrapbooking I am giving you a freebie card template to get you started. Oh and if you have any questions just drop me line..shellysart at verizon dot net.
You can download the freebie by clicking HERE. Please do not share the freebie with others..direct them here so they can download the file themselves.
Please stop by tomorrow I will have a cutter file freebie.
Here are the rest of the ladies participating in the Heart Hop stop by their blogs..
I'm sorry I haven't been around much lately. Our Summer has been anything but lazy. I have been suffering for about 5 possibly 6 months now with foot pain. I have an abnormally large bone in my foot. Ordinarily this isn't a problem but I did something to irritate the tendon and now it's rubbing against the bone causing a lot of pain. The foot doc tried various things but nothing really helped. So the last resort was physical therapy. Thankfully it has made me feel sooo much better. Since Tyler got out of school..he and Adoree have accompanied me to physical therapy sessions 3 times a week. I also need to do exercises twice a day. It's all worth it though my foot feels 10x better than when I started therapy about a month ago. Bless those therapist! I had taken for granted before being able to walk without pain and never really realized how a strong foot is important. I couldn't believe how weak my foot was before starting the exercises. One of the hardest things for me to get used to is wearing shoes in the house...I need the arch support so I must wear them. It might be easier in the Winter but now that it's warm I'm just can not get used to wearing shoes all the time! I was thrilled though as we found sandals with built in arch supports in them at an Amish store for really cheap! I love these sandals and my feet thank me for wearing them! LOL!
After the 4th of July we decided to remodel our porch. At first it was just going to be a paint job but after taking a good look at the condition of the porch we decided to tear down the awning, replace floor boards, posts and put vinyl railing and soffit up. We have a rather large porch and not much DIY skills so this is a big deal for us! Even with all those renovations it still left a lot of wood that had peeling and crackled paint on it. So it is my job to get the wood ready for painting (hubby is going to help!) . We tried scraping and sanding but the crackled paint wouldn't budge. So we are now using a stripping gel. It is working somewhat but takes off thin layers at a time so that means tons of scraping and reapplying the stripping until we get a paintable surface. As I was telling hubby this is a very hard job..especially with my wimpy arms! I repaired the horsehair plaster walls, sanded, cleaned, primed and painted the entire room mostly myself for my craft room and that was nothing compared to all this scraping! I wish the temps would cool a little as this stripping gel is supposed to be used in temps ranging from 65-85 degrees and we have been hitting the 90s. I think I'll get out there tomorrow morning before it gets too hot and then take a break and not go back out until after supper. The gel is supposed to stay active for 24 hours so that should work out well. Any suggestions on paint colors? We have a white house and the posts along with the railing will be white but I want the porch and steps to be a different color. I'm leaning towards a light olive green but I just can't visualize it. Most of the porches I've seen are the hunter green and for some reason I'm not fond of that color. I love the brick red but I think that looks better with a beige house and hubby already informed me we are not painting the house! LOL!
While working on the porch I managed to take some breaks and finish up the PTI's Make it Monday challenge..however...I didn't managed to get it posted on my blog by the deadline! DRAT! I love PTI stamps and really wanted to enter that challenge to win some. Oh well I do love how my card turned out so I figured I'd share it with you anyway!
It really is a great technique. You make your own stamp pad using reinkers so you can color one stamp with multiple colors. I used distress ink reinkers to color the butterfly and leaves as that is one stamp. I had to mix yellow and blue to get green since I didn't have any green but I love how that gave a lot of shading to the leaves. I had plenty of ink left on my custom stamp pad to make several of these. I wish I would of had the hindsite to stamp more of these for future cards. Someone did mention you could possibly store your handmade stamp pad in a sealed bag for later use but I didn't think of that either. :(
Before I tell you a little more about my card...I'd like to share with you the video describing this technique. Remember this challenge is no longer active but they do have a new challenge up for this Monday here. I only have one PTI die that I used on the card above so I'll have to see if I can get creative with that die!
I started with my Card Base 4 file then added PTI stamps for the focal point. The butterfly circle came from the Round and Round Anniversary Set (not available for sale anymore) and the frame came from the Mat Stack 2 collection and a Nestabilities Scalloped circle was added behind that for a pop of color. The background paper was stamped with a french script stamp. The patterned paper was made with the following PTI stamps: Turning a New Leaf (love...love..love..this set!) and the separate butterfly the the Round and Round anniversary set. This is my first time stamping my own background paper and I thought for sure I would screw it up but I think it turned out pretty well! It is impossible to tell in the photo but I sprayed the yellow scallop circle, border and butterfly patterned paper with pearl glimmer mist. I love the shimmer it added! The tag is from my tags galore file. The sentiment is from PTI's Round and Round anniversary set. I added a few clear dew drops colored with a purple Copic marker and also some rhinestones to the sentiment. Oh and see that baker's twine....guess..what....I made that myself! Yep...all it took was my Dremel tool, a cup hook, crochet thread and embroidery floss. (If you want to see a demo of how I did this let me know and maybe after the porch is done I can get one made up). I do think I will use this color combo in the future. I'm not a big fan of the color yellow for some reason but I love it paired with the purple and green.
My CDT member Johanne also had fun with my Card Base 4 file.
I just love this color combo and the papers she used. The stickles add just the right amount of pizazz to this great card! It would be a great card not only for Valentine's Day but any time you want to let you loved ones know you are thinking of them. Here is what Johanne had to say about her lovely card:
I Love you from Barb Wire Designs (from the KNK complementary files CD)
Fancy Hearts(Free_Feb_007) a freebie from one of the group
Paper: Together Ruby from
Chatter Box
Stickles
Tim Holtz Distress Ink brushed
corduroy
So do you any of you want to come to my house and put a bed together? LOL! Adoree has been sleeping in Tyler's "crib". It is one that converts into a day bed but she is a rather active child and the springs have started to sag plus she is getting really tall. So we decided it's time to get her a big girl bed. Her room is very small so we wanted a bed that had storage in it that way we wouldn't have to try to squeeze a twin bed and dresser into her room. We found a great loft bed on Amazon. It came in three boxes and now needs put together! It is funny even the instructions say it's best to ask a friend to help! Hmm I wonder if hubby and I can do this without too much frustration! Wish us luck! Adoree is such a girlie girl! Tyler has always been perfectly happy with plain sheets. However, Adoree just begged to have the Princess and Fairy sheets. It's a good thing they were on sale at Kmart! Okay now that your eyes hurt from reading this long post...I will bid you goodnight!
Thanks for stopping by and come back again. If I get a chance I'll come back with some porch before and afters! At this rate though the after might not be until the end of the month!
Do you have your Valentines done? We'll here is your chance to pick up a nutty Valentine for only $1.00. Click here to purchase my I'm Nuts About You Card. Hurry though this price expires at midnight EST today 2/11/11. Before you leave though I have some awesome projects done by my Creative Design Team. Week after week my e-mail box fills with such wonderful projects! I am soo lucky to have such a talented bunch of ladies on my side!
Isn't this Valentine by Shelly just terrifically whimsical? I love how she combined my Birds of a Feather file with my Valentine Set to make this great card. My favorite part of the card is the actual use of feathers...it's begging touch me! I also love the white accents and the doodling on the branch. Great job Shelly! If you would like to "case" Shelly's card click on the words above the previews to buy the files needed.
Kelly also was busy making a wonderful Valentine too. Laury...a fellow Paperthreads designer designed this huggable card. You can see it here. I just love it! Kelly used some of the files from my Lovely Layout to design the front of her card. Way to go Kelly thinking outside the box..seeing more than just a layout in that file. I just love the shimmery paper she used also. If you would like to purchase this file click on the words above the preview
Well I don't know about you but I'm soo tired of putting on numerous layers of clothing and such just to be able to endure the bus stop without freezing! I long for the days of heading out the door with just a pair of shoes! I have thoughts of Spring in my head and I think Shelly did too check out her great butterfly card below.
Yep...I wish these butterflies could fly off this card and bring warm weather to my world! Oh well I'm sure warmth will come soon enough and I'll be complaining it's too HOT! LOL! Shelly got our her airbrush to make the butterflies wings come to life. The stamps/dies she used were from Papertrey Ink. The butterflies are from my 3-D butterflies file. Click on the words above the preview to
purchase this file.
Now I promised you a little sneak peek at my newest file. Here it is...it's the first installment in a fruit digi collection. Let me know what you think and also pass along any "fruity" sentiments you can think of please. I'm not sure I'll stick with that font. I have seen where you can add Kool Aid to embossing powder to make a "smelly" card...I think these digis would be perfect for that!
Stampin' Up Tip
I am not an expert stamper by any means but I recently have gotten back into stamping. I know there are many companies out there that sell stamps but Stampin Up is the only company in which I know the stamps will last a very long time. I have some from 1994 that are still in like new condition! So I decided to cash in on some of the deals and freebie during Sale-a-bration..knowing I was making a good investment.
I am loving the new clear mount stamps! Okay the tip is to save the sticker sheets once applying the cling sticker to your stamps. You can use these scraps to turn your wood mounted stamps into cling mounted. Remember you don't need the entire stamp to be covered with the cling sticker for it to stick. The smaller stamps you can get away with a scrap in the middle. The larger ones make sure you have your edges covered and one smaller scrap in the middle. I ordered the Loads of Love stamp set. It only came wood mount so instead of mounting it on the wood I placed the sticker directly onto the grey foam and cut off the excess then I applied the remnants from my clear mount sticker sheets on top of that sticker to make them stick to acrylic blocks. I was able to use the remnants to make 4 SU wood mounted stamp sets into clear mount and I still have enough left to do one more set. I am working on my stamp storage system so I will share that with you along with photos when I get it done. Oh and here is a tut on how to unmount stamps for you to look at in case you don't understand the whole sticker on the foam thing I was talking about.
Okay time for lunch! Have a great weekend and stay warm!
Hi everyone,
Now that my sale is over that means Frugal Friday specials are back. Today's special is perfect for Valentine's Day!
That little love tag is a perfect addition to cards and layouts. The pieces all cut separately so you could easily add any die cut or stamps to these tags. This makes them them very versatile and soo worth $1.00. So hurry on over to my store and pick these up. Click here. The price magically disappears at midnight EST today (2/4/2011). (Look Gina...I got the date right..tee hee!). Before you leave please check out these great projects from my very talented CDT.
Take a look at the tag/card by Shelly M! Wouldn't this be a very cute Valentine! Let's see she used my Clothes Line Baby Girl Card. I just love those mini clothes pins! (Edited to add: Shelly used a cut/emboss die from Stampin' Up for the butterfly) but you could easily shrink my 3-D Butterflies to baby size and added it to a heart. Simply adorable! I'm not sure what she used for the tab...but you could use my Hinged Tabs and not cut the window for the same effect. I'm also not sure what Shelly used for the card base but you could use my Pocket Card file to make something similar.
Click the words above the previews if you'd like to purchase any of these files. Pocket Card
Next up we Caz helped my owl from my Loving Owl Tag file fly off the tag onto a card. I love where Mr. Owl landed! Her card is great...take a look for yourself!
See I told you it was a Hoot! Sorry I couldn't resist! I think the mixture of different patterns makes Mr. Owl look wonderfully whimsical. Take a look at the card base...Caz created that herself! It's it amazing! Click on the words above the preview if you'd like Mr. Owl to come visit you! Loving Owl Tag
I do have a few more CDT projects to share with you but it's almost lunch time and I must get to some housework before that. I did get some layouts done at a recent crop so I'll try and take some photos of those and share them with you too soon. I am also looking at ways to organize my acrylic, unmounted, and wood stamps so if I figure things out I will post my system. Meanwhile if you have any tips for me..please send them my way! I could use all the help I can get!