Showing posts with label Colour Q. Show all posts

Friday, August 26, 2016

Make it Monday #258 Cover Plate Tags

This week's Make it Monday involves using cover plate dies to make tags.  Laurie shows us an easy way to add just about any cover plate to a tag in her marvelous technique video here. I also sought out the latest Colour Q challenge for my color scheme.

I just adore those colors together and couldn't wait to start creating!  I only have one cover plate die.  I absolutely love my butterfly cover plate so I was excited to have an excuse to use it!

I started by using my Clarity Stencil brushes to blend the ink colors onto the cover plate die cut.  I loved how the blue and red blended together accidentally to make purple!  Blending with these brushes is soo effortless... no streaks whatsoever is heavenly!  I decided I wanted to add some pizazz to the background of my tag so I used a technique Jennifer McGuire shared in her video here.  I used a paintbrush to flick splatters of water onto my tag and then immediately sprinkled on some glittery silver embossing powder which is then heat embossed.  It's amazing how the embossing powder clings so well to the water!  It is really quite sparkling in real life!  I dug out some fun fibers from my stash to add to the top of the tag.  I didn't feel like finding some stamps to fit in that small space not covered by the butterflies so I hand wrote "a gift for you" with a black fine tipped marker.

Supplies listed and linked below:
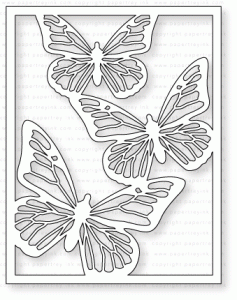
PTI Butterfly Cover Plate Die

Momento Rose Bud Dye Ink

PTI Scarlet Jewel Dye Ink

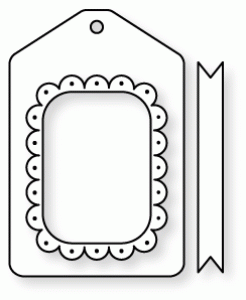
PTI Tag Sale #10 Die

Momento Pistachio Dye Ink

Momento Summer Sky Dye Ink
Thanks for stopping by! Please stop back again! Enjoy your weekend!

Share:

Sunday, May 22, 2016

Papertrey Ink Make it Monday #249 Make It With Money and Colour Q #342

This week's challenge involves either folding money into a shape or decorating a paper wallet to give as a money holder. Lexi shares a wonderful video showing how to fold a dollar bill into a shirt.  Check it out here.   My daughter had her 9th birthday on Friday.  I knew I had to incorporate a money shape onto her card.  She loves the Papertrey Ink Color Pop Butterflies kit so I knew I had to use that in some way.  I wasn't sure what colors to use so I sought out the latest Colour Q  challenge to give me a palette to work with.

I love that dark blue paired with those bold colors.  Here is what I came up with:

Since my daughter loves butterflies I decided to make a money folded butterfly to add  as a focal point for the card.  I watched this video by Simply Debbie to make it.  I used some gold wire for the antennae.   I didn't realize the butterfly would be soo wide but I didn't have time to make another.  Fortunately, I was just able to tuck this card inside the gift bag just prior to giving it to my daughter so I didn't need an envelope  If I were to do this again I'd definitely find a smaller butterfly.

This is my first time using the Color Pop Butterflies kit and I absolutely love it!   The background of this card was soo fun to make!  You use a stencil to ink in the butterflies, flowers and leaves shapes.   Then you add details over top of that using stamps.  I actually used the same color of ink to sponge and stamp.  The sponging gives you a lighter shade of ink than directly stamping thus making it easy to add your details.   I did add a third layer of details to the organge butterflies using PTI's terra cotta tile ink but I could have easily just used the MISTI to stamp over the images a few times to make the ink dark enough to stand out.  I cut a vellum banner using Sunny Studios Banner dies to have a place rest my "happy" sentiment also from the kit.  I accidentally embossed the birthday word in white.  I actually stamped it in blue then stamped a layer of versarmark over that then added what I thought was clear embossing powder but apparently it was white!  OOOPS!

My daughter absolutely loves bling so I instead of adding the stamped details to the flower centers I added tiny holographic rhinestones to finish the card off.   The butterfly is attached to the cards with glue dots and can easily be taken off and unfolded to spend.  My daughter loved it so much though that she wanted to keep the butterfly on the card!  I am thrilled that she liked it!  I can't wait to let her use the kit and see what she can make!

I need to go eat supper.  I will be back either tonight or tomorrow with more details of the supplies I used and such.  Thanks for looking!  Please come back again!


Share:

Sunday, March 06, 2016

Papertrey Ink Make It Monday #241: Ombre Stenciled Backgrounds and colourQ challenge #331.

This week's Make it Monday technique over at Papertrey Ink involves ink blending and then using a stencil over the ink blended background.  Betsy does a splendid job showing us exactly how to do ink blended backgrounds without harsh lines.  Check out the wonderful video here.

I didn't feel like choosing a color palette so I used the gorgeous colors in the latest Colour Q challenge.

I absolutely love these colors!  In fact my favorite color is turquoise.  So I couldn't wait to work with this beautiful color scheme!

I sponged on my backgound colors from light on the bottom to dark on top.  I then laid a stencil over my background and sponged again the same colors over top the stecil being sure to over lap so the colors can blend.  I fussy cut the flower but had a die for the leaves.  I very rarely use a color other than green for leaves but I like this grey color for foliage in this card.  I added darker highlights to the inner flower petals using a grey (C5) Copic marker.  I also shaded in between the petals to give more depth using grey (C3) Copic marker.  The flower was popped off the card with foam.  The sentiment was heat embossed and a few blue sequins finishes the card.

Supplies are listed and linked below:

PTI Think Big Favorites #12 Mini Stamp Set

PTIRosie Posie Stamp Set

PTI Rosie Posie Die Collection (set of 3)


PTI Aqua Mist Dye Ink

Thanks for stopping by! Please come back again!
Share:

Friday, January 29, 2016

Colour Q Challenge #326

This week's color Colour Q challenge is a great mix of colors that remind me of Spring.

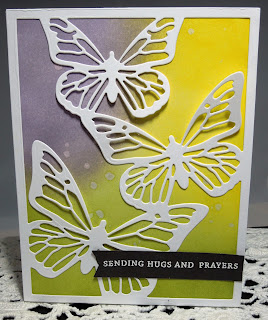
It's  nice to see colors like this in the Winter.  When I think of Spring I think of butterflies.  PTI just released this gorgeous butterfly cover plate and I couldn't wait to use it!   One of PTI's talented designer's created an amazing card using this cover plate and I just knew her design would be perfect for these colors.  You can see Laurie's beautiful card here.

Okay warning I loved using this coverplate so much I got kinda carried away!  So you will see many variations below.


I hadn't played with my distress ink for a long while.  I got the round blending tool and a pack of mini cubes from hubby and the kids for Christmas so I figured I'd pull them out.  I love that little round blending tool!  It's sooo much easier to blend then the rectangle one! The closest purple distress ink  I had to wisteria wonder is shaded lilac so I used that in addition to mustard seed and peeled paint.  I took a paintbrush and flicked on some white pearl shimmer mist to the background.  A sentiment from PTI's wishes come true stamped on chocolate brown paper (sorry it looks black in the photo) then embossed with white embossing powder finishes the card.

Tip...clean off your mat in between inking colors. As you can see in my card I have numerous colors in the lilac ink because I didn't clean my mat!  Oops!  I do better in the next cards!

I didn't care for the bluish hue in the first card so I tried some plain old dye ink by PTI called winter wisteria along with the same distress ink colors in the first card.  I liked this much better.  I used plain water to spritz the background this time.  I will say the distress ink was much easier to blend then the dye ink...not impossible but takes a little longer.  Plus distress ink does react with the water better.

I wanted to try an even more vibrant purple so I used dusty concord in addition to the other colors.
I also remembered I had some pearlized cardstock (woohoo using up my stash) so I cut the coverplate from that.  I wish I would have thought about this before I cut several out of plain white cardstock.  The finish is amazing!  It's hard to see in the photo...take a look at the one on the bottom.
Still more gorgeous in real life but you get the idea!  Next, I thought I'd try an orange...
So it was distress orange marmalade along with the others I previously used. Next I went with a total different rainbow to really brighten things up a bit.
This time the following distress inks were used: abandoned coral, cracked pistachio and fossilized amber.  Gold shimmer spray spritzed on the background this time.

As you can see I had way too much fun with ink and this butterfly cover plate.  I did an experiment and cut cover plate out of good PTI card stock and then out of cheap Georgia Pacific card stock and really the thickness doesn't matter for these.   The pearlized card stock is stunning but if you are looking to be frugal (who isn't?!) then the cheaper card will still give you good results!  (I used the cheaper in all of these except for the shimmer)  Plus this is a really flat card which is easy to mail.   You don't need a lot of bumpy bling to make this one look good!  Gotta love that! This is my first cover plate purchase (thanks to birthday money!) as I thought the cover plates were nice but expensive.  However, I am glad I invested on this one because you can create a beautiful card with minimal layers in no time!

Supplies are listed and linked below:


PTI Cover Plate: Butterfly Die

PTI Wishes Come True Stamp Set

PTI Winter Wisteria Dye Ink


Mustard Seed Distress Ink

Peeled Paint Distress Ink

Dusty Concord Distress Ink


Spiced Marmalade Distress Ink

Cracked Pistachio Distress Ink

Abandoned Coral Distress Ink


Fossilized Amber Distress Ink

Hero Arts Prayers Stamps

PTI Round and Round Anniversary Set
(no longer available)

Thanks for stopping by! Please come back again!
Share:

Monday, May 25, 2015

Colour Q #292

I saw these wonderful colors for the Colour Q challenge and couldn't wait to participate.  The colors are sooo cheerful.  I just knew they would work  fabulous together on a card.

I knew immediately that I wanted to case Melissa Philipps stunning card that can be found here.

I had soo much fun playing with Papertrey Ink's Plaid Builder and Quilted: Summer stamp sets.  It's great being able to make my very own plaid paper to match the colors in my quilt block!  I just know I'll reach for these stamp sets time and time again!

Thanks for stopping by!  Please come back again!


Share:

Sunday, March 29, 2015

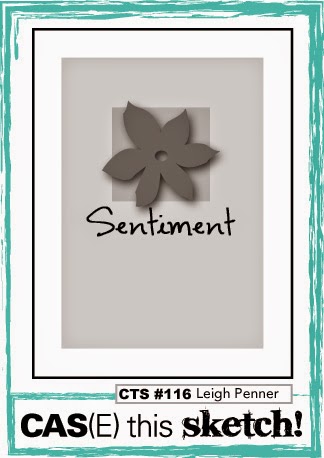
Case This Sketch #116 and Colour Q #284

Hello everyone!  Are you enjoying the Spring weather?!  I am loving hearing the birds and seeing the bulbs push their vibrant green leaves out of the ground BUT...I just wish the temps would get a little warmer.   If this keeps up the Easter bunny will have to wear a coat!

 I apologize but I had so much furn with the PTI challenge involving stamping your own patterned paper (discussed in my last post) that I just had to try it again.   I decided to use :

http://casethissketch.blogspot.com/2015/03/case-this-sketch-116.html
and

http://colourq.blogspot.com/2015/03/colourq-challenge-284.html


That way I wouldn't have to rack my brain figuring out a style and color for my card set.  I can get to the fun part...decorating!


I have to apologize for the poor photos.  I have a light box but am trying to figure out the best position for the lights in my room.


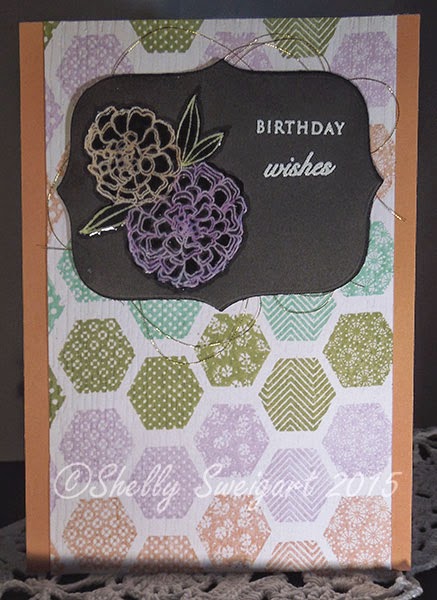
I used PTI's Make It Monday #45: Coloring Embossed Images with Copics. Yes it is an older video but one of my favorite techniques! I haven't felt like coloring detailed images with shading and such as you are supposed to with Copics so this technique makes my Copics feel less neglected and me more creative! 

I used PTI's Year of Flowers collection and Mat Stack Two to complete my card set.  I added a layer of glossy accents to the flowers to really make them pop!  I also tried a new embellishment.  Some messy gold thread behind the focal image.  I love the texture it adds without adding a lot of bulk!  I think I need to find some in silver too!

Time to run!  Thanks for stopping by and be sure to visit again!  Those of you in my part of the world...stay warm!

Share:

Monday, January 12, 2015

Make it Monday #197 and Colour Q #274 Birthday

I happened upon the most recent Colour Q challenge # 274. I absolutely loved these colors but....the deadline was tonight!  Yikes so I whipped up a card quick!

It's been  a very long time since I participated in a Papertrey Ink Make it Monday challenge so I figured I'd incorporate that too.  Here is what I came up with:

The MIM challenge involved making your own foam letter stickers.  Check out the great video tut here.  I really do like the raised effect this gives and the fun foam was easy to cut through.  I cut plain white cardstock letters and colored them with a Copic marker before gluing them on top of the foam letters.  I used another of my card base files.  I just love how fast this makes cards come together!  This file will be coming soon to my store.  I will update this post when it arrives. ETA:  My file is now official for sale in my store.  Click here or the preview below to purchase.

http://www.cutandcreate.com/store/index.php?main_page=product_info&cPath=106&products_id=964


I also adhered a sequin border to the back of the circular focal point.  The background was stamped with PTI's Rosie Posie and Happy Hexagon stamps.   The "Happy" are letter dies from Quick Kutz I believe.  The "birthday" is from PTI's Think Big Favorite's #12.  I stamped polk-a-dots on the banner tail using white pigment ink.

Whew!  I made it before the deadline!  Yippee!  I actually made two of these cards so I very well maybe be caught up on the cards I need for January!

I'll talk to you again soon...are you getting sick of me yet?!  I have never posted this much!  LOL!


Share: