Showing posts with label color pop florals. Show all posts

Wednesday, January 25, 2017

Papertrey Ink January Blog Hop Challenge

Every month at Papertrey  Ink Nicole Heady posts a photo on her blog...in which we are to use to inspire us to create a project.  This month's is phenomenal.  Check it out below:
I just love the black icing and pretty floral clusters with the cookie edge peeking through.  Nicole posted the photo in advance and the minute I saw it I couldn't wait to create!  It is so inspiring!  It was nice to have my blog hop card done early for once!

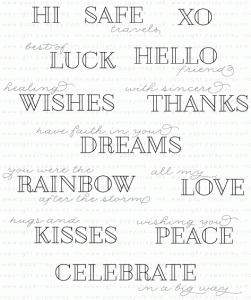
I am thrilled with how this card turned out!  It's even prettier in real life.  I used two different shades of pink (lovely lady, and sweet blush) but in the photos the pink aren't as vibrant as they are in real life for some reason.  I initially wanted to use roses but the ones I had just weren't the right size.  PTI's Color Pop Floral blossoms were perfect.  I took a technique from Nicole by drawing in little white dots around my vine and in the center of the flowers.  I love this little detail!  I once again used a sentiment from PTI's colorful words.  It is heat embossed in white.  I can't wait to try this card design with other colors and other sentiments.  This would work well for Mother's Day!

Oh and I did color over the flowers with a clear Wink of Stella glitter pen to give them some shimmer.  I also added some glossy accents to the berries.  I tried to capture this in the photo below.
Supplies are listed and linked below:
HTML Code:

Make It Market Mini Kit: Color Pop Florals

PTI Colorful Words Stamp Set

PTI Fancy Foliage Details Dies
HTML Code:

PTI Pure Poppy Dye Ink

PTILovely Lady Dye Ink

PTI Sweet Blush Dye Ink


White Gel Pen

Thanks for stopping by! Please come back as I will have some updated organizational posts for you! I have been working on organizing my inks, dies, and stamps and will share with I have done with you soon.
Share:

Sunday, August 21, 2016

Papertrey Ink Create Along With Us August 2016

This week at Papertrey Ink the challenge is to be inspired by a project the fabulous design team created during the release this week.  I loved Betsy Veldman's card below:
You can get the details on how she created this beautiful card on her blog by clicking HERE.   I was also inspired by the latest color challenge at the Colour Q.
I just loved the combo of red and green colors paired with the dark grey background.  So I pulled out my Color Pop Florals kit and got to work!

I was soo excited to use this color combo but it ended up looking like a Christmas card!  It never fails..anytime I use red and green together I end up with a Christmas card!  Oh well it is still pretty and I am sending this to a friend in need of "healing wishes."  I heat embossed the center of the flowers and leaves with white emobssing powder.  The wishes die cut word came from PTI's Big Basics:  Birthday.  I simply cut off the "birthday" word to just use the wishes die cut word. The "healing" comes from the PTI Colorful Words stamp set.

 I love this card design!  It works great with all the Color Pop kits or anytime you create your own stamped background paper.  This is the first time I used the little scallop feature of the Fishtail Banners dies  from Sunny Studio and I really love that little detail.  I did use the Clarity Stencil brushes with the stencils from the kit.  It did take a little while to build up this intense red color but I love the smooth finish.   They almost looked stamped instead of stenciled!

Supplies listed and linked below:

Make It Market Mini Kit: Color Pop Florals

PTI Colorful Words Stamp Set

PTI Big Basics: Birthday Die

Clarity Stencil Brushes

Versamark Emboss Ink Pad

Ranger White Embossing Powder
Thanks for stopping by! Please come back again!
Share:

Saturday, July 02, 2016

Papertrey Ink Make It Monday #254: Stenciling with Texture Paste

This week Ashley teaches us how to use our texture paste with stencils to make a multi-colored card.  Check out her awesome video here.

I had bought some texture paste several months ago but had yet to use it so when I saw the lastest MIM I was very excited to have an excuse to finally use it!

Ashley's technique involves apply texture paste over the stencil smoothing it out and immediately adding color to the wet paste without removing the stencil.  Ashley used reinkers in her video but I dind't have reinkers in the colors I wanted to use so I just smooshed the ink pad on my craft mat and added some water to color my images.  Ashley made this whole process look very easy.  The texture paste itself was very easy to apply and smooth out.  I had some problems adding color though I kept leaving indents in the paste with my brush and in a few places the ink seeped under the stencil.  That is why I used a very bold sentiment to cover my mistakes.  The largest and medium flower have the texture pate on them.  The leaves and smallest flowers are just stenciled with ink like normal.  Once again I used my clarity stencil brushes and  I love the soft look you can achieve with these brushes.  I was pleasantly surprise at how the texture paste holds up.  I even die cut this piece with stitched rectangle die and it didn't crack or anything.  Plus it was very easy to stamp the flower details over the texture paste flowers.  I finally invested in a clear wink of stella pen and applied it to the sentiment.  I am soo impressed with the sparkle of this pen.  If you cick on the photo to make it bigger I think you can see it too.   In the past I only had a white pen which didn't seem to sparkle as much and also changed the color of your image a bit (which is some cases like my last post is good).

So since I had some seepage of ink with the above card I decided to try one more card.  My daughter wanted to make our piano teacher a card for her birthday so she suggested we try a rainbow.


This time I used reinkers but still had some seepage and managed to put more indents in the texture paste rainbow.  However, I was able to cover up the seepage with the cloud stencil.    This rainbow stencil is in two pieces.  The three bows are done first then another stencil gets layered over top to complete the rainbow. So I applied the texture paste to the first stencil let it dry then applied the second and thus the stencil rested on the previous texture pasted bow which made it higher so my last two bows are raised more than the first.  I think if I were to do this again I would tape the two rainbow stencils together and use them at the same time to apply texture paste to the full rainbow.  I used the palette knife to apply some swirly texture to the clouds.  Love this effect!  My daughter added rainbow colors to the die cut words using the stencil brushes and also some makeup brushes (since I didn't have enough stencil brushes for each color family).  She positioned everything on the page just as she wanted.  She loves her bling so she was excited to add sparkle to the bows with the Wink of Stella brush pen.    We combined several stamps to create the sentiment "Wishing you sunshine and rainbows on your birthday."  Luv, luv, luv, that sentiment.  I can't wait to try making this card again myself!

Supplies listed below:

Birthday Wishes Card:

Make It Market Mini Kit: Color Pop Florals

PTI Big Basics: Birthday Die

PTI Berry Sorbet Dye Ink

PTI Melon Berry Dye Ink

PTILovely Lady Dye Ink

PTI Mint Julep Dye Ink

I will have to check and see which reinkers I have so I can figure out which colors I used on the rainbow card. I have some errands to run so I will have to finish my supply list later. Thanks for stopping by! Please come back again!
Share:

Thursday, April 14, 2016

Papertrey Ink Create Along With Us Challenge

Since this is new release week over at Papertrey Ink they aren't hosting a Make it Monday technique challenge.  However, we don't have to do without our weekly challenge fix!  Instead they have a Create Along With Us challenge.  This involves picking out some of the wonderful projects the designers have showcased during this release to inspire us to make our own creation.  I chose Kay Miller's awesome tags for inspiration:

She used the new Color Pop Butterflies kit.  (I just love her vibrant color choices!) This kit is soo great!  I can't wait for these butterflies to come to my house!  I wanted to make a tag similar to Kay's to package with the stamps I am selling.  I looked in my dies and I don't have any type of tag except really tiny ones.  But I did find a really cool scallop card so I pulled out my Color Pop Florals kit and the fun began!

Click on the photo for a large picture.  The kit comes with preprinted florals and leaves than can be die cut for quick cards.  I added a few gems to the center of flowers to add some depth.  The sentiment is embossed with white powder.    These cards the perfect size to write a little note!

Supplies are listed and linked below:

Make It Market Mini Kit: Color Pop Florals

PTI Everyday Classics (2009 Anniversary Edition 

no longer available

Versamark Emboss Ink Pad


Ranger Clear Embossing Powder


Thanks for looking! Please come back again!

Share:

Sunday, March 27, 2016

Papertrey Ink MIM #243 Ink blending over heat embossing and Colour Q #334

This weeks Make it Monday Challenge over at Papertrey ink involves ink blending over heat embossing.  Dani has an amazing video showing this technique check it out here.

I also sought out the latest Colour Q challenge for my color scheme.

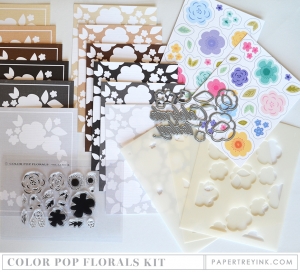
I decided to pull out my first ever kit from Papertrey ink.  I have always ooed and awed over PTI's kits but many of them were way out of my price range.  So when Color Pop Florals was introduced I was delighted to finally be able to order a kit.  In this kit you get a massive amount of supplies for your money... stencils, stamps, dies, preprinted images and preprinted card bases.  I chose one of the preprinted card basis for my card.

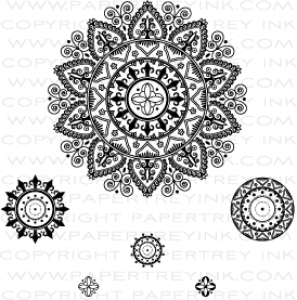
The preprinted card base had white spots for the leaves and flowers.  You simply position the stencils over these white spots and sponge on the ink.  So  for this challenge I stamped PTI's mehndi medallion mini stamp set in the center of the flowers instead of the flower centers that were included in the kit.  I heat embossed the medallions with clear embossing powder.  That way the white cardstock would show though when ink is applied over top. The stamps, and die cuts I used was included in the kit.  I had a hard time with this card. I felt it was too flat as I'm used to more dimensional cards.  I did cut the sentiment from fun foam to add some dimension.  I still wasn't happy so I used a Copic marker to shade around all of the images to add some depth.  I used a white gel pen to add small dots to the small flowers and leaves.  A few sequins finishes the card.  I am still not loving it though! 

Supplies listed and linked below:

Make It Market Mini Kit:

 Color Pop Florals

PTI Pure Poppy Dye Ink

PTI Hibiscus Burst Dye Ink

Cracked Pistachio Distress Ink

Mini Ink Blending Tool

Ruby Slipper Sequins

Clear Gems

White Fun Foam

Copic E51 Milky White Cream

Versamark Emboss Ink Pad

Ranger Clear Embossing Powder

White Gel Pen

PTI Mehndi Medallion Mini Stamp Set
Thanks for stopping by! Please come back again!

Share: