Showing posts with label tag sale #10. Show all posts

Saturday, October 08, 2016

Make It Monday #263 Background Building With Frames and ColorTthrowdown #413

Amy Sheffer shares with us a wonderful technique for her MIM video over at Papertrey Ink.  It involves building a background with frames.  Check out the video here.

I loved the technique of Amy's!  She first shared a card using this technique back in Feb of this year on her blog.  See her fabulous tulip card here.   I had saved this card of hers because I knew one day I'd like to copy it.  I was excited when she showed this card in her technique video because I now had an excuse to duplicate it!

I also pulled my colors from the latest Color Throwdown Challenge.
Below is my card:
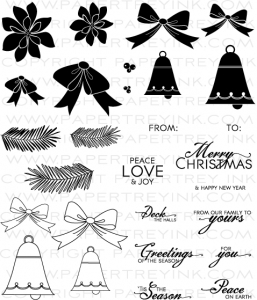
Because of the bold colors in the challenge I went bold with my stenciled background.  Turns out that doesn't work for this technique.  I am not loving my card!  Amy's soft stenciled background was obviously the way to go.  My white frames got lost on this busy background so in an attempt to bring them back to life I colored the dots in with blue marker.  I stamped a flower my PTI's bitty bouquest and a tiny sentiment from PTI's the skinny to complete the card.   One day I might redo this card in different colors or something.

I'll be back at some point to add my product links.  Thanks for stopping by!  Please come back again!


Share:

Sunday, September 25, 2016

Papertrey Ink September 2016 Blog Hop Challenge

Today at Papertrey ink there is a blog hop going on.  We are to make a card with the above photo for inspiration.  You can check out all the wonderful cards at Nicole Heady's blog here.  As Nicole mentioned it's good when the artist keeps things simple and just sticks to the basics.  So I kept that in mind when making my card but I have to say It was very difficult for me to stop adding embellishments and such!

I also used a sketch by Amy Sheffer for inspiration.  It is from Papertrey Ink April 2016 newsletter.


I didn't have any pinecone stamps so I made due with flower stamps from PTI's Everyday Classics stamp set.  I used a white Prismacolor pencil to add the "snow" to the pinecones.  What do you think...do they look like pine cones to you?  In the sketch is says to add a variety of material to add interest and texture so I cut the tag out of burlap and the scalloped element out of felt.  I like how some of the leaves were overturned exposing the backside of the leaf in the photo.  So I cut the sprigs out of two shades of green and glued them together then I flipped some of the leaves over and glued down them down so the lighter side showed.  I colored the berries on the sprigs with a white gel pen.  A craft tag (cut using the QK special edition kit) and bow finishes the card.  I really struggled to stop here and keep things simple.  I really wanted to add some sequins or rainstones.

Supplies listed and linked below:

PTI Everyday Classics (2009 Anniversary Edition

PTI Bells and Boughs Stamp Set

PTI Tag Sale #10 Die

PTI Cocoa Bean Dye Ink

WPlus9 Under the Mistletoe Dies

White Gel Pen
Thanks for stopping by!  Enjoy the rest of your weekend!  Please come back again!


Share:

Friday, August 26, 2016

Make it Monday #258 Cover Plate Tags

This week's Make it Monday involves using cover plate dies to make tags.  Laurie shows us an easy way to add just about any cover plate to a tag in her marvelous technique video here. I also sought out the latest Colour Q challenge for my color scheme.

I just adore those colors together and couldn't wait to start creating!  I only have one cover plate die.  I absolutely love my butterfly cover plate so I was excited to have an excuse to use it!

I started by using my Clarity Stencil brushes to blend the ink colors onto the cover plate die cut.  I loved how the blue and red blended together accidentally to make purple!  Blending with these brushes is soo effortless... no streaks whatsoever is heavenly!  I decided I wanted to add some pizazz to the background of my tag so I used a technique Jennifer McGuire shared in her video here.  I used a paintbrush to flick splatters of water onto my tag and then immediately sprinkled on some glittery silver embossing powder which is then heat embossed.  It's amazing how the embossing powder clings so well to the water!  It is really quite sparkling in real life!  I dug out some fun fibers from my stash to add to the top of the tag.  I didn't feel like finding some stamps to fit in that small space not covered by the butterflies so I hand wrote "a gift for you" with a black fine tipped marker.

Supplies listed and linked below:

PTI Butterfly Cover Plate Die

Momento Rose Bud Dye Ink

PTI Scarlet Jewel Dye Ink

PTI Tag Sale #10 Die

Momento Pistachio Dye Ink

Momento Summer Sky Dye Ink
Thanks for stopping by! Please stop back again! Enjoy your weekend!

Share:

Monday, July 25, 2016

SAF 2016: Gilded in Gold with Danielle Flanders

My next SAF project involved using Liquid Leaf as Danielle Flanders showed us in her video.  I love this stuff!  If you haven't tried it before I urge you to get some...you won't be disappointed!  I never used gold much before but after using liquid leaf I certainly will use it more in the future.  You brush it on and it dries almost instantly leaving behind a shiny but not brassy gold finish.  This stuff is amazing!  Now it does have a rather unpleasant order similar to spray paint so you may want to open some windows when using it.  Okay enough gabbing I'm sure you want to see this stuff in action on my card now.  Oh and in case you missed it you can see the card I did for the blog hop which also uses the liquid leaf here.

I used PTI's tag sale #10 cut out of pale peony cardstock.  I cut the scallop part of the tag out of PTI's coasters then applied the liquid leaf to them.  I love Danielle's tip of using these coasters.  They cut really well and accept the gold well.  They are super thick too about the thickness of stacking 3 cardstock die cuts together.  They are super cheap too you get 25 for only $1.00.  The flowers and sentiment are from the stamp-a-faire exclusive set Art with Heart.  I just love that flower cluster! I added dots of the liquid leaf using my stylus to the flower centers.   I got the color scheme from beautiful card Kay Miller did.  You can see it here.  I added a soft swirl of ink to enhance my sentiment using the Clarity stencil brushes and some aqua mist ink.  Some iridescent sequins and much neglected fibers finishes off this tag.  Now I just have to make a gift to go with it!

Thanks for stopping by!  Please come back again!


Share: