Showing posts with label stitching. Show all posts

Friday, March 25, 2016

Papertrey March Blog Hop Challenge

Isn't that picture just gorgeous!  This is our inspiration for the latest blog hop at Papertrey Ink. I love how the artist combines embroidery with drawing!  There is more info and more photos on Nicole's blog here.  It's eye candy so go and check it out!

I absolutely love using stitching on my scrapbook pages but always forget to use it on cards.  So I was excited to participate in this challenge!  I used Weathered Wood distress ink sponged onto  PTI Soft Stone cardstock in an effort to mimic the artists wonderful background.  Then I used a stitching template from Oriental trading to poke holes in my cardstock for the swirls.  They were stitched with 6 strands of embroidery floss pulling colors from some of the artist's prints.  A few PTI The Sweet Life flowers were added along with leaves using Memento Pistachio dye ink.
Roses:
Layer 1
Memento Summery Sky
Layer 2
PTI Blueberry Sky
Layer 3
Memento Nautical Blue

Supplies listed and linked below:
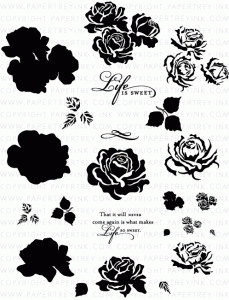

PTI The Sweet Life Stamp Set

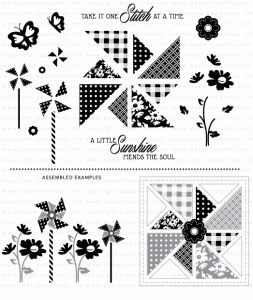
PTI Quilted: Summer Stamp Set

PTI Blueberry Sky

Momento Pistachio Dye Ink

Momento Nautical Blue Dye Ink

Momento Summer Sky Dye Ink


Weathered Wood Distress Ink

Mini Ink Blending Tool

Iris Embroidery Floss Pack SUPER GIANT PACK
One more thing.  I have a tutorial coming up showing you how to use the MISTI to stamp these rose layers easily.

Have a blessed Easter!
Share:

Thursday, January 23, 2014

Color Q #225 and Case This Sketch #60 challenges

Hello again!  This is my second post for today so if you are looking for the card a day blog or fusion challenges please see previous post.

I absolutely adore sketches.  The hardest part of creating cards is figuring out where to put my elements so when I found the Case This Sketch challenge I just had to join in.  Here is the sketch:


Here is what I came up with using the sketch:

I figured why not make things even easier (or so I thought) and seek out the latest Colour Q challenge for my color inspiration.

Aren't these colors gorgeous together and the sketch is pretty simple too...should make for fast card creating.  NOT!  Do you ever have a project where you keep changing and adding things and still it doesn't look right?  Well this was one of those projects.  It started off simple enough but I made it complicated.  Let's see First I stamped the image from Stampin Up's just believe and heat embossed it in white.  I wanted to use the PTI's MIM #45 coloring embossed Images with copics to incorporate the challenge colors.  I love this technique to add multiple colors to non layering stamps!


This technique worked pretty well even on the very textured card stock.  I added a heat embossed sentiment from PTI's Year of Flowers collection stamp set.  I mimicked the stitching in the sketch by using my Sew Easy and the circle pattern.  The image still seemed to need something so I added the tiny pearls and yes I kept fussing with the image still and ended up adding the twine bow.  I put everything together modeling the sketch and still wasn't happy with the background.  I ended up stamping it with script background using distress inks and then sponging distress inks around the edge.  Then I ran it through the Grand Calibur with my favorite texture plate.  Would you believe the card still looked too plain to me.  So I stamped the burgundy strip with PTI's Fancy Flourishes.  Then I added some scallops to the side of the burgundy strip.  Whew!  Now I'm restraining myself from adding anything else!  I really thought this card was going to be simple!  It is a simple sketch..I should try it with a scrap patterned paper strip and a simple focal image sometime. 

Thanks for stopping by!  Please come back again!  Stay warm!

Share:

Monday, July 30, 2012

Moxie Fab Hooked on Hexagons Challenge

Gasp!  Well look at that I am sharing a layout with you!  I know you all thought I only make cards!  I do scrapbook now and again..I just always forget to photograph my layouts.  This time I had a good excuse to take a photo.  I am entering this layout into the  Hooked on Hexagons Challenge in the Moxie Fab World.

I went to a crop this weekend and really wanted to included hexagons in one of my layouts.  I found the above sketch by Becky Fleck featured on Bella Blvd Studio Blog and fell in love with it!  It wasn't as easy to duplicate as I thought but...I do love how it turned out.  I used my Sew Easy and some embroidery floss to do the stitching.  I didn't bring my KNK with me to the crop so I used my friend's cutter to cut 2.5" hexagons.  I intend to replicate this layout again.  I will use my Card Base 11:  Hexagons cutter file to cut the hexagons as a single hexagon is included in the file.   I used Color Me Crazy flowers colored with Copics.  I added a bead cap and rhinestone to finish off the center.  I would think my Playful Flowers Leaves and Vines cutter file could easily be substituted.  The hearts are punches I borrowed at the crop.  The stitching really did take forever..I am thinking next time I might just use my pen tool in my KNK to draw some faux stitching lines or maybe even let the KNK make stitching holes as it was hard to get the Sew Easy to pierce straight holes.  I could totally see this layout done with snowflakes instead of flowers too.  Now to find a single winter photo I can use.  I normally take too many pics!  A single photo layout is rare for me!

In case you are in need of a hexagon...you can purchase my file by clicking on the preview below.  It's on sale through the end of this month (July 31, 2012) so hurry and grab this great deal!
In case you are in need of a flower cutting file..you can purchase my file by clicking the preview below.


Yikes it's time for lunch!  I've gotta go feed the kiddos!  Thanks for stopping by and please come back again!

Share:

Sunday, July 24, 2011

Paprey Trey Ink MIM #24 Dry Brushing, new files, and CDT projects


Before the kids occupied my time I dabbled in decorative painting.  I packed up all my painting books but fortunately my paints and brushes are still easily accessible.   I had fun participating in Papertrey Ink's Make It Monday dry brushing technique.   I wanted a very soft look on my cards so I used a very soft brush designed for painting on glass.  I love the results!   The top one has off white paint the the bottom has yellow over chocolate brown cardstock.   I think it reminds me of a chalkboard covered in chalk.   Black with white paint would be perfect for school cards and layouts!  I copied the basics of the card from Lisa Johnson.  I loved the card she made here.   However, I did not have the rustic branches stamp so I improvised using the single line from Paper Tray for my stems and a single leaf from Turning a New Leaf  to mimic Lisa's focal image.  I used two different colors of rhinestones to mimic the berries.  I ran out of gems though so I used glitter glue for the second card.  See more details of the other PTI stamps I used in the supplies list.   I used the butterfly from my Buttons Galore file cut out of grungeboard and covered in crackle paint for an accent.  Below is a close up.  I really need to use my crackle paint more...such a great effect and soo easy!


The scallop came from my card base 1 file. Once again I used my own baker's twine to wrap the card.  I love this stuff!  I've gotta make more!    I also dusted off my sewing machine and zig zag stitched between the strips.  For me this takes some time because I'm a terrible sewer but I love the end result!  I  envy those of you who can sew! 

Supplies:
Papertrey ink Stamps:  Paper Tray (long single line and sentiment), Turning a New Leaf (single leaf),  Round an d Round Anniversary set (dotted background strip), Let Freedom Ring (firecracker swirl for blue strip background)
French Script Background 
Tim Holtz  Distress Crackle Paint (Mustard Seed) and Grungeboard
Swirl Glitter Glue
Folk Art Acrylic paint
Rhinestones
Shelly's Art:  Buttons Galore, Card Base 1 
Janome Sew Mini with heavy duty cream colored thread
Creative Memories Corner Rounder
Baker's Twine made by me (I only have one request for a tut on how to make this yourself so if you'd like to see it please let me know)

If you would like to purchase any of the files used in my card.  Please click on the photos to be taken directly to my store.


The newest member of my CDT has been soo busy using my files that I can't keep up with her!  So I must showcase two absolutely wonderful cards designed by her today!  She used my Card Base 3 file for both cards.  This file is a steal at 30% off through the end of this month.  It is great for not only feminine cards but also masculine, teens and toddlers alike! 

First up is an incredible card using paper embroidery.  I have always wanted to try this technique but have yet to sit down and do so.  It sure does look great and Johanne did an excellent job.  I'm adding this technique to my to do list!


Here is what Johanne had to say about her lovely card:

Cutting file:  Card Base 3 from Shelly's Art
Embroidery pattern from Basics of embroidery on paper  from Erica Fortgens
Paper: Classic K Designer Paper from K&Company
Tim Holtz Distress Ink in brushed corduroy

Next up a card with the exact same card base but a different focal point.  I find it is easy to make up two or more of these card bases then when you need a quick card all you do is add some stamping or a die cut and you've  got a card in minutes!  Also, instead of having scrap paper to store you have something you can use quickly when you need it.

 I just love the soft colors Johanne used!  It's wonderfully vintage looking.   I will have to try that flower tut she mentions too.  I bet you could use the flowers from my Playful Flower, Leaves and Branches files and Dawn's technique to make some beautifully unique flowers.  

 Cutting file:  Card Base 3 from Shelly's Art
Stamp:      Flower, leaves & Stem:  Automn Leaves from Mindy Terasawa
                Sentiment: Kensington Gardens from Cloud 9
Paper: Classic K Designer Paper from K&Company
Antique Gold embossing powder for the card and the flower
Tim Holtz Distress Ink in brushed corduroy

If you would like to purchase the file that Johanne used in her elegant cards please click on the photo below.

I do have a few new files in my store.   Click on photos below to purchase them.


 Thanks for stopping by!  I hope you come back again!  Have a wonderful week!


Share: