Showing posts with label peonies on parade. Show all posts

Sunday, September 11, 2016

Papertrey Ink Make it Monday 260: From Black and White to Color

This week's Make it Monday over at Papertrey Ink involves using black and white plus colored images on one card.  Sound confusing?  Danielle has a wonderful video explaining exactly how to do this technique here.

I wasn't sure I was going to make the deadline for this challenge.  Coloring for me can be quite time consuming...but since the whole image didn't need to be colored I made this card in record time!  I think using colored pencils gives more precise control of where color can be put down thus increasing speed too!  More about the pencils I used later in this post.

I hardly ever practice on scrap paper before starting my cards.  However, I wasn't sure how this technique would look with the products I wanted to use so I had to practice first.

I thought I would share my practice sheet so you can see how I figure out how to layer my flowers.  I simply stamp my images overlapping then I roughly color each image in the order they get stamped in.  The top image...the one closest to you get stamped first.  So I lay this paper in my MISTI position the purple stamps upside down on top of the stamped practice sheet close the lid and viola they are in perfect placement for stamping on my card.  After stamping the purple images I apply masks over them and then position the brown #2 images in the same way....and so on.  I find this is the absolute best way to figure out how I want my stamps layered.

I used watercolor paper and some new water soluble pencils I recently received to color in my images.  (I also put a blue shadow around the floral images and leaves too)  They are made by Voyage designs and on Amazon today they are about $8.00 for a pack of 50 and they even come in a plastic case with a screw on lid.  I have used water color pencils in the past and found it was very hard to blend out the pencil lines.  Normally I just use reinkers to watercolor but I love the precise control pencils gives so I was anxious to see how these would work.    I was super impressed!  When I added water the lines just melted away and the colors blended beautifully!  See for yourself..

You can click on the photo to make it larger.  My watercolor paper had texture to it so there were much white showing through after I had colored my image.  But once a little water was added..you can't even tell I started with a colored pencil.  My small flower in the left corner wasn't as vibrant as I liked so I used my heat gun to dry the image then colored right over the same place and added more water.  The paper accept the second layer of  color very well without any peeling or the paper whatsoever.    I did the coloring and painting in the water super fast...I bet I could get even better results if I took my time.  I can't wait to play with these pencils some more.  I do have a project in the works that shows how I used them to add depth and shading to my solid stamped images...so stay tuned for that.

Oh and another fun thing you can do with these pencils is draw in little dots of color then use the water to make halos of color around them.  It almost looks like little party lights or confetti in the background of my card.  Here is a close up so you can see what I mean
 
Supplies listed and linked below:

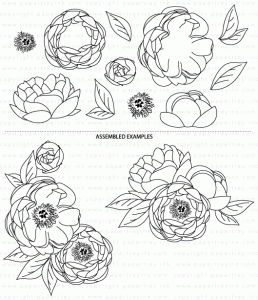
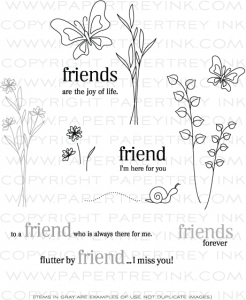
PTI Peonies on Parade Stamps

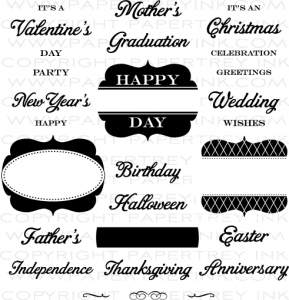
PTI Ombre Sentiments: Birthday

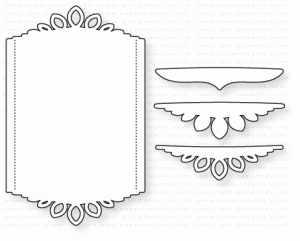
PTI Center Style: Feminine Die


Voyage Designs Water Soluble Color Pencils

Thanks for stopping by! Please stop back again!
Share:

Monday, July 25, 2016

SAF 2016: Pointillism Play with Heather Nichols

Next up I believe is one of my favorite techniques.  It involved mimicking pointillism artwork.  This means artwork comprised of dots of color to make an image.  Heather taught us how to color a outline image using the end of a pencil eraser and some dot stamps.  I loved this!  There is something so carefree and fun about using dots to color in an image instead of the precise coloring normally involved used with Copics or colored pencils to color.  It really is amazing how the image starts to take shape the more dots you add.  You really can get a lot of dimension with this type of stamping.

I only have a handful of outline type stamps.  This is the only one I have that is large enough for this technique.  So thus I used the Peonies on Parade stamp set.  I used Momento Lulu lavendar, PTI amethyst allure and PTI plum pudding for my purples.  I used PTI spring moss and Momento Pistachio for the leaves.  PTI lemon tart and bright buttercup make up the center of the flower.  The sentiment is from Graceful Greetings II.  Everyone kept telling me how great the graceful greetings I stamp set was but I was still on the fence.  So when the second installment came out and I saw they had a sympathy and a get well sentiment I decided to jump on in.  I am glad I did and now the Graceful Greetings I is on my wish list!  I guess I can only run beside the bandwagon for so long before getting aboard!  I added the border from the no longer available PTI Nostalgic notions kit to the side but I felt I needed a darker purple element yet.  I didn't want to do sequins or any frilly ribbon since this is a sympathy card so I opted to color the border in with a Copic marker.    I was quite pleased with he way this looks and will have to remember to do it more in the future.

Thanks for stopping by!  Please come back again!



Share:

Sunday, May 08, 2016

Papertrey Ink Make It Monday #247: Watercolored Card Set

This week's Make it Monday challenge at Papertrey Ink involved making a watercolored card set.  Melissa does an outstanding job showing how to make a wonderfuly artsy card set.  See the video HERE

I have always wanted to try watercoloring but I am the type of girl who DOES NOT color outside of the lines.  Although I loved Melissa's beautiful card set I could not bring myself to be carefree and messy and paint outside of the lines.  I was a little nervous about my first  major watercoloring project.  ( I did create some watercolored backgrounds before)   So I dug out my watercoloring pencils and my Papertrey Ink Peonies on Parade stamp set.  Stamping on bumpy watercoloring paper doesn't give you the smoothest images.  Thankfully I have the MISTI and was able to stamp each image 3 times to get good coverage. 

I do like the end result but it seemed to take forever and a day to complete this!   I tried my best to do lots of shading and try to add shadows and such to make it look more realistic.  It also took me a long time to blend out the pencil lines with water and figure out what color would add some depth to my plain pink flowers.  I really don't think this looks much like water colored flowers but more like colored pencils blended with Gamsol.

So I watched the video again and decided to try a more carefree approach to my next card.

This time I used distress ink and dye ink inkpads to achieve the watercolor looks.   I used Fantastix to get the ink sponged into the tiny areas of the stamped image then added water to blend everything out.   This took much less time but still looks artistic.  I still used the watercolor pencils to get the blue shadow around the flowers .  I also put drops of plain water on the image after I was done painting just as Melissa suggested.  I love the way it almost erases some of the ink leaving lovely color variations.   So I tried a few more dye and distress ink combos to complete two more cards to make my set.


 Sorry I don't have a photo of all the cards together in one photo.  I had to mail/give my Mom's day cards out earlier and just now finished up the last two cards in the set today. 

I am pretty happy with the way these turned out and I look forward to doing more watercoloring in the future.

I hope all the Mom's out there enjoyed this special day!  Thanks for stopping by!  Please come back again!

PS.  I have a tutorial showing how I layered these single stamps to form the bouquet above. So stay tuned for that.  Also, I haven't forgotten about the layered rose tutorial.  I took the photos with my phone in a hurry so my hand wasn't steady.  I need to start the tutorial from scratch and take better photos but hopefully I can get that done before May is over!  So stay tuned for that as well! Thanks for being patient with me!

Supplies Listed and Linked below:
PTI=Papertrey Ink

PTI Peonies on Parade Stamps

PTI Big Hugs Die Set

PTI Happy Day Stamp Set

Hero Arts Exclusive PRAYERS Stamps and Dies Set

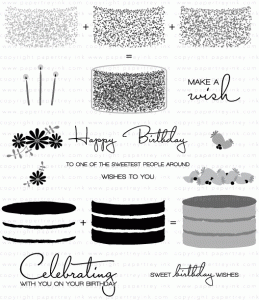
PTI Just Desserts Stamp Set

Staedtler Ergosoft Watercolor Pencils
Watercolor pencils used for first card only:
Flowers 80 (pink), 23 (dark pink almost red)
Leaves 50, 52
Blue 30 to outline flowers

Card 2:

Abandoned Coral Distress Ink

Picked Raspberry Distress Ink

Fossilized Amber Distress Ink

PTI Green Parakeet Dye Ink

PTI New Leaf Dye Ink

Fantastix Brush Tip Ink Applicators

Card 3:

Seedless Preserves Distress Ink

Worn Lipstick Distress Ink

Scattered Straw Distress Ink
PTI Green Parakeet and New Leaf also used for the leaves...linked in Card 2 supplies

Card 4:

Broken China Distress Ink

PTI Tropical Teal Dye Ink

Scattered Straw also used linked in card 3

Peeled Paint Distress Ink

Iced Spruce Distress Ink


Share:

Friday, April 08, 2016

Papertrey Ink Make It Monday #245 Color Isolation


This week's Make it Monday challenge at Papertrey Ink involves color isolation.  Basically this means stamping a background in a neutral color and then adding a pop of color with one image.  Ashley has a wonderful video showing just how to do this here.

I don't have many stamps the involve coloring.  Many years ago I bought several Copics when coloring those children images on cards were popular.  I also made my own digital stamps so I figured the Copics would help me color those.  I never truly loved coloring with the Copic markers..the end results were good but it took a long time and you had to use special paper/ink.  I ended up giving my coloring stamps to my kids.  So recently  I was gifted a set of Prismacolor pencils.  I decided to give coloring a try again and purchased PTI's gorgeous Peonies on Parade stamp set.  Here is what I came up with for this challenge:

I embossed the focal image with Versamark ink using white powder.  This kinda made it hard to color and see each flower petal.  So I scribbled over the entire image with peach pencil first.  (I think I if I do this again I will stamp in black or a color a shade darker than the flower).  Then I added shading with the pink pencil.  I blended it all with Gamsol.  I just love how the pencil strokes just melted away when I applied the Gamsol!  (Oh and I used the Gamsol kit by Inky Antics.  It includes everything you need to start blending your color pencils.  I love the dauber bottle!  It has a sponge tip which you depress with the blending stump.  No open containers to spill.  I have heard you can refill this bottle too by popping the top off.)   The middle was done with goldenrod appplying heavier color to the very center.  I do love how this flower turned out!  This didn't take nearly as long as using Copics.  It was quite relaxing coloring.  I can see why everyone is jumping on the adult coloring book bandwagon!    I have to admit though I tried various shades of purple for my first attempt at this flower and didn't like the results.  So I think it will take some experimenting knowing which pencils blend well together.

I scribbled the leaves first with the chartreuse pencil then added shading with the apple green pencil.  I am soo glad I got this stamp set and will definitely be looking at other outline images to color in the future.   Do you love or loathe coloring?

I did not buy the metal dies for this set.  I really don't think I will anytime soon.  For this image I fussy cut close to the flower so I wouldn't have to color precisely.  I just cut off my scribbles!  I always have a hard time deciding if the metal dies that match the stamps are worth purchasing.  Sometimes they cost almost as much as the stamps themselves!

For the background I used more images from Peonies on Parade stamped in Memento Platinum Planet metallic ink. I needed one small flower to fill in the spaces and borrowed my daughter's PTI Flutterby Friend for that.  Since this challenge involves a single pop of color I resisted adding any embellishments.  I did cut out the background panel with a pierced rectangle die to add some interest.

Supplies listed and linked below:

PTI Peonies on Parade Stamps

PTI Think Big Favorites #2 Mini Stamp Set

PTI Flutterby Friend Stamps

Versamark Emboss Ink Pad

Ranger Clear Embossing Powder

Brilliance Platinum Planet Pigment Ink

Avery Elle Dies Double Pierced Rectangle Set

Inky Antics Gamsol Coloring Kit
I used the following Prismacolor pencils:
Goldenrod (1034) Peach (939) and Pink (929)for flowers
Chartreuse (989) and Apple Green (912) for the leaves
You can find individual pencils here or the whole pack here.

Thanks for stopping by!  Please come back again!
Share: