Showing posts with label thank you. Show all posts

Tuesday, October 25, 2016

Papertrey Ink October 2016 Blog Hop Challenge

Blog Hop
Isn't the above photo just gorgeous?! That is what we are to use to inspire us to create a project for the Papertrey Ink October blog hop. I just love the colors, music sheet and that wood background. So these elements are what I chose to concentrate on when making my card. 

I printed something off of my computer to make my own "wooden" background.  To give it some interest I added a Stampin' Up texture plate which embossed the paper a bit.  I brushed some grey ink around the edges to give some depth. I cut the bottom of this paper with a very old Creative Memories circle cutter.

I stamped some rustic cream cardstock with an old Stampin' Up music note wheel.  I had cut the stamp off the wheel and applied some Aleene's tack it over and over again to the back so I can use it with my MISTI.  It stamped splotchy but I think that distress look is perfect for this card.  I added this to the bottom portion of the card beneath the grey paper. 

Next I hand drew some sketchy branches and stamped the ends of them with berries from PTI's bells and boughs.

 Third, I set about making my own Autumn inspired paper.


I applied various colors of distress ink with a round ink blending sponge.  I didn't bother blending the inks at all.  I spritzed and splattered on some water.  You can't tell in the photo very well (you can click on the photo to enlarge it)but I also splattered on some copper and gold shimmer mist.   I cut PTI's fancy foliage detail dies out of this paper and applied them in a cluster. The leaves are soo intricate that I don't think you really see much of this beautiful paper.  Originally I wanted to cut the "thanks" word die out of the paper for my sentiment but that die is too big.  I will have to make another card at some point using more of this paper. 

Lastly,  a sentiment from PTI's Think Big Favorites finishes off the card.  Does this look okay?  I felt like I still needed something else but I wasn't sure what.  But I always seem to have a problem with "white space".  

I'll be back later with the details.  Thanks for stopping by!  Please come back again!


Share:

Sunday, July 10, 2016

Paper Trey Ink's Make it Monday #255: String Art Using Die Cuts

Amy has a wonderful video showing 3 ways to use string art on your cards using die cuts.  Check out the video HERE.

I used a PTI Woodblock Prints stencil and Clarity stencil brushes to apply my background pattern on pale peony cardstock.  I absolutely love these brushes!  They make it easy to apply ink to the stencil with no splotchiness and no foam getting stuck in the stencil to worry about.  I also love this new pale peony color by PTI.  It is a shade lighter than melon berry thus making it perfect for layering in these flowers from PTI's Graceful Greetings II.  I wrapped some gold thread around a scallop oval.  I added some gold glitter embossing powder to some of the stamped flowers.  I added one more gold element by using gold posterboard as my card base.  (Thanks to a good friend I have quite a bit of this to use...she mentioned you can get it really cheap sometimes at Hobby Lobby...a great alternative to expensive gold cardstock but still looks just as nice).   Isn't that big "Thanks" die just lovely.  I cut it in Berry Sorbet.  I love how the bold size makes it star of the card...conveying my thanks in a big way! Oh I almost  forgot I also added tiny dots of gold to the middle of each flower in my background paper using a Copic Twinkling Stars gold marker.  I hardly ever use metallics in my projects but I do love the royal look of gold.  I should use it more often!
Supplies listed and linked below:

PTI Graceful Greetings II Stamps

PTI Big Basics: Thanks Die

PTI Woodblock Prints Stencils

PTI Pale Peony Dye Ink

PTI Berry Sorbet Dye Ink

PTI Aqua Mist Dye Ink


Momento Pear Tart Dye Ink

Clarity Stencil Brushes

Wow Embossing Glitter Gold

PTI Hawaiian Shores Dye Ink

Metallic Gold Thread

Metallic Poster Board


Copic Gold Glitter Marker

Note: I couldn't find the exact items I used to link to for the gold embossing powder, poster board, and the gold thread so I linked to similar items.
Thanks for stopping by!  Please come back again!

Share:

Wednesday, June 01, 2016

Tutorial: Stamping on Die Cuts and Layering Stamps using the MISTI

Hello!
A while ago I posted a card I did for Papertrey Ink's blog hop using The Sweet Life Stamp Set.  It was similar to the card below.  You can see the original by clicking HERE.

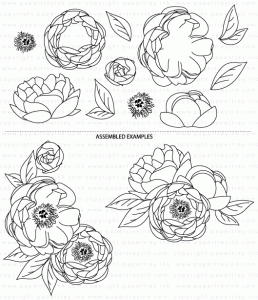
I promised a tutorial on how I did the stamp layering on the die cuts using the MISTI.  So here it goes... Please note this is not my original idea!  Cindy O mentioned this technique on the Papertrey Ink forum and I thought it was simply BRILLIANT so I just had to try it.  Thanks soo much Cindy!   Also Understanding Blue posted a video tutorial using acetate for layering in this video.  I just thought I would give you a picture tutorial of how I combine both of these methods to get beautifully stamped rose die cuts.

I will provide you with a collage of key instructions then elaborate below the photo.  I figured this will give you a quick overview in case you don't want all the chatter! :) Oh and you will notice many different colors used in this tutorial.  I stamped several roses and took the best photos out of the numerous ones I took for the tutorial.  You may click on any of the photo collages to enlarge them. 

 I realize with the invention of hollow dies this part of the tutorial might not be necessary but the Sweet Life stamp set contains solid dies and I have many more solid dies then hollow in my stash.

1.  I look at the size of my die and cut a piece of cardboard larger than the die.  This gives me a place to use the magnets in the MISTI to hold on to the  negative space of the die cut.  I use cereal boxes and other boxes I normally throw in the burn trash.  This cardboard is just the perfect thickness and you don't have to waste your good cardstock plus it give me a contrasting color.  You can of course just save the negative space of the die cut you intend to stamp on to use as your template.  (Note:  Since there are three layers to this flower I cut 3 identical cardboard pieces..one for each layer...well actually 4 but the 4th is optional..explained later!)

2.  Take a piece of copy paper and stamp your first layer onto it.  I use scrap paper that has writing on the one side.  DO NOT use cardstock it will be too thick.  Be sure to use a darker color of ink.  The darker ink will help you line up the image in step 5. 

3. Now take the stamped image and center it in the negative space of the die cut making sure there is equal spaces all around.  Stick a piece of micropore or washi tape to keep it in place on the front.

4.  Turn it to the back and tape the copy paper in place.  Remove front tape.  This template will be used over and over again.


5.  Now take the template you made in steps 1-4 and position it into the left hand corner of the MISTI.  Be sure it is snug up against that L corner shape of the MISTI.  Place your stamp on top of the template lining up the stamped image with the stamp.    (Note:  The wrong side of the stamp should be facing up.)  Close the lid of your MISTI to pick up the stamp.

6.   Die cut your die from the cardstock you would like to stamp on.  Keeping the template snug up against the L shape of the MISTI position die cut into negative space on the template. 

7.  Stamp your image (1st layer) onto the die cut.  You should have a perfectly stamped die cut with an even border all around the edge!   The next time you use this stamp you can simply start at step 5 since this template is reusable.

You can also use the steps above to add a second layer stamp to the die cut.

Repeat steps 1-7 for the second layer.  Since the second layer is centered on your template it should stamp perfectly over the 1st layer on your die cut.  After stamping, keep this die cut in the template as you will need it for the 3rd layer of stamping. 


You can try to do the exact same steps as aove for the third layer of stamping but honeslty I didn't have much luck doing that.  There is too much room between the negative space and edges of the stamp to center well.  It took me several attempts but this is the method I have found to work best for the 3rd layer.  If you know of an easier way.  Please..please...please share it with me!

Below are the instructions for the third layer of stamping and this corresponds to the photo above:

1. First take a piece of acetate large enough to cover the template made in the second layer of stamping.  Tear off a piece of removable  tape and attach it to the side of the acetate making a hinge.  (Note:  I used the Stamp-a-ma-jig sheet and wide painter's tape).  Position the third layer stamp towards the middle of the MISTI lid.  Stamp in black on your acetate.  Stamp as many times as you need to make sure you get a good dark image. Now take the template you made in step two with the die cut still tucked in the negative space.  Slide it under your stamped acetate aligning it up so the roses look perfect.   DO NOT move the actual stamp.   Place magnets or tape on top to hold the template in place.  Use the hinge to pivot the acetate out of the way and apply magnets to the bottom of your template.  I prefer the side hinge versus the top hinge but do whatever you like the best..eithr will work.  The hinge is explained in Understand Blue's wonderful video Here.   (Note:  The hinge isn't absolutely necessary here but it does help to keep the acetate in place wonderfully and prevents you from moving the template accidentally when you remove the acetate)

2.  Stamp the 3rd layer on top of the 2nd layer.  Viola!  A perfectly aligned beautiful rose!  Now you could stop here and just use the acetate every time you use the third layer.  However, I wanted a template I could use time and time again like in the other steps.

3.  I kept the 2nd layer template in place after stamping my rose.   I then die cut a copy paper die and placed it into the template.  DO NOT use cardstock it will be too thick.  Stamped the 3rd layer on this.  Remove the copy paper die cut.  Now take a blank negative space die cut and position the stamped copy paper die cut into this negative space.  Add tape to the front to hold it in place. 


4.  Tape the die cut in place on the back of the negative space die cut.  Now remove the front tape.  You can use this template for the third layer by positioning the stamp wrong side up and aligning it over the stamped image just as in step 5 above.  (Note:  I glued together two cardboard pieces for this layer so I have a bigger "lip" on the negative space to hold my die cut in.  This isn't necessary but I found it is helpful in keeping the cardstock die cut from slipping out of the negative space)

Goodness I sure do hope this doesn't all sound Greek to you!  This really is much easier than I am making it sound!  Please just give it a try and if you have any trouble just contact me at shellysart at verizon dot com.  I'll try my best to explain things better.

Below are the other cards I created:

Here are the colors I used for my roses and leaves.  I will not be linking these products because I don't want to make this post even longer!
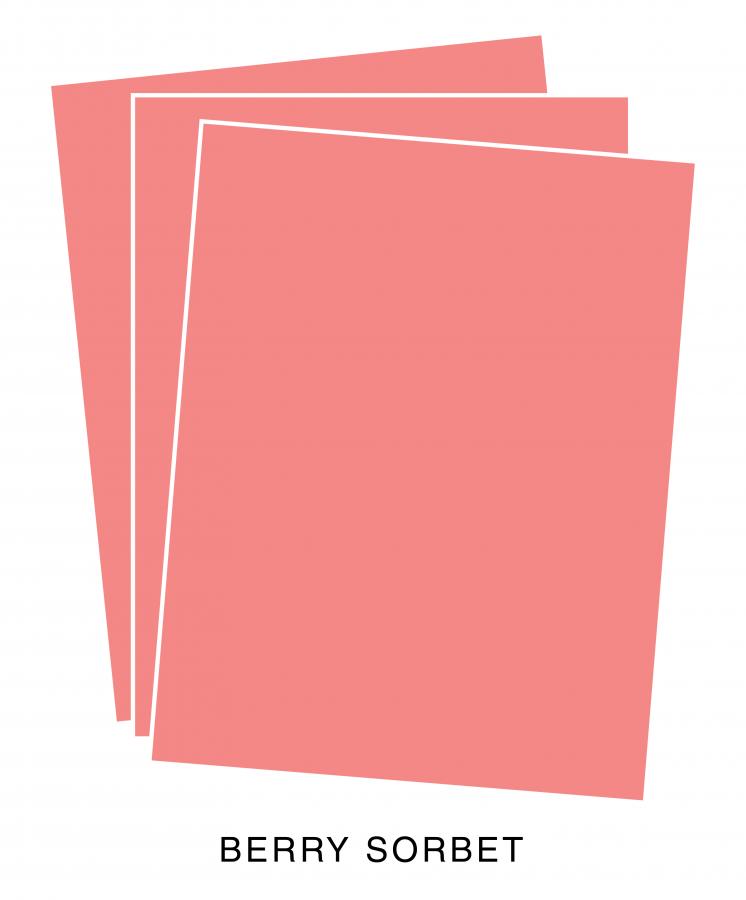
Red Roses:
All PTI Berry Sorbet, Pure Poppy, Winter Wisteria (didn't like this color) stamped over with Scarlet Jewel
Leaves: Memento Pistachio

Purple Roses:
PTI Lulu lavender, PTIWinter Wisteria, Momento Elderberry
Leaves: Momento Pistachio

Yellow Roses:
PTI Lemon Tart, Meomento Dandelion, Momento Cantaloupe
Leaves: PTI Green Parakeet

Sentiment is from PTI's Think Big Favorites #2 

I hope you enjoyed the tutorial!  Thanks for stopping by!  Please come back again!
Share:

Friday, April 08, 2016

Papertrey Ink Make It Monday #245 Color Isolation


This week's Make it Monday challenge at Papertrey Ink involves color isolation.  Basically this means stamping a background in a neutral color and then adding a pop of color with one image.  Ashley has a wonderful video showing just how to do this here.

I don't have many stamps the involve coloring.  Many years ago I bought several Copics when coloring those children images on cards were popular.  I also made my own digital stamps so I figured the Copics would help me color those.  I never truly loved coloring with the Copic markers..the end results were good but it took a long time and you had to use special paper/ink.  I ended up giving my coloring stamps to my kids.  So recently  I was gifted a set of Prismacolor pencils.  I decided to give coloring a try again and purchased PTI's gorgeous Peonies on Parade stamp set.  Here is what I came up with for this challenge:

I embossed the focal image with Versamark ink using white powder.  This kinda made it hard to color and see each flower petal.  So I scribbled over the entire image with peach pencil first.  (I think I if I do this again I will stamp in black or a color a shade darker than the flower).  Then I added shading with the pink pencil.  I blended it all with Gamsol.  I just love how the pencil strokes just melted away when I applied the Gamsol!  (Oh and I used the Gamsol kit by Inky Antics.  It includes everything you need to start blending your color pencils.  I love the dauber bottle!  It has a sponge tip which you depress with the blending stump.  No open containers to spill.  I have heard you can refill this bottle too by popping the top off.)   The middle was done with goldenrod appplying heavier color to the very center.  I do love how this flower turned out!  This didn't take nearly as long as using Copics.  It was quite relaxing coloring.  I can see why everyone is jumping on the adult coloring book bandwagon!    I have to admit though I tried various shades of purple for my first attempt at this flower and didn't like the results.  So I think it will take some experimenting knowing which pencils blend well together.

I scribbled the leaves first with the chartreuse pencil then added shading with the apple green pencil.  I am soo glad I got this stamp set and will definitely be looking at other outline images to color in the future.   Do you love or loathe coloring?

I did not buy the metal dies for this set.  I really don't think I will anytime soon.  For this image I fussy cut close to the flower so I wouldn't have to color precisely.  I just cut off my scribbles!  I always have a hard time deciding if the metal dies that match the stamps are worth purchasing.  Sometimes they cost almost as much as the stamps themselves!

For the background I used more images from Peonies on Parade stamped in Memento Platinum Planet metallic ink. I needed one small flower to fill in the spaces and borrowed my daughter's PTI Flutterby Friend for that.  Since this challenge involves a single pop of color I resisted adding any embellishments.  I did cut out the background panel with a pierced rectangle die to add some interest.

Supplies listed and linked below:

PTI Peonies on Parade Stamps

PTI Think Big Favorites #2 Mini Stamp Set

PTI Flutterby Friend Stamps

Versamark Emboss Ink Pad

Ranger Clear Embossing Powder

Brilliance Platinum Planet Pigment Ink

Avery Elle Dies Double Pierced Rectangle Set

Inky Antics Gamsol Coloring Kit
I used the following Prismacolor pencils:
Goldenrod (1034) Peach (939) and Pink (929)for flowers
Chartreuse (989) and Apple Green (912) for the leaves
You can find individual pencils here or the whole pack here.

Thanks for stopping by!  Please come back again!
Share:

Sunday, February 14, 2016

Papertrey Ink 9th Anniversary Saturday Snail Mail Challenge and Colour Q #328

This challenge involves creating a thank you card to send to the wonderful people in the warehouse at Papertrey Ink.  They really do package stuff with care and nothing arrives damaged or broken.

I was inspired by a fantastic card by Karolyn Loncon.  You can see her lovely creation here.
I was simply amazed at how quick this card came together!  (This is a great scrapbuster card!) I sought out the latest colour Q challenge for my color combo.
I don't use gold that often but I'm not sure why.  I love the regal element it adds to a card.  I simply punched some 1 1/2" and rounded opposite corners using the 1 2 3 Punchboard.  I have other corner rounders but I have found this easiest to use for perfectly rounded corners.   I used glitter gold embossing powder for the sentiment and butterfly (btw the butterfly is from the PTI butterfly coverplate..I simply cut the middle butterfly free from it's frame).  If you are going to do a glittered/embossed die cut like this I would suggest covering a square of paper in versamark ink and then sprinkling powder on before heat embossing the entire square.  This is much easier than trying to emboss an intricate die cut.

Supplies are listed and linked below:
 

PTI Cover Plate: Butterfly Die

PTI Think Big Favorites #2


PTI Berry Sorbet Cardstock

PTI Hibiscus Burst Cardstock

PTI Sweet Blush Cardstock
Thanks for stopping by! Please come back again!
Share:

Sunday, November 15, 2015

Jennifer McGuire continues her share handmade kindess challenges.  " Week 2 (November 9 – 15) will focus on sharing any kind of handmade kindness with anyone who works/serves in our community anyone who provides a helpful service to us.'  Visit Jennifer's blog for more info about this wonderful challenge.

I decided to send a card to a lady at our church.  She wears many hats (choir director, bell choir player, head of knottie ladies...ect)  and definitely deserves some thanks!

I made a version of this card before.  You can see it in this post. It is inspired by a beautiful card by Maile Belles Here.

Thanks for stopping by!  Please come back again!


Share:

Thursday, January 30, 2014

Card A Day Blog: Thank You, Color Throwdown #277 and Case this Sketch #61

Hello!  I am here!  Just haven't had as a much a chance to create as I did last week.  I was thankful it is my turn to design for Card A Day blog this week.  Ha..I didn't even realize I said thankful in the last sentence...kinda fitting since the theme this week is Thank You cards.   I'm sad to say I don't send these type of cards very often.  I must make more of an effort to do so in the future.

So once again I sought out challenges to point me in the right direction when starting this card.  First the wonderfully romantic color scheme came from Color Throwdown latest challenge #277.

I found this paper in my stash that basically contained all the colors in the challenge although the blue is a little different but they say substitutes are okay.  Next I sought out the latest Case This Sketch #61

I absolutely loved the white tree in the photo so I used my Stampin' Up Season of Friendship stamp and heat embossed it plus the leaves in white.  I placed the tree behind a rolling hill.  I freehand cut the hill and added a slight texture to it using a Stampin' Up texture plate. I added some punched flowers with pearl centers to the tree/hill some baker's twine finished off the hill.  Oh and the sentiment stamp came from Papertrey Ink's everyday classics anniversary set.   A friend of mine gave me that ruffled trim...I keep pulling it out to try to use on cards but it never looked right..but this time I think the ruffle is a perfect accent..what do you think?

Thanks for stopping by.  Please come back again!

Share: