Showing posts with label 3-D butterflies. Show all posts

Saturday, November 08, 2014

Case This Sketch #99 Sympathy Card

Do you have a hard time creating sympathy cards?  I sure do! They are very important and must be sent.  Yet it's hard to convey the gesture of sympathy in a card.  So I made one today and figured I'd share it here not only to hopefully inspire you but also to inspire myself in case I need a similar card in the future.  I am not very good at keeping things organized on my hard drive!

I sought out the latest Case this Sketch challenge #99.   I love how customizable this sketch is!  I could definitely see me using this again!

Below is my sympathy card.

It uses Stampin' Up's beautiful stamp set called "Just Believe"  and the sentiment is from Papertrey Ink's "round and round" anniversary set. A few trims, pearls and a bow rose finish up the card.  The bow and rose were actually one colored and I colored the rose brown with Copics to match the rest of the card.  The butterfly is from my 3-D butterflies file.  The butterfly was actually blue cut for another project but not needed.  I simply colored it with Copics too.  These markers were quite an investment in the beginning but I have found soo many money saving uses for them!

If you would like to purchase my file please click here or the preview below.
http://www.cutandcreate.com/store/index.php?main_page=product_info&cPath=43_105&products_id=868
I will be posting other cards here soon so please stop back.  Oh and I will also be posting some of my favorite homemade cleaning recipes too.   Thanks for visiting!


Share:

Friday, April 04, 2014

Card A Day Blog Post: Sympathy


Hello everyone!  How are you?!  What is the weather like in your neck of the woods?  It is rainy here but I'm not complaining since it's making the Spring flowers burst through the ground and also making the grass greener.  Plus this rainy weather helped put me in the mood to make a sympathy card for the Card a Day blog.  I always dread making these cards because it is such a somber occasion and it's hard to convey the right message with just a card.  However, it's good to have these on hand so I am happy to have one in my stash.

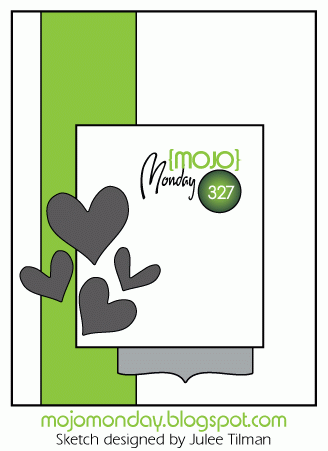
I made a card similar to this in the past you can find it here.  I found this awesome sentiment through pinterest..it didn't have a source website but you can find it here.  I printed it 4 to a page making it easy to grab one and have a finished card in no time.  I used my 3-D butterflies file.  I just love the depth they add to a card!  It's hard to tell in the photo but I used black Stickles on the butterfly's bodies.  This style of card is a great way to use up some of that printed ribbon and lace trim I just loved but couldn't seem to find a use for. It it based on Mojo Monday's sketch 327.   Some sequins finish up the card.  Not sure if the sequins are too much..making the card gaudy but I just felt it needed one more bit of jazz.


Thanks for stopping by!  I hope you have a fabulous weekend!  Please stop by again!


Share:

Monday, January 13, 2014

Fusion Card Challenge #1

I'm back again as promised.  I have another challenge card to share.  I stumbled upon the Fusion Card Challenge last week.
It's an interesting concept....you can use just the sketch or just the photo for inspiration...or go for it all and use both!  I really loved the orange/grey/white color combo but unfortunately I used most of my grey cardstock up for the previous challenge so instead I used a piece of pattern paper and pulled my colors from there.  Hmm..guess it would be best just to show you my card before I explain any more huh!

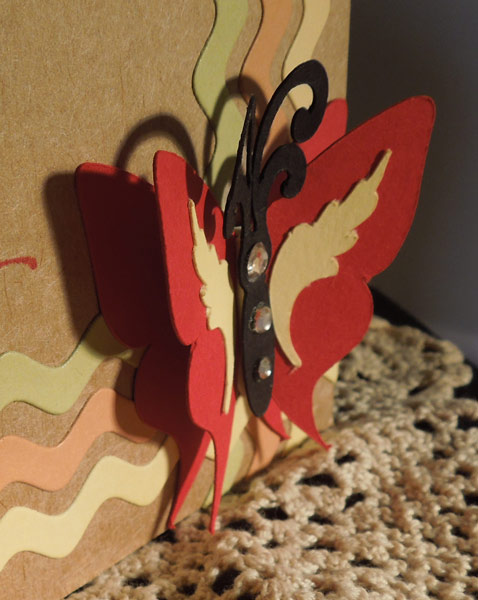
I absolutely adored design team member Betty J's card example so I decided to case hers.  I used one of my card base files to add some decorative border strips to the sides.  The butterflies are from my 3-D butterflies file.  (Both files are coming soon to my new store!).   I actually made two cards one with the embossed butterflies and one with plain butterflies.  I definitely like the texture the embossed butterflies add to the card.  The sentiment is from Papertrey Ink's. Happy Hexagons mini stamp set.  I was very happy to dig out my dusty/forgotten fiber to wrap around the bottom of the card.  It is hard to see in the photo but it's tiny pom poms on a string...adds a fun element to this card.  Oh and some more of those gems designed for jeans was added to the center of the butterflies.  The wings were attached with a tiny piece of foam tape allowing them to be folded slightly in the middle to give a 3-D effect.

Time to get the kids ready for bed.  I'll see you back here on the 17th for my Card a Day blog post.  Thanks for stopping by!  Enjoy the rest of your week!
Share:

Saturday, January 11, 2014

Color Throwdown and Mojo Monday Challenge

Yikes!  Has it really been since the beginning of November since I posted?!  I'm sooo sorry about that!  The end of the year just flew by not only because of dealing with birthdays and Christmas but we also did some painting too.  I can't believe 2014 is actually here!!  One of my resolutions this year is to definitely blog more.  So...to encourage me to blog more I have decided to try and participate in lots of challenges.  Not only does this spruce up my mojo but also challenges have deadlines for entry and so I must blog to meet those deadlines.  So wish me luck!  I hope you all do well with your New Year resolutions too.

Okay so I decided to make a card combining two challenges.  I love it when others choose color combos.  I have found soo many amazing combos when looking at color combo challenges.  This time was no exception...I never would have put these colors together on my own but they really do look great together!
 Find more info about the color throwdown challenge here.  There is still time to enter! 

So I had my color combo but I mentioned another challenge.  I sought out Mojo Monday's latest sketch to figure out where to place my elements.  You can find more info about this challenge here.

I fell in love with Wanda Cullen's example.  You can see her elegant card here.  Isn't that sentiment terrific.  I found it on Pinterest but it doesn't give a website.  You can find the printable sentiment here.  I copied it into word and printed 4 to a page so I can make similar cards quickly.  Aren't those butterflies adorable!  I just love the pearl beads on the body.  They actually are made using my KNK cutter and my 3-D butterflies file.  (Psst...I'm opening up a new store soon so these will be available there shortly).
Here is a close up.  Simply lay the one butterfly down flat then layer the embellished one on top with a little foam pop tape just in the middle and bend the wings forward a bit.  Instant depth!


I stamped the background with a Filagree Stamping up stamp using a Memento ink a shade darker than my cardstock.  The trim was from a bag I got at the Good Will store. 

The kids are in bed and it is so peaceful and quiet here!  Time to chill..watch some Dexter (a show we just started watching..but I feeling we're going to be hooked!) and snuggle with my hubby!  I will be back tomorrow with another challenge card post!  Please come back and visit me!

Enjoy the rest of your weekend!


Share:

Sunday, August 25, 2013

PTI August 2013 blog hop

It's time again for the Papertrey Ink monthly blog hop.  I wasn't sure I would have a chance to squeeze in an entry but I'm here just in time!

PTI graciously gave us not only the color scheme but also the sketch to follow making it very easy to come up with a quick card.  Check out this post for more color schemes and sketches.

I have to say I didn't think this color scheme really would work at all.  The red didn't seem to fit in but once I put it all together I love it!  I used PTI's Extra large rick rack die in place of the straight strips.  The sentiment is from PTI's Signature Series Dress Form for the sentiment.  I felt I needed some type of focal point to place where the strips cross.  I chose one of the butterflies from my 3-D butterfly file.  I just love how much dimension postioning both parts of the file brings.  Rhinestones on the body of the butterflies finishes up the card.

If you would like to purchase my file please click on the preview below.  It's a steal at only $1.05 for the rest of Aug.  (The sale price will show up when you place the item in your cart)


Don't forget my whole store is 70% off until the end of Aug.  So go shopping here before it's too late.

Well my kids started school last Thursday.  I cut letters out of vinyl depicting their grade level and adhered them to the apples.  This is the second year I have done this.  I really like how they turned out and will continue the tradition (as long as I have white vinyl that is!).  I can't believe I have a 1st and 4th grader.  Where has time gone?  The kids didn't go to school on Friday.  They were doing construction all day Thursday while the kids were there.  Many parents felt it wasn't a safe environment for their kids.  Our son came home coughing and had a migraine.  Both kids have asthma so construction dust simply isn't good for them to be around.  Around 7:00 Friday morning the message came through that school was cancelled.  They promised to work a lot over the weekend.  Hope they kept their word!  How in the world can teacher's teach and students learn while construction workers are drilling and such! 

Thanks for stopping by.  Please come back again!  Have a splendid week!


Share:

Friday, April 19, 2013

Spring Sale Time!

OMG!  Has it really been almost 3 months since I blogged?  Please forgive me as things have been hectic here!  While I was busy though the flowers have popped up in my flower beds!  Spring is finally here!  Hubby just got done mowing the grass!  There is something so fresh and renewing about Spring.  Those heavenly flowers have a way of chasing away my Winter doldrums and makes me excited to craft again!  Just in case you are in a crafty mood I am having a store wide sale!  All my files are 40% off now through April 22, 2013.  Click HERE to go shopping.  Before you leave though I have some inspiring projects for you.


First up we have a project from Shelly M.  (she is no longer on my design team..boo..hoo...but she was when this photo was taken).  I love how she mixed stamped images with my die cut 3-D butterflies file.  

Elizabeth also played with my 3-D butterflies file.  I love the way she added stitching lines around the edge of the butterfly.  She also embossed patterned paper.  I have never tried this but I love the look! 

If you would like my butterflies to fly to your home too please click HERE or the preview below.


Thanks for stopping by!  I promise to do better at blogging!  So please stop by again!  Have a wonderful weekend!


Share:

Thursday, September 27, 2012

Card Inspiration and Sneak Peek

Howdy!  I have a treat for you today!  My talented design team member has whipped up some lovely cards. 

 
See I told you they were stunning!  Kelly used some lovely K and C patterned paper.  I have some of this paper and I never thought to mix them this way.  Kelly sure did make them look amazing!  I love the glitter paper!   Both cards used my cutter file Card Base 12.  along with Elegant Sentiments.  She also used my 3-D Butterflies on the top card and the tulips are from my Think Spring file.  It's always nice to have sympathy cards on hand.  I should definitely make a set like Kelly did.  The file does all the work for you..instead of cutting pieces for one card simply cut enough for 3.  If you would like to purchase any of the files Kelly used please click on the previews below.

I am working on some new things just in time for Halloween.  I thought I'd give you a sneak peek!

I'll be back tomorrow bringing some sunshine!  Thanks for stopping by!  Come back again!


Share:

Sunday, January 22, 2012

PTI MIM #49: Ghost Masking and a few other cards

Hello,

When I saw this MIM video demoing a technique called Ghost masking..my eyes were glued to the screen.  I had never seen this done before and I loved how it added dimension to a flat card.  This would be perfect for Operation Write Home cards.  You can see the video here if you missed it.   I will say this technique works better with larger stamps I think.  Unfortunately, I do not have large stamps in my PTI collection.  So I made due by creatiing a flowering vine.  Overall I think it did turn out pretty cool.  I will definitely be trying this technique again in the near future.


I tried to leave this card alone as is after stamping but it just seemed to flat to me...I'm a sucker for embellishments!  Sooo I added one of my 3-D butterflies to fill in that empty space in the left hand corner.   I cut the butterfly out of white and used the same ink I used for the stamping to color the butterfly. 

Papertrey Ink stamps used:
Paper Tray (sentiment)
Mat stack 2 (frame)
Turning a New Leaf
Honey Bees (flowers)

Other supplies:
Momento Ink
3-D Butterflies by Shelly's Art

If you would like to purchase my butterfly file...please click on the preview below:


Next up we have a lovely card by creative design team member Johanne Larouche. She used my Birds of Feather file. I just love how she added the pennants to her sentiments.

Here is what Johanne had to say about her great card: "This card uses Shelly's Art cutting file Bird of a Feather - SS00075 and Aussie Caz Card Template 29. The paper is from Momenta (from Walmart). I used crystal stickle on the bird and mounted it on thick square to give it a 3D effect. The flowers were colored with copic and finished with distress ink. I added a bit of crystal stickle to give it a bit of sparkle."

If you would like to purchase my birds of a feather file please click on the preview below:


Lastly,  I have a card I made using my Scalloped card file.  I gave this to a wonderful friend who is definitely a cat lover so that is why I chose to substitute the items provided in the file with a digital stamp by Motivet.


For the background I used a PTI: MIM video technique coloring embossed images with Copics. I used Versamark ink but I should have used white so I could see better what I was stamping. I do like this technique though and the color options it gives since I don't have that many inks. I also colored the digi stamp with Copics. I added flocking to the flower and colored fluff to the dirt. The card is based on a sketch from Aussie Caz for my monthly card sketch challenges on Paperthreads. I added silver spacer beads and small brown rhinestones for an accent. I also stitched a little with yellow floss.

If you would like to purchase my Scalloped Card file please click on the preview below:


Thanks sooo much for stopping by! I hope you are making the most of the last few hours of this weekend! It snowed here so the kids were thrilled to play in it. I'll share some photos later in the week. Oh and please stop by on Monday for the next installment in my Mission Organizational series.

Share:

Friday, December 16, 2011

Papertrey Ink Make it Monday Challenge and Sale

Howdy,

I know we are all busy getting ready for that Christmas so I decided to just put my whole store on sale all month.  You can buy any of my designs the whole month of December 2011 for 30% off.  So if you are crafting away in the wee hours of the morning or the wee hours of the night my store is always open.  Please stop by click here

I absolutely loved the new Papertrey ink technique video.  It involves coloring embossed images with Copics.  I love finding more uses for these markers!  Check it out the video here if you missed it. I was busy making my Legal Pad Covers for Christmas gifts so I decided to incorporate this technique into one of these. 
Here is a close up of the colored embossed image.
The inside:
I used the Round and Round 2009 anniversary set from Papertrey Ink. I love the images in this set but often felt they would look better in multiple colors. I don't own any stamping markers so I was thrilled to find this technique and I love how this turned out! The tree branch is thin and hard to color but I think the uneveness of the coloring adds to the look of the bark.  I also used the PTI die mat stack 2 along with some spellbinders, grey baker's twine  and rhinestones to enhance the focal point.    Oh and the papers are from K and Company

Well I was on a role with these Legal Pad Covers so I decided to make another one to give to our hairdresser.
I used my 3-D Butterflies file accented with some rhinestones and some stiff paper twine for the a
antenna.  I used a bead cap and matching rhinestone to the lace.  My hairdresser is going to keep this by her computer as she said she is always wanting to write some stuff down but can't find any paper.

I'm totally addicted to making these things!  I'm making two more for Adoree's teachers.  Hopefully, one of these days I can make one for myself.  I just love what my design team member Kelly Stone did.  She made one to take to the grocery store.  The pocket holds coupons.  Check it out below.


inside:
Don't you just love it! Yeppers...I'm going to make one of these someday! I don't know if I could convince hubby to take a floral one to the store though. LOL!

If you would like to make a jr Legal Pad Cover yourself then please click on  previews below.

If you are still making Christmas cards...I have some great inspiration for you from CDT member Lisa Lindesmith! She used my Christmas Tickets to create a great background for her cards. The tree is an image she created herself. What great quick cards!

 If you would like to purchase my Christmas Tickets please click on the preview below.

Okay I've gotta run! Hope you are having fun preparing for the holidays! Have a fun weekend! Merry Christmas!
Share: