Showing posts with label explosion box. Show all posts

Thursday, December 06, 2012

A joyful freebie and exploding gift box!

Oh my goodness can you believe it's December already!  I was hesitant to change the calendar this weekend.  Where has the year gone!  Christmas is just around the corner!  Are you ready?!  Maybe I can help!  I have several files that will make wonderful quick gifts for the special people in your life.  I will be showcasing them regularly on this blog over the next few weeks.  So please subscribe in the right hand column so you don't miss anything!

First up we have a delightfully festive way to share photographs by Kelly Stone.  (Thanks Kelly!) She used my Explosion Box, Build a Wreath, Christmas Word Charms, and Build  a Snowman files to showcase pics of her adorable son Alex!


 Here is what Kelly had to say about this wonderful present!  Scroll down to see more photos.
 
"All of the patterned papers are from a seasonal paper pad by Colorbok (Cloud 9 Design Harvest Holiday 2). The green ribbon is from Joann's. The snowflake is from the Build-a-Wreath file. Coated both sides with red Stickles. The 3D Tree was decorated with gems using my i-rock and I added yellow Stickles to the star. The green cardstock underneath the tree was embossed with a snowflake embossing folder. The Merry Christmas sentiment is from Christmas Word Charms. And the snowman is from the Build-a-Snowman file. I added Sparkly Fluff to look like a snow drift."

Below is a close up of the 3-D tree included in the Explosion Box file.   I just love the sparkle of those gems!
Below you can see how the layers all nest onto one another.  There is no need to glue them together as the lid keeps the box closed.  The layers explode open when the lid is removed.


I am working on getting files added to my new store.  Just in case you missed them check them out below.  Click on the previews to see them in my store.


Chevron seems to be a huge trend right now.  So I decided a Chevron Christmas was in order.  I think the stocking would look very cute as a gift tag..write the to and from on the brim of the stocking.  The present would work for birthday and anniversary cards too thus making this file more versatile..not just for Christmas!
These sentiments are perfect to add to those last minute cards that need to be mailed soon!

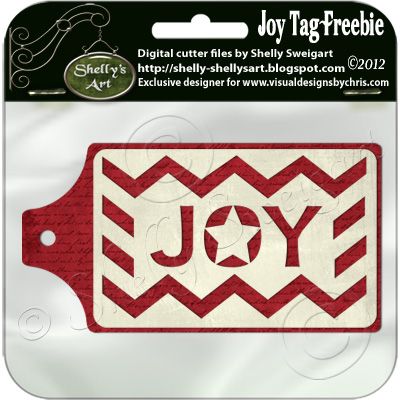
Okay now that you go through all my gabbing.  I will reward you with a Christmas freebie!  This tag is a quick accent to cards and gifts.  It matches well with my Chevron Christmas file.  It is also a nice reminder that we have sooo much to be joyful for this holiday season! 


Freebie No Longer Available!.  Keep in mind that this file though free still abides to my TOU included in the zip file.  Also, please send others to my blog to download the file.  This will motivate me to give you more freebies in the future. 

Well I've got some errands to run so I will catch up with you later!  Enjoy your weekend!  Thanks for stopping by!  Please stop again!

Share:

Saturday, November 27, 2010

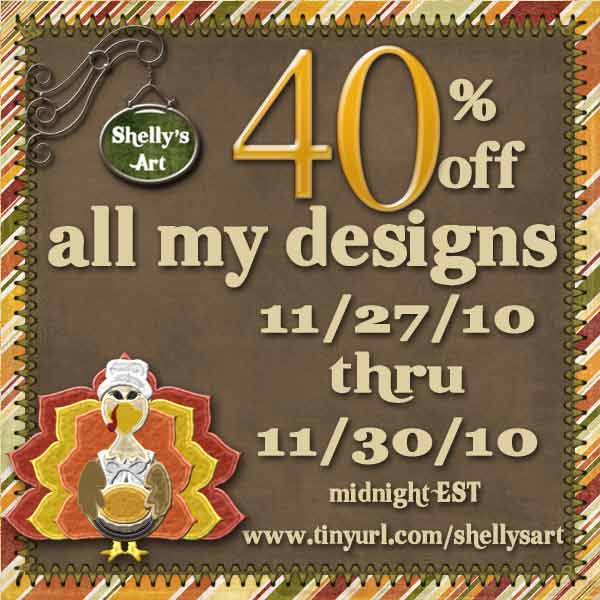
It's not too late to save! 40% off all my designs now through Nov 30, 2010 and an exploding box!


Just in case you were out shopping yesterday or enjoying a late Thanksgiving it's not too late to save on my designs.  You can get 40% off through 11/30/2010.   There's still time to get those handmade gifts ready! Stop by my store today by clicking here.  Don't know what to make...I have some ideas for you.  Check out some fab projects by Lisa and Sue below.


Explosion Box

All the projects I'm about to show you involve the explosion box above.  Click on the words above the preview if you'd like to purchase.  This box really makes a great gift.  The box actually becomes the present.  A 2 for 1 kinda thing.  When you take off the lid the side "explode" leaving you with panels that can be decorated with photos and embellishments.  There is even a 3-D tree that can be attached to the middle if you choose as an added surprise.

First up here is a closer look at CDT Lisa's wonderful version of the box that is depicted in the store.  You can see the outside in the store preview above.  She did an awesome job!  In addition to the Explosion Box she used my Build a Wreath and Christmas Word Charms files.


Above is the inside view of the bottom panel and the next layer and also a close up of the 3-D tree.  What is nice about this box is you don't need to glue these panels together if you choose not to because the lid of the box keeps the panels secure when you close it.  I just love how Lisa stamped words on the photos too.  It's hard to see but there is a dove behind the tree.  This proves you don't have to use just photos on the panels.  You could even write the lyrics to a song or verses to your favorite poem. 


Sue realized that the Explosion Box had 12 panels.   So she decided to do a 12 days of Christmas box.  How FUN is that!  I think my kids would adore looking at a box like this time and time again.  Hmm maybe I should get Sue to make me one!  LOL!  Check out her amazing box below.  Oh and you can find the 12 days of Christmas file by Paperthread's Designs here


If you like the bow on top of the boxes.  You can get it in a separate file.  Click on the word above the preview to get it.  It makes great ornaments too (I'll  have to show you that example later when I get the file I used for it in the store). 

Accordion Folded Flower


If you would like the Christmas Word Charms file Lisa used in her box.  Please click on the words above the preview.

Christmas Word Charms

Okay now I've gotta get this house clean and then it's time to make this house look more festive!  I just love decorating for Christmas!  Thanks for stopping by!  Enjoy your weekend!


Share:

Saturday, January 16, 2010

Birthday Salebration! Cutting for a Cause!


It's party time!  That's right it's my birthday on Tuesday and I've decided I'd like you all to join me in a wonderful salebration!   I'm kicking starting my birthday off early by giving you all 40% off all my designs now through the 19th (my actual birthday)!  Oh and I will have a gift for you later but...shhh...inlaws are coming and our house is a wreck so I have to clean and I'll wrap up your gift sometime soon!  In the meantime if you'd like to go shopping click on the Ad above or click here.   My files are available in AI, GSD, KNK, WPC and SVG formats.  I do have a handful that I haven't gotten the SVG version in my store.  Simply purchase these in any format and I will e-mail you the SVG if you provide me with a proof of purchase.

I have put many files in the store that were previously available in my membership.  See below to see just a few and click each preview to get to them in my store.


I am so thankful to be able to celebrate birthdays and have a roof over my head, a warm bed to sleep in and an abundance of food.  Unfortunately, many people in this world do not have any of these comforts.  The people of Haiti especially come to mind.  They were in poverty prior to the earthquake and now they need even more help.  So a few of the Paperthreads Designers have joined forces to help.   If you donate to any charity where the proceeds help those in Haiti who are struggling I will give you a free file from my store and so will Jan of Sam and Hailey Designs and Ileana of I Scrap Designs.  Please click on their names to check out their blogs for further info.  E-mail your thank you message or proof of donation to shellysart@verizon.net and tell me what format you'd like your file in.  I ask that you make your donation by the end of Jan 2010 to qualify for the free file.


So by making one donation not only do you help those in Haiti but you also help yourself to 3 free files.  Hurry and donate today-what have you got to lose!

Ileana has compiled a list of charities to help you choose but you can choose whatever you want as long as it goes toward Haiti relief funds. 
The one with the lowest administration and fund-raising costs (and, therefore, the highest percentage of your donation going directly to the relief effort) is first and so on down the list.

Food for the Poor
Their ranking at Charity Navigator.
Donate to Food to the Poor in Haiti here.

Unicef
Their ranking at Charity Navigator.
Donate to Unicef here.

Mercy Corps
Their ranking at Charity Navigator.
Donate to Mercy Corps here.

Red Cross
Their ranking at Charity Navigator.
Donate to the Red Cross here.

Also, here is another list of links to reputable charities that are involved directly in Haiti and their grades according to The American Institute of Philanthropy.

Jan also added another good place to the list:

"My personal favorite, LDS Humanitarian Services was not on the Charity Navigator list.  Maybe because it's a church, I'm not sure why! But here's the article about the Hygiene kits (like the ones we made) and there's a link at the bottom to donate.  The great thing about donating to LDS Humanitarian Services is that the operating costs of the program are paid through our member's tithing donations.  100% of Humanitarian Services donations go directly to the people in need. Here's another great article about the temprary medical center they are setting up and staffing in Port-Au-Prince."

Our church makes blankets to give to those less fortunate.  These quilts are made from donated fabric.  So sometimes they aren't the best looking design wise.  But boy they are warm and they are well loved by all those who receive them.  They are like gold to those who are cold and suffering.  Fabric is getting harder and harder to find with so many store around us going out of business so I do hope they can continue to make the quilts.

Anyway, I appreciate you do this and I'm sure the Haiti will definitely appreciate everyone's generosity!

Yikes I'd better get cleaning in-laws will be here soon!  LOL!
Have a fabulous weekend and please count your blessings each and every day!
Shelly
Share:

Thursday, November 26, 2009

Black Friday 55% off sale, explosion box and freebies.

Hello everyone,
I hope you all had a wonderful Thanksgiving....and are ready to start on that Christmas wish list. To help you out Laury of Just Laury and I have teamed up to give you an amazing sale. See the Ad below for more details. Note: my membership club is already at a discounted price so it is not included in my store sale. Check out Laury's fab designs here and mine here. But don't go yet I have more to share. Oh and if you see any files you want but aren't listed in SVG format...simply purchase them in any format and e-mail me the invoice and I'll send you the file ASAP. My e-mail: shellysart@verizon.net


Sue Shaff made this amazing box that I would like to show you all! She made it with my explosion box, flower bow, and 3-D tree files. All available in my quarterly membership. You may purchase the membership here and make your own box. She also used Paperthread's Design's awesome 12 days of Christmas file available here.


You can click on the photos to see all the gorgeous details Sue added to each die cut.

Oh and in case you haven't heard of an explosion box. It is a box where the lid holds the panels together that make up the sides of the box. When you remove the lids the panels drop down (explode) and you can see all the goodies glued to the panels. Sue used die cuts but you can also use photos, poems, recipes etc.


Look I got one Christmas gift all ready to go! This will hold a gift card and I'm calling it done! I got to play with my set of copics for the first time too when making this project! Can you guessed what I used them on? Yep...I colored the flowers using my copics. I cut them on my cutter using my build a wreath file using Georgia Pacific cardstock. I got a little bleeding when I started blending but I think in this case it looks good. I have a ton of the Georgia Pacific stock so until I use it I'll just have to make due! What do you think? Did I do a good job coloring? Any tips on how to use these copics is greatly appreciated. I think it will be easier to color a digi stamp as the areas to color aren't as large and I don't have to worry about the colored areas drying out before I got to blend them.

The charm came from my Christmas word charms file. I placed multiple layers of gold embossing powder on the paper to make it look like faux metal. Click on the previews below to purchase the word charms or build a wreath files at 55% off today only!


Would you like to make an ornament just like this too? Okay well I'll let you in on a little secret. You can get this adorable woven basket ornament as a freebie on Laury's blog here and I'll have the flower and word charm for you as a freebie below.

Oh and the glittery button was painted with glitter glue and then I applied my paper button technique you can find more about it here.

Click preview below to download the freebie. The file contains the SVG, KNK, AI, GSD, and WPC formats. Even though it is free..it still follows my terms of use. I ask that you do not share this file but instead send people to my blog to download it themselves. This freebie will expire in 24 hours so get it NOW! Sorry freebie expired!

I do apologize. My frugal Friday $1.00 file conflicts with my black Friday sale..making it $1.35. I will offer this file again after the sale is over. Thanks for your patience.

I hope you enjoy shopping from the comfort of your own computer chair. I also hope you get some hand made gifts made this year for Christmas. After all those are the best gifts to give and receive...well besides love and kisses!

Shelly
Share:

Tuesday, November 17, 2009

Technique Tuesdays: Paper Ornament freebie and Happy Birthday Tyler!

HAPPY BIRTHDAY TYLER! My little boy turned 6 today! I can't believe it! He is growing so fast. Even his jeans we bought at the beginning of the school year are short! He eats like crazy but stays soo thin! I wish I could grow tall again! LOL! Daddy took Tyler out for breakfast then dropped him and his cupcakes off at school. He just loves riding in Daddy's truck and going out for breakfast! The teacher made him a party hat and he wore it all day! It was covered in 6s! Hmm I should take a photo of him wearing it before his sister gets a hold of it!

Okay now for the technique. I know it's a little late but at least this time it's still Tuesday! I must work on next week's technique early...Tyler's birthday party is Sat so we'll see! I found the technique for these cool ornaments on Carlos N Molina's blog. (Carlos has amazing paper items..his shoes look sooo real!) I can't take credit for the idea. Carlos created them and he has a video for you to view here. I did my own little tut in photograph form below too. I have provided you with the digital paper cutter file as a freebie at the end of this post.


Remember you can click on the photos to make them larger. I will show you some examples of one I made. But first let me share with you some things I discovered while making them...meaning things I goofed up and don't want you to.

*The center tube is much easier to roll if it is NOT cardstock. It is best to make sure your tube matches your ball in case it is visible between the paper strips. So if you have a thinner paper as one of your colors use it to cut the rectangle used for the tube.

*Very thick cardstock is harder to make form the curve of the strips. So you may want to "soften" by running a pencil down it as you would if you were curling ribbon with scissors. Making it curve as it will when you make the ornament.

*As you add the strips onto the top of the wire it will have a tendency to "pop" up so make sure you use your fingers to press down the strips maintaining the round shape. Also make sure at the very end when you form the loop that you have cut enough wire off. If there is any gap between the beads or paper circles then you need to cut more off. You need everything to be tight to have a nice round ball...or you will end up with an ugly cone!

*I was trying to use thing around my house so I used two different wires. One hubby gave me was a softer copper wire. The other was a stiffer wire 22 gauge I think...maybe 24. For this project the stiffer wire was better as the softer wire kept wanting to bend while I was making the ornament.

I know none of these hints make sense right now but you'll understand once you start actually making your ornament. Oh and these are really very easy to make don't be intimidated by all the steps in my instructions! Okay now on to my examples.


Above is one more tip....I think it is better to use cardstock for the circles but if
you want your patterned paper to show just cut two and glue them together so you have the stability of the cardstock and the prettiness of the patterned paper.

The pictures really don't do the ornaments justice. The glimmer mist has such a pretty gold sheen on it. The snowflake one is pretty too with the silver sheen. Tyler wanted me to make some of these to hang up for his birthday party! Hmmm now there's an idea! Don't know if I'll have time though! I'm giving the ornaments I made to the church for their craft bizarre on Sat.

Oh and for the snowflake one you can purchase the snowflake in my Festive Twig Tree file. Click on the preview below to purchase it. It's on sale the whole month of November!


I was trying to use things around my house...beads that I had and papers. I bet you if you went shopping though you could easily make these to coordinate with a birthday party or Christmas party. I'd love to see some done with glitter but I didn't have any loose glitter and didn't want to have to wait for the glitter glue to dry. You guys have waited long enough for this tut! Flocked flourishes would be soo lovely! If you make an ornament I'd love to see it email me it to me at shellysart@verizon.net. I'd love to feature it on my blog!

I'd like to share with you this pretty box Jan Walz made using files from my quarterly membership club. I love the burgundy and evergreen colors she used and the felt embellishments.


If you'd like to make a box like this of your own then click on the Ad below to purchase my membership. (It's a great gift to mail as you can lay it flat to send it off!) I promise to offer a variety of boxes, embellishments, cards, and home decor items. If you scroll through previous posts you can see some of the files I have offered already in the membership. All files will be in SVG, KNK, GSD, WPC, and AI formats.


Wow! I didn't realize this post had gotten soo long! Sorry! I guess I'd better stop blabbing and give you the freebie I promised. This is totally a time saver. You can use your digital paper cutter to cut the ornament pieces and not fuss with measuring. (I despise measuring!) KNK, SVG, GSD, AI, and WPC are included in the zip. This file still follows my terms of use. Please do not share this file instead send others to my blog to download it. Click on preview to download.


Thanks for letting me share with you this little ornament. I do hope you are inspired to make one too and will share you creation with me! I'm ready for a snoozers!

Goodnight! Be sure to join me Frugal Fridays where I feature 1 file for $1.00 for 1 day only!
Shelly
Share: