I made a card using the latest MIM challenge over at Papertrey ink. It features Reverse Stenciling. Betsy made a wonderful video telling us just how she made her beautiful card from start to finish. Check it out HERE. I love using stencils so I am happy to have an excuse to sit down and play with them. I have to say though PTI's stencils are the best...very sturdy plastic and easy to clean.
I sought out the latest Colour Q challenge for inspiration also


In the video Betsy used a brayer to do her reverse stenciling. I did not have a brayer so I did a slightly different technique but the end result is the same. I laid down my stencil over the white cardstock and then applied a thin layer of rubber cement over the stencil. I waited for it to dry then brushed on a very soft layer of ink using Clarity stencil brushes. The rubber cement resists the ink. When finished applying the ink simply rub off the rubber cement leaving the white areas exposed. Let me tell ya these brushes are wonderful...it's super easy to apply a very soft light layer of ink without any streaks or unblended areas!
I didn't have the circle Betsy used so I used a scallop frame from the very old Quickutz Special Delivery Kit...which is no longer available. I stamped and die cut all the flowers from the Floral Sketches set. I added a few wisps of vellum cut with Wplus9 Under the Misteltoe dies.
Oh and see the lighter peach flowers. I actually used the PTI Melon Berry Ink I used the for the biggest flower. Using my MISTI I stamped the flowers with the melon berry ink twice then I stamped directly over that using a white pigment ink. I did two layers of white using the heat gun to dry each layer. The heat is very important because the white ink just sits on the surface of the paper and takes forever to dry. I then stamped the detail layer with PTI Smokey Shadow ink heat drying it again...otherwise the ink would just smear. I love the ability to get lighter colors of ink using my existing ink collection. Gotta love a money saving technique like that! I can't wait to experiment with more color using the white pigment ink layers on top!
Supplies listed and linked below:
 PTI Floral Sketches Stamp Set |
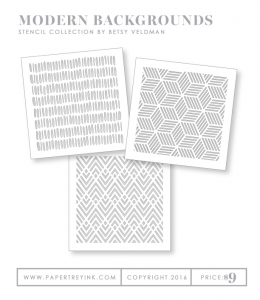 PTI Modern Background Stencils |
 Clarity Stencil Brushes |
 WPlus9 Under the Mistletoe Dies |
 PTI Melon Berry Dye Ink |
 PTI Smokey Shadow Dye Ink |
 Momento Rich Cocoa Dye Ink |
 Momento London Fog Dye Ink |

4 comments:
Absolutely gorgeous card Shelly! Love your stenciled background and those flowers are SOOOO pretty! LOVE all those colors together...may have to check out that challenge myself! Beautiful, beautiful card!! :0)
Wow your card is beautiful the colours are amazing
So beautiful!! The stenciling adds interest without distracting!
very beautiful card!
Post a Comment