Wednesday, April 25, 2012

April 2012 Papertrey Ink Blog Hop

Aren't those patterns just gorgeous!  I didn't have a lot of time today but I just couldn't let the chance to play with these colors and patterns pass me by.  I created a card inspired by the photo above for the April 2012 PTI blog hop just in time!


I apologize for the poor photo.  It is really dark here!  I knew I had the perfect digital paper pack in my stash.  It is called Victoria Gardens by Echo Park I think.  It has beautiful damasks and roses just like in the photo.  I did some editing in Photoshop to make my colors match the inspiration photo.  Except my printer printed the blue more of a greenish tone.  I still love the color combo though.  I used my card base 9 file again for the background.  I have a feeling this will always be a favorite file of mine!  I stamped the "You are amazing" sentiment repeatedly across the front.  The rose and sentiment are both from Papertrey Ink's Year of Flowers Collection.  I was in such a rush so I'm not totally happy wiht my Copic coloring.  Next time I will study how the PTI designer's color their amazing roses and learn from them.  I never know where to put my light source!  Yummy velvet green ribbon, loopy lace, pink baker's twine, a bead cap and pearl complete the card.

If you would like to purchase my card base 9 file please click on the preview below.  It's on sale now through Sunday the 29th of April 2012 for only $1.00!


My next couple of weeks are filled with events like birthdays, graduations, anniversaries, and Mother's Day. I have a ton of projects to make! Just in case your April and May are filled with activities like mine I decided to have a sale. I have many files that are useful for not only cards and scrabooking but also teacher gifts and decorations. You can find my store by clicking on the Ad above or by clicking here. I do not have all my files converted to MTC and Studio but if you purchase a file in any format I will be glad to convert it for you and send it to you through e-mail.  Just e-mail me at shellysart@verizon.net with your invoice.

Wow!  Two posts in one day!  Can you believe it!  Well I guess I should get some sleep!  I sure did have fun playing along with the PTI blog hop and now I have one Mother's Day card done!  Woo Hoo!  I'm thrilled...I never get anything done a head of time!


Share:

Sale continues and a few cards to share.


My next couple of weeks are filled with events like birthdays, graduations, anniversaries, and Mother's Day. I have a ton of projects to make! Just in case your April and May are filled with activities like mine I decided to have a sale. I have many files that are useful for not only cards and scrabooking but also teacher gifts and decorations. You can find my store by clicking on the Ad above or by clicking here. I do not have all my files converted to MTC and Studio but if you purchase a file in any format I will be glad to convert it for you and send it to you through e-mail.  Just e-mail me at shellysart@verizon.net with your invoice.  Oh before you leave I have some inspiration for you!

Don't you just love this card Creative Design Team member Kelly designed!  Kelly is a whiz at combining multiple files to create something spectacular!  She used my fancy labels, card base 9, and sentiments:cursive to create this great card!  I love her combo of papers!


I also made a card using my card base 9 file.   I used my I love Ice Cream file for the focal point.  Now that I finally have my paper organized (see mission organization tab at the top of my homepage)...I was able to take 3 lonely papers and pair them up into a great background for my card.  That is one thing I like about this file..it lets you easily take scraps or busy prints and use them effectively on your card.  I added some glossy accents on the fudge sauce to make it a little more real.  I also colored the cherry with a Copic glitter marker to make it look like a sugared cherry.  I replaced the paper strip with some ribbon.  The sentiment stamp if from Paper Trey Ink's Papertray stamp set.

If you would like to purchase any of the files used in the cards above please click on the previews below to be taken directly to them in my store.


It's been a while since I've shared any personal photos.  So  I figured one from Easter is as good as any.

We were headed to Pop pop and Grandmas hurrying to make our reservation time so I didn't have time to get the prefect photo! Despite the bad lighting I still think this turned out pretty cute!  Tyler's tuxedo t-shirt just cracks me up!  He loved it and made sure to tell everyone it wasn't a real tuxedo!  I have to admit I love having a girl and being able to buy an Easter dress!  Growing up my parents really never went shopping for Easter duds so I am loving being able to dress my kids up during this special holiday.  Would you believe Tyler is 8 and Adoree will be 5 next month!  Where have my babies gone!

Thanks for stopping by!  Come back and see me again!

Share:

Saturday, April 21, 2012

Sale Time!

My next couple of weeks are filled with events like birthdays, graduations, anniversaries, and Mother's Day. I have a ton of projects to make! Just in case your April and May are filled with activities like mine I decided to have a sale. I have many files that are useful for not only cards and scrabooking but also teacher gifts and decorations. You can find my store by clicking on the Ad above or by clicking here. I do not have all my files converted to MTC and Studio but if you purchase a file in any format I will be glad to convert it for you and send it to you through e-mail.  Just e-mail me at shellysart@verizon.net with your invoice.  Oh before you leave I have some inspiration for you!


Isn't this card just stunning!  Kelly (member of my design team) created this lovely card.  Here is what Kelly had to say about her card:


"I needed a card for a bridal shower and using 3 of Shelly's files, here is what I came up with. I used Card Base 10 (SS00238) for the base of the card. It uses Bazzill cardstock for the base, DCWV Old World Stack for the patterned paper and Paper Temptress mica/metallic paper for the rest, including the flowers. I used the Flowering Foliage embossing folder on the small rectangle. The wedding rings charm is from Wedding Charms (SS00084). I cut 4 of them from plain cardstock and layered them to make it thicker, then I cut one from silver vinyl to layer on top and make it look more like a real charm. Finally, I used Fringe Flowers (SS00228) to make the 2 flowers and topped one of them with a silver embellishment (an end cap used in jewelry making). 

I love all the details Kelly put into this card.  Layering 4 cardstock rings and then a silver vinyl layer over the top is a great technique to make these charms look more realistic!  I 'll have to remember that for the future.

If you would like to purchase any of the files Kelly used then please click on the previews below or on the highlighted words in Kelly's description.

Thanks for stopping by! Have a glorious weekend!
Share:

Monday, April 16, 2012

Mission Organization: Embellishments

I am back as promised (albeit later than I had planned...sorry!) with a new organizational post.  This week we are going to talk about embellishments.  As mentioned in my first organizational post here...I sort items by color.  When I start a project color is usually an important factor.  I used to store all my embellishments by type but got tired of looking through soo many bins to get what I need.  Sometimes I knew I needed something purple but wasn't sure what so I'd have to pull out all my brads, eyelets, flowers testing to see which suited my project best.  It was just not working!    So now I store all embellishments of one color together in a snapware container. 

The snapware containers all snap together to create my embellishment tower.  I labeled each "drawer" in rainbow order using a light scallop circle, a darker circle and also a white circle stamped with a stamp from SU's circled Circus to make it look pretty!  These labels match my paper scrap storage labels but all you really need is one circle to designate which color is in which "drawer".


 Above you can see he inside of the green "drawer".  Some of the stackware came with the 3 compartment inserts...but not all.  I'm not sure why but they only give you enough for a few of the drawers.  The snapware I bought after Christmas on clearance didn't include any of those compartments.  That's okay though...I have a solution for that.


 As you can see in the orange drawer above I put some rubber shelf liner on the bottom to keep things from sliding around.


I keep baker's twine in small zippered baggies found in the beading department at Wal-mart.  The little boxes actually are used to store microscope cover glasses.  I ordered them from JDTtwo on Etsy.  She is a wonderful seller who is great to work with and ships fast!   You get a ton of these boxes.  They fit perfectly in these snapware containers allowing me to separate brads, eyelets, buttons etc.  I prefer these over the zippered bags.  You can find her boxes here. Oh and pictured above is the brown "drawer".  I don't have many embellishments or ribbon in brown and black so I just store them in the snapware instead of in my jars as shown in my ribbon organization post.

I ran out of snapware drawers so I store my gold and silver embellishments in a double sided fishing tackle box found at the Good Will store.


I love white embellishments!  I can easily color them to match my projects with Copics.  So I have a ton of white embellishments.  They are stored in the top drawer of the plastic storage container that holds 12 x 12 paper.  The bottom two drawers have my most neutral card stock in them.  Hmm some of those flowers look pretty sad...I think I need to donate them to the kids!

This storage system is great for showing you what color of embellishments you are lacking.  I went nuts with the pink when my daughter was born so there isn't much more room for pink things.  However, red is lacking!  So I now know when I see that totally cute pink glittery flower that I should back away and reach for the red one!  Another great pro to this storage system is that it's a "snap"...(tee.hee..pardon the pun) to take to crops.  Just make sure all the levels are snapped together and grab the handle..never worrying you'll leave something behind!

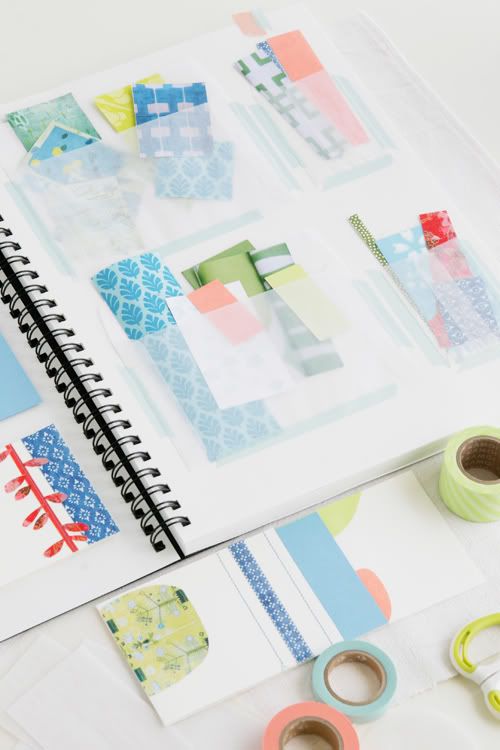
Oh and I apologize for the poor photos.  I did take them outside in natural lite and edited them in PS but they still don't look that great.  Hopefully, if you click on them to enlarge them they will give you any details you need to see.  

Items needed for my embellishment storage:

Snap 'N Stack  6"X9" Rectangle 2.5" 

small zippered bags or small plastic or metal storage containers (optional...you can just throw everything in the "drawers" and not separate anything if you wish)

rubber shelf liner (optional...keeps smaller containers from sliding around when you travel)


I am going to show you a few specific ways to store specific embellishments in the rest of this blog post.  I am only going to highlight some unique ways. You can see more on my Pinterest board here.  I will continue to add to this board as I find new storage options.

I absolutely love Karen's brad storage as shown above!  It would take a while to do but the results are a stunning artwork display that easily lets you see what you have and make use of it!  Check out more info on her blog here.

Isn't that the cutest button storage you have ever seen!  Linda did a great job displaying Stampin Up buttons on this baking sheet!  Linda used the containers the buttons came in and placed magnets on the back and then labeled them soo sweetly!  I bet you could do this with those containers that hold spices too if you don't buy SU buttons.  Check out more on Linda's blog here.


This is yet another wonderful button storage solution!  It is from Mallia.  It involves a bunch of buttons stored in little clear tubes with an actual button glued to the lid so you can see what is inside the tube at a glance.  I think this would work for brads, eyelets, small flowers etc.  This is a flickr photo so I don't have any blog to direct you to...sorry!


Did you see what Marthe created!  OMG!  A whole table filled with flowers!  This reminds me of something you would find in a craft store not a craft room!  How amazing is this!  I don't have many of these purchased flowers but have admired those who use them on their cards.  I think they look great but...since many of them come in bunches with the stems on..they would be very hard to store.  If you have the space this is a great way..don't you think!  Check out a tut on how to make your own floral storage table on Marthe's blog here

Okay that is all for today...I think this post is long enough!  I hope I gave you some ideas on how to store your embellishments!   Thanks for stopping by!   Check back again...I'll  have some inventory posts for you...sometime in the future!


Share:

Saturday, April 14, 2012

Awesome cards from Johanne to share!

Howdy!

First, I must apologize for not having a mission organization post this week.  I was soo busy with Easter activities that I didn't have much time for organizing.  Then we had some problems with our internet too.  I promise I will be back on Monday with tips on embellishment organization.  I'm afraid I am running out of things to organize...well at least prominent things.  So is there anything you would like to see organized that I haven't shared?  Please let me know.  I am considering doing fabric but I wasn't sure how many of you have a fabric stash.  Would you be interested in knowing how to store fabric?  I help make quilts for the unfortunate at our church and they give me all their scraps.  I have a few scrap quilts I want to make someday...Small scraps are great for embellishments on cards and scrapbook pages too.  Right now I have bags of scraps and I don't use them since they are hard to get to so I am thinking of trying to organize them in some way.  Oh and at some point I will be doing posts on how to inventory your supplies too.

I have been too busy to craft but my creative design team member Johanne has been on a creative streak lately!  I am always amazed by her projects!  This time is no different!  So I'll get on with the photos so you too can be amazed!


Here is what Johanne had to say about her wonderful card:


"I made this card for the Tim Holtz Distress Ink #2 Bingo Challenge.   I don't have the name of the paper.  The top one was a pre-embossed white paper that was left in my stash of paper for a long time. I used the following Distress Ink on it:  Shabby Shutters, Victorian Velvet, Scattered Straw and I applied the Black Soot around it.  I decorated with a piece of ribbon and a Bow made with the Bow Easy.  Here is the link for a video showing how easy it is to use this tool:      http://stamptv.ning.com/video/how-to-use-it-the-bow-easy     I finished with 3 decorative brads."


I think this card shows you how it doesn't take many supplies to make an amazing card.  The embossed white paper rubbed with ink is phenomenal!  I've got to get more distress inks!  This piece could easily be substituted with a piece of patterned paper or stamped paper.  The sentiment from my elegant sentiments file serves as the focal point..super easy!  I also love the addition of the brads.  I have a ton of these small shaped brads and never know what to do with!

Johanne was having soo much fun with my elegant sentiments that she decided to make another card with it.


Here is what Johanne had to say about her unique flower card:


" I printed the sentiment including the ''Thinking of You'' for easy placement and then cut it.  I embellished the ''Thinking of You'' with Stickles.  I made a giant Open Me Flower from Just Laury; it turned out amazing.  The paper was ''be loved'' by My Mind's Eye.  This paper was printed on both side and I love the effect it accomplished.  I embellished the section of the dotted side that make the flower with stickles on the dots.  I inked all the edges with the distress brown corduroy ink."

I think MME is my favorite company for patterned paper...this doubled sided paper is wonderful for this card!  Who wouldn't love to get a big flower like this in the mail!

If you would like to purchase my elegant sentiments please click on the preview below.  Hurry though it is on sale for the month of April only.  


I have yet one more from Johanne using the same open me flower but in a much smaller scale.


Here is what Johanne had to say about her elegant card:


"I made this card  using the Card Base 10 from Shelly Sweigart.  The lace file is Lace  - KBD30013 from Keepsakes by Design.  The leaves for the flowers are Butterfly in a Round - EC00147 from Accents by Edita and the flowers are Open Me Flower from Just Laury. The beige paper was a scrap piece from K&E company.  The paper for the flowers and the lace border was Jolie Chocolat from SEI.  For a finishing touch I added pearls to simulate the center of the flower and on the ribbon."

Isn't that just stunning!  I love the addition of the pearls!  If you would like to purchase my card base 10 file please click on the preview below.   


 I've gotta run but I hope you enjoyed Johanne's creative cards!  Please stop by again!  Have a wonderful weekend!


Share:

Friday, April 06, 2012

Are you ready for Easter?

Happy Easter!  I can't believe the Easter bunny will be hopping down that bunny trail in a few days.  Actually, I can't believe it is April!  Where has Jan, Feb, and March gone?!  Time is just flying by now-a-days.  When I sit down to craft more often than not I need quick projects.  I'm sure you do too.  So...I have some quick projects to share with you that will get you ready for the Easter bunny!

Don't you just love this card my talented creative team member Johanne made!  Here is what Johanne had to say about her amazing card:

"This card is made with the file from Shelly's Art , Build a Easter Egg2 -SS00082.  I used pieces of scrap papers.  I made shadow for the egg and grass layer.  This card comes up so quickly.  I inked the edges and used stickles on some of the eggs."   

I love that patterned paper she used on the tree trunk.  Those eggs look wonderful all glitzed up.  What a great way to use scraps!  If you too would like to make a quick Easter card please click on the preview below to purchase this file in my store.

 I have a few other files that are quick and easy to make up to share Easter treats with your family and friends.  Click on the previews to purchase them in my store.


I also have some digi stamps you can easily add to your cards and gift tags to make Easter festive.


Have a blessed Easter everyone!  Please come visit me again!


Share:

Monday, April 02, 2012

Mission Organization: Paper Scraps

Hello everyone,
So do you keep all the scraps of paper that are left over after completing a project?  Do you hate to throw away that 1 x 1 inch square just in case you might need it for something?  Are you scraps in such disarray that is takes too much time to sort through them so you just grab a new piece of paper instead.  Well then listen up because this is one thing in my craft room that is totally organized and I am totally happy with! 

I have shared with you my methods for storing scraps before but I am going to cover it again here just in case you are new to my blog or "gasp" you have forgotten!  LOL! 

First up let's talk about solid card stock scraps.  I love saving card stock scraps.  I do a lot of paper peicing.  In fact a card I made yesterday involved using that 1 x 1 inch square of red.  So it is very practicle for me to save even little pieces of card stock.  But...how to store such small pieces without them getting lost and still make them accessible....

 I don't remember where I saw this idea originally but I have seen many people put it to use since I first started using this method.  These are simply Sterlite plastic storage organizers.  I got mine at Wal-mart but I think just about any department store carries them.  I labeled them with scalloped circles, two colors of cardstock (light and dark) and a stamped image from Stampin' Up Circled Circus set in rainbow colored order.   These drawers are great for pieces around 8.5 x 11" or less.  Perfect for scraps.  I just toss the srap in the appropriate colored drawer after creating.  When I need a scrap of a certain color it is easy for me to find the size of scrap I need.  Oh and that black box you see is where all the paper goes after I finish up a project.  When it gets full like it is now then I trim down the scraps and store them away.

Next up is the patterned paper.  This has got to be the hardest type of scrap to store.  Many papers are multi-colored making it hard to sort.  So...when I came across Jennifer's brilliant idea I knew it was for me!


What Jennifer's suggested to do is to cut your scraps to the closest inch.  Yes that means you could be cutting off a 1/2" strip that could be used.   This was hard for me to do but I gave the trimmed off pieces to the kids and they loved making use of them!  Now stack all the pieces of the same size together putting the longest pieces in the back and the shortest in the front.  Keep it all together with a binder clip.  (Similar to a wallpaper swatch book)  This makes it easy to flip through the papers and see which one (s) you need.  I keep mine in a larger plastic storage drawer unit under my desk so it's easily accessible.  But you could put the tines of the binder clip in the up position and hang them on a hook on a wall too.  I absolutely love this method!  The other day I was making some origami boxes and needed a 4 inch x 4 inch sheet of paper.  So  I pulled out my 4" scrap pile and found the perfect pieces already trimmed!  2" was the smallest I went anything smaller went to the kids.  When I started trimming my scraps I soon realized all scraps could be cut into only 6 sizes.  Now I did have more than one stack of certain sizes like the 2" ones. I also love that this system doesn't take a lot of space to store! 

Here is what you need for my scraps storage:

Cardstock Scraps:
Labels for drawer colors (optional...drawers are clear so labels aren't really necessary)

Patterned Paper Scaps:
Paper Trimmer (optional.... makes cutting paper to the nearest inch easier)

I do have a few other methods for storing scaps I will share with you but I did not find a lot.  Hopefully something will strike your fancy though.


Scrapfreak.com uses an over the door shoe rack to store scraps of paper.  This would work hanging on a wall too I would think.


Rachel uses labeled magazine holders to store both patterned paper and solid scraps.  Her sons have access to this too.  This would be a great way for my kids to store their scrap papers.  It would even help my daughter prep for Kindergarten.   Right now we have all their papers in a big bin.  Check out more of Rachel's wonderful scrap room on her blog here.

Leslie uses glassine bags attached to journal pages to store her small paper scraps.  Check out more amazing storage ideas along with some beautiful floral photos on her blog here.


Denise made her own as she puts it "El Cheapo Clip It Up" using badge ID clips, page protectors, a dowel rod and cup hooks.  It costs her less than $2.00!  Amazing!  Check out more info on her blog here.

Barbara has a great idea for useable scrap storage.  She makes mostly A2 cards.  So when she needs a mat to place on an A2 card she cuts a full sheet into quarters..uses one and stores the remaining 3 quarters into this box...labeled by color.  This works really well if you use one brand of card stock.  Check out more on her blog here

I mentioned this in my mission organizational post about 6 x 6 paper storage but it's worth mentioning for scraps too.  Betsy Veldman cuts down scraps into 6 x 6 sheets and stores them in these cute little plastic cubes you can get at the Dollar Tree.  After cutting she still has a lot of leftover strips so then she .....


makes new paper by gluing the paper strips onto a sheet of 8.5 x 11" of card stock.  Don't these look great..who knew soo many patterns could be mixed like that!  Check out the wonderful cards Betsy made using her "new" sheets of paper here.

Okay that's scrap paper storage in a nutshell.  I hope you find something that inspires you to get a handle on your scraps and helps you make use of all that paper you invested in. Be sure to come back again!


Share: