Tuesday, October 25, 2016

Papertrey Ink October 2016 Blog Hop Challenge

Blog Hop
Isn't the above photo just gorgeous?! That is what we are to use to inspire us to create a project for the Papertrey Ink October blog hop. I just love the colors, music sheet and that wood background. So these elements are what I chose to concentrate on when making my card. 

I printed something off of my computer to make my own "wooden" background.  To give it some interest I added a Stampin' Up texture plate which embossed the paper a bit.  I brushed some grey ink around the edges to give some depth. I cut the bottom of this paper with a very old Creative Memories circle cutter.

I stamped some rustic cream cardstock with an old Stampin' Up music note wheel.  I had cut the stamp off the wheel and applied some Aleene's tack it over and over again to the back so I can use it with my MISTI.  It stamped splotchy but I think that distress look is perfect for this card.  I added this to the bottom portion of the card beneath the grey paper. 

Next I hand drew some sketchy branches and stamped the ends of them with berries from PTI's bells and boughs.

 Third, I set about making my own Autumn inspired paper.


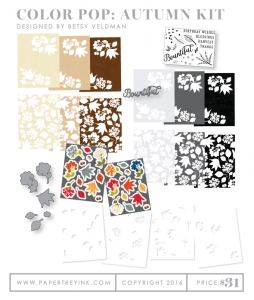
I applied various colors of distress ink with a round ink blending sponge.  I didn't bother blending the inks at all.  I spritzed and splattered on some water.  You can't tell in the photo very well (you can click on the photo to enlarge it)but I also splattered on some copper and gold shimmer mist.   I cut PTI's fancy foliage detail dies out of this paper and applied them in a cluster. The leaves are soo intricate that I don't think you really see much of this beautiful paper.  Originally I wanted to cut the "thanks" word die out of the paper for my sentiment but that die is too big.  I will have to make another card at some point using more of this paper. 

Lastly,  a sentiment from PTI's Think Big Favorites finishes off the card.  Does this look okay?  I felt like I still needed something else but I wasn't sure what.  But I always seem to have a problem with "white space".  

I'll be back later with the details.  Thanks for stopping by!  Please come back again!


Share:

Saturday, October 22, 2016

Papertrey Ink Make it Monday #264: Die Cut Stencil Shapes

This week at Papertrey Ink Melissa shows us a great technique involving uses die cuts as stencils. Check out her wonderful video here.

I knew immediately what die I wanted to use to participate in this challenge.  I used PTI's loop de loop II die and used Clarity Stencil brushes to apply classic craft ink over the die moving it repeated down the card to create a background.  I used spray adhesive to temporarily adhere the die cut to my card base. I think if I were to do this again I would just apply multiple borders and brush the ink onto the card base all at once. I love how the loop de loop die resembles the icing you might find on cookies.  I had soo much fun creating cookies with PTI's Sweet Holiday Wishes stamp set! I wanted to make my icing shiny so I applied UTEE to the die cut pieces and heat embossed.  I tried heat embossing with UTEE a whole sheet prior to cutting but didn't have much luck with that.  I wanted a plate to set my cookies on so I used a circle stamped with the veins of the leaves from PTI color pop Autumn and the berries from PTI's bells and boughs  to serve as my plate.   I wanted a different color other than the cookie colors for my plate but I think I chose too dark a color for my berries.  I scribbled on a white pencil to try to lighten the color but it still seems too dark.  The sentiment, cookies and holly are all from PTI's sweet holiday wishes set.  I added some wink of stella glitter marker to the word die cut to add some sparkle.  Oh and I used some stitched border dies to add some details to two edges of the card.


Supplies linked and listed below:


PTI Sweet Holiday Wishes

PTI Sweet Holiday Wishes Dies

Clarity Stencil Brushes

PTI Classic Kraft dye ink

PTI Pure Poppy Dye Ink

PTI Mint Julep Dye Ink

Lawn Fawn Stitched Border Dies

PTI Scarlet Jewel Dye Ink

Momento Bamboo Leaves Dye Ink

PTI Cocoa Bean Dye Ink

Wink of Stella Clear Glitter Brush Marker

Ultra Thick Embossing Powder (UTEE)

PTI Bells and Boughs Stamp Set

PTI Color Pop Autumn Mini Kit

Prismacolor Pencils
Thanks for stopping by! Please come back again!
Share:

Sunday, October 16, 2016

Papertrey Ink's Create Along With Us Oct 2016

It's release time again at Papertrey Ink.  That means instead of a MIM challenge we have a Create Along With US challenge.  That simply means we look at all of the wonderful projects the designers have created during release week and use that as our inspiration.  I decided to pick a project that was out of my comfort zone.  I hardly ever stamp on kraft card stock so I decided to go to Heather Nicols blog as she is the "queen of craft".  Kraft is her go to card stock and everything she does with it looks grat!  Here is the card I chose of Heather's for inspiration: (you can see more details on Heather's blog  by clicking here)

I didn't have any wreath stamps so I set about making my own using PTI's Bells and Boughs stamp set.  I simply traced one of my circle dies with a pencil and stamped the smallest sprig around the circle to make my wreath.

I've gotta run but I'll be back tomorrow with more details.
Thanks for stopping by!  Please come back again!


Share:

Saturday, October 08, 2016

Make It Monday #263 Background Building With Frames and ColorTthrowdown #413

Amy Sheffer shares with us a wonderful technique for her MIM video over at Papertrey Ink.  It involves building a background with frames.  Check out the video here.

I loved the technique of Amy's!  She first shared a card using this technique back in Feb of this year on her blog.  See her fabulous tulip card here.   I had saved this card of hers because I knew one day I'd like to copy it.  I was excited when she showed this card in her technique video because I now had an excuse to duplicate it!

I also pulled my colors from the latest Color Throwdown Challenge.
Below is my card:
Because of the bold colors in the challenge I went bold with my stenciled background.  Turns out that doesn't work for this technique.  I am not loving my card!  Amy's soft stenciled background was obviously the way to go.  My white frames got lost on this busy background so in an attempt to bring them back to life I colored the dots in with blue marker.  I stamped a flower my PTI's bitty bouquest and a tiny sentiment from PTI's the skinny to complete the card.   One day I might redo this card in different colors or something.

I'll be back at some point to add my product links.  Thanks for stopping by!  Please come back again!


Share: