I had bought some texture paste several months ago but had yet to use it so when I saw the lastest MIM I was very excited to have an excuse to finally use it!

So since I had some seepage of ink with the above card I decided to try one more card. My daughter wanted to make our piano teacher a card for her birthday so she suggested we try a rainbow.

This time I used reinkers but still had some seepage and managed to put more indents in the texture paste rainbow. However, I was able to cover up the seepage with the cloud stencil. This rainbow stencil is in two pieces. The three bows are done first then another stencil gets layered over top to complete the rainbow. So I applied the texture paste to the first stencil let it dry then applied the second and thus the stencil rested on the previous texture pasted bow which made it higher so my last two bows are raised more than the first. I think if I were to do this again I would tape the two rainbow stencils together and use them at the same time to apply texture paste to the full rainbow. I used the palette knife to apply some swirly texture to the clouds. Love this effect! My daughter added rainbow colors to the die cut words using the stencil brushes and also some makeup brushes (since I didn't have enough stencil brushes for each color family). She positioned everything on the page just as she wanted. She loves her bling so she was excited to add sparkle to the bows with the Wink of Stella brush pen. We combined several stamps to create the sentiment "Wishing you sunshine and rainbows on your birthday." Luv, luv, luv, that sentiment. I can't wait to try making this card again myself!
Supplies listed below:
Birthday Wishes Card:
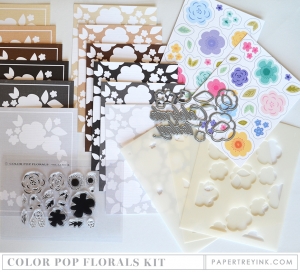 Make It Market Mini Kit: Color Pop Florals |
 PTI Big Basics: Birthday Die |
 PTI Berry Sorbet Dye Ink |
 PTI Melon Berry Dye Ink |
 PTILovely Lady Dye Ink |
 PTI Mint Julep Dye Ink |
I will have to check and see which reinkers I have so I can figure out which colors I used on the rainbow card. I have some errands to run so I will have to finish my supply list later. Thanks for stopping by! Please come back again!

1 comments:
Shelly, your Color Pop Florals look great using texture paste and color. Love the class your black sparkly sentiment adds to finish it off. Your daughter did an awesome job on the rainbow card. Have to agree that's a lovely sentiment, too.
Post a Comment