Showing posts with label tutorial. Show all posts

Wednesday, December 07, 2016

Tip: How to make an open wreath using a vine stamp and it's coordinating die

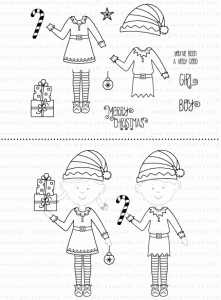
Do you ever see a card by one of the fabulous Papertrey Ink designers and think I've gotta make a card just like that now!?  But then you realize you don't have all the supplies the designer used?  Well that happened to me recently.  I sat down to make some Christmas cards.  I immediately thought of Betsy's amazing card using the PTI Dress Up Dolls: Elves stamp set.  I couldn't wait to start making this:

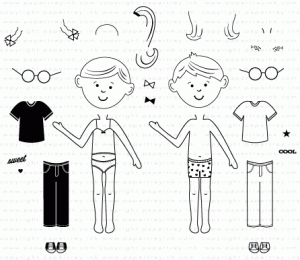
Isn't it wonderfully cute!? (You can see more details on Betsy's blog here)  I was soo happy my daughter had the PTI dress up doll basic set because it gave me an excuse to buy the Elf set and thus I could recreate this card.  Or so I thought....I didn't have that rustic wreath stamp set.  So I got to thinking what I could replace the wreath with.  This is my finished card...see what you think?!


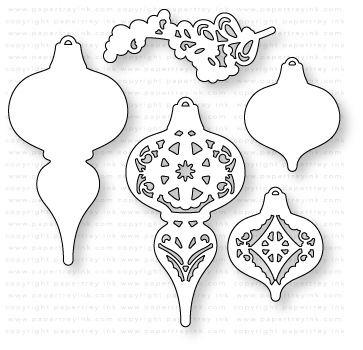
Can you guess what I used for my wreath?  I used the vine included with PTI's What the Doodle:  Ornament stamp and die set.  I had to do some snipping though to make it work.  Here let me show you.

First you stamp and die cut or fussy cut several of the vines.  (I wanted a hollow wreath for the elves to pop out of so I cut a circle out of my card front and the size of that determined how many vines I needed)  Next you will snip apart the vine as indicated above.  Then begin layering your cut peices around the circle.  I lay the middle black part of the vine directly along the edge of the circle so half  the vine is on the cardstock and the other half is hanging out of the circle.  As indicated in the photo you will want to flip the top half of the snipped vine so it is facing the wrong way.  You will also want to overlap the vine pieces slightly when you glue them around the circle.


Above is a picture of the completed wreath.  The red showing through is mat on my table.  I decided make another card using just the open wreath since it's so pretty on it's own.


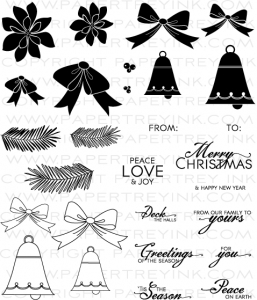
I colored the wreath and bow with Prismacolors an used a sparkle gel pen to color the tiny berries.  The bow and sentiments were all from PTI's Bells and Boughs stamp set.

Supplies are listed and linked below:

PTI Dress Up Dolls: Basics Stamp Set

PTI Dress Up Dolls: Elves Stamp Set

PTI Bells and Boughs Stamp Set


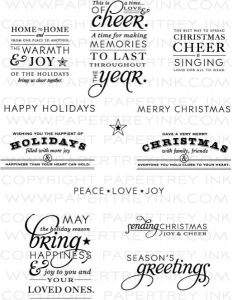
PTI Stylish Sentiments: Holiday

PTI What the Doodle Ornament
Thanks for stopping by! Please come back again! Happy Holidays!
Share:

Wednesday, June 01, 2016

Tutorial: Stamping on Die Cuts and Layering Stamps using the MISTI

Hello!
A while ago I posted a card I did for Papertrey Ink's blog hop using The Sweet Life Stamp Set.  It was similar to the card below.  You can see the original by clicking HERE.

I promised a tutorial on how I did the stamp layering on the die cuts using the MISTI.  So here it goes... Please note this is not my original idea!  Cindy O mentioned this technique on the Papertrey Ink forum and I thought it was simply BRILLIANT so I just had to try it.  Thanks soo much Cindy!   Also Understanding Blue posted a video tutorial using acetate for layering in this video.  I just thought I would give you a picture tutorial of how I combine both of these methods to get beautifully stamped rose die cuts.

I will provide you with a collage of key instructions then elaborate below the photo.  I figured this will give you a quick overview in case you don't want all the chatter! :) Oh and you will notice many different colors used in this tutorial.  I stamped several roses and took the best photos out of the numerous ones I took for the tutorial.  You may click on any of the photo collages to enlarge them. 

 I realize with the invention of hollow dies this part of the tutorial might not be necessary but the Sweet Life stamp set contains solid dies and I have many more solid dies then hollow in my stash.

1.  I look at the size of my die and cut a piece of cardboard larger than the die.  This gives me a place to use the magnets in the MISTI to hold on to the  negative space of the die cut.  I use cereal boxes and other boxes I normally throw in the burn trash.  This cardboard is just the perfect thickness and you don't have to waste your good cardstock plus it give me a contrasting color.  You can of course just save the negative space of the die cut you intend to stamp on to use as your template.  (Note:  Since there are three layers to this flower I cut 3 identical cardboard pieces..one for each layer...well actually 4 but the 4th is optional..explained later!)

2.  Take a piece of copy paper and stamp your first layer onto it.  I use scrap paper that has writing on the one side.  DO NOT use cardstock it will be too thick.  Be sure to use a darker color of ink.  The darker ink will help you line up the image in step 5. 

3. Now take the stamped image and center it in the negative space of the die cut making sure there is equal spaces all around.  Stick a piece of micropore or washi tape to keep it in place on the front.

4.  Turn it to the back and tape the copy paper in place.  Remove front tape.  This template will be used over and over again.


5.  Now take the template you made in steps 1-4 and position it into the left hand corner of the MISTI.  Be sure it is snug up against that L corner shape of the MISTI.  Place your stamp on top of the template lining up the stamped image with the stamp.    (Note:  The wrong side of the stamp should be facing up.)  Close the lid of your MISTI to pick up the stamp.

6.   Die cut your die from the cardstock you would like to stamp on.  Keeping the template snug up against the L shape of the MISTI position die cut into negative space on the template. 

7.  Stamp your image (1st layer) onto the die cut.  You should have a perfectly stamped die cut with an even border all around the edge!   The next time you use this stamp you can simply start at step 5 since this template is reusable.

You can also use the steps above to add a second layer stamp to the die cut.

Repeat steps 1-7 for the second layer.  Since the second layer is centered on your template it should stamp perfectly over the 1st layer on your die cut.  After stamping, keep this die cut in the template as you will need it for the 3rd layer of stamping. 


You can try to do the exact same steps as aove for the third layer of stamping but honeslty I didn't have much luck doing that.  There is too much room between the negative space and edges of the stamp to center well.  It took me several attempts but this is the method I have found to work best for the 3rd layer.  If you know of an easier way.  Please..please...please share it with me!

Below are the instructions for the third layer of stamping and this corresponds to the photo above:

1. First take a piece of acetate large enough to cover the template made in the second layer of stamping.  Tear off a piece of removable  tape and attach it to the side of the acetate making a hinge.  (Note:  I used the Stamp-a-ma-jig sheet and wide painter's tape).  Position the third layer stamp towards the middle of the MISTI lid.  Stamp in black on your acetate.  Stamp as many times as you need to make sure you get a good dark image. Now take the template you made in step two with the die cut still tucked in the negative space.  Slide it under your stamped acetate aligning it up so the roses look perfect.   DO NOT move the actual stamp.   Place magnets or tape on top to hold the template in place.  Use the hinge to pivot the acetate out of the way and apply magnets to the bottom of your template.  I prefer the side hinge versus the top hinge but do whatever you like the best..eithr will work.  The hinge is explained in Understand Blue's wonderful video Here.   (Note:  The hinge isn't absolutely necessary here but it does help to keep the acetate in place wonderfully and prevents you from moving the template accidentally when you remove the acetate)

2.  Stamp the 3rd layer on top of the 2nd layer.  Viola!  A perfectly aligned beautiful rose!  Now you could stop here and just use the acetate every time you use the third layer.  However, I wanted a template I could use time and time again like in the other steps.

3.  I kept the 2nd layer template in place after stamping my rose.   I then die cut a copy paper die and placed it into the template.  DO NOT use cardstock it will be too thick.  Stamped the 3rd layer on this.  Remove the copy paper die cut.  Now take a blank negative space die cut and position the stamped copy paper die cut into this negative space.  Add tape to the front to hold it in place. 


4.  Tape the die cut in place on the back of the negative space die cut.  Now remove the front tape.  You can use this template for the third layer by positioning the stamp wrong side up and aligning it over the stamped image just as in step 5 above.  (Note:  I glued together two cardboard pieces for this layer so I have a bigger "lip" on the negative space to hold my die cut in.  This isn't necessary but I found it is helpful in keeping the cardstock die cut from slipping out of the negative space)

Goodness I sure do hope this doesn't all sound Greek to you!  This really is much easier than I am making it sound!  Please just give it a try and if you have any trouble just contact me at shellysart at verizon dot com.  I'll try my best to explain things better.

Below are the other cards I created:

Here are the colors I used for my roses and leaves.  I will not be linking these products because I don't want to make this post even longer!

Red Roses:
All PTI Berry Sorbet, Pure Poppy, Winter Wisteria (didn't like this color) stamped over with Scarlet Jewel
Leaves: Memento Pistachio

Purple Roses:
PTI Lulu lavender, PTIWinter Wisteria, Momento Elderberry
Leaves: Momento Pistachio

Yellow Roses:
PTI Lemon Tart, Meomento Dandelion, Momento Cantaloupe
Leaves: PTI Green Parakeet

Sentiment is from PTI's Think Big Favorites #2 

I hope you enjoyed the tutorial!  Thanks for stopping by!  Please come back again!
Share:

Saturday, April 16, 2011

Easter Sale 40% off all my files, tent card treat sac tut and freebies

Howdy,
I hope you are all in the Easter spirit!  You know I figured since Easter is later this year I'd be totally prepared for it...NOT!  I have many ideas of what I want to do and hope to accomplish some of them this weekend.  Well just in case you aren't ready for Easter either Laury (fellow PT designer-Just Laury) and I are having a sale 40% off all our designs (my membership club is excluded...sorry!).  The sale runs now 4/16/2011 through 4/24/2011 EST.    I have many Easter files but since everything is one sale why not check out some of my digital kits, digital stamps or cutter files by clicking here and Laury's store is here.  Before you find some Easter treats in our stores keep reading....I promise you there will be a freebie or two if you can hang in there!

 Treat tent:  strawberry digital stamp (found here) colored with Copic markers and cut with Nestabilities. Card: Card Base 7, sentiments from strawberry digital stamp and strawberry freebie cutter file provided by Just Laury on her blog here).    I did add paper glaze to the strawberry to make it extra juicy and flocking to the stem.   Below you will see the same project but this time I printed out the strawberry digi that Laury had colored and sent to me via e-mail. 

I recently put a strawberry digital stamp in my store.  I thought it would be nice to do up some projects with it.  However, I didn't have any paper ( and no scrapbooking or craft store near) so I made some digitally and printed them out to use in my projects.  (Psst...keep reading to find out how you can get these papers for FREE).  The card I used above is file #10 in my membership club.  It comes with a cutting file aiding in making a pleated border.  I love that the cutter puts the score lines in the exact places without any measuring needed!
I have updated my slide show to the right depicting all the files entered in my membership so far.  If you do indeed decide to purchase my membership.  You will get at least 10 more files in addition to the ones shown.  Click here to purchase my membership. 

The other project you see above is actual a treat tent.  I took one of the tent card being offered in my membership and added a few things to it to make it hold some yummy treats.  I'd like to show you just how I did that in a pictorial tut below.  One thing about these treat tents is they will hold larger sized snacks so you could even make some homemade cookies to throw in them.


1.  You need to follow the instructions in the tent card file to assemble the base.  I chose not cut the window
in the card since I wanted to add my strawberry digi to the front.  However, if you'd like your treats to peek out go ahead and cut the window opening too.  The scalloped rectangle (provided free later in this post) and a little ribbon is all you really need to turn my tent card file into a treat tent.  

2.  Place glue as indicated on the scalloped rectangle piece.

3.  Adhere rectangle to the back of the tent card so it acts as a flap to close the treat tent.

4.  Mark where to put the holes in the treat tent front.


5.  Punch holes at your marks.


6.  Glue treats to the inside of your treat tent.

7.  Thread ribbon through the holes pulling it out the front of the treat tent.

8.  Now thread ribbon through holes in front flap.

9.  That's basically it!  Just tie your ribbon into a bow and decorate.  Easy peasy strawberry squeezy...LOL!

Here you can see the side of the treat tent.  It stand on it's own and make a great gift!  Remember you can fill these with things other than food like say some brads, eyelets, ribbon for a paper crafter.  I can picture it filled with hair accessories for a girl or baseball cards for a boy.  You could put my Chickie Digi on the front and fill the treat tent with a few Easter chocolates and maybe a gas card for older kids who still deserve a treat but think they are too old for Easter baskets.

Okay I guess I've gabbed enough!  Now on to the freebies!

Above you'll see a preview of the papers I am about to give you absolutely FREE.  Grab 'em quick though as they will go into my store for purchase after the weekend.  They were created digitally and of course can be used for digital scrapbooking and card making but...I made them at 300 dpi resolution which means they can be printed out and used just as I did for my projects at the beginning of this post.  Because of the size of these papers I have broken them up into 3 zip files for faster download times.  Be sure to download all three to get the complete set.  Oh and please remember that these fall under the rules of my TOU provided in the zip file.  I ask that you direct people to my blog to get these freebie rather than share them amongst yourselves please.
Sorry papers no longer available as a freebie...look for it in my store soon! 

Click HERE to download the treat topper.  AI, GSD, KNK, SVG and WPC formats included in the zip.

Thanks for visiting me today.  I hope you enjoyed the project and that I have inspired you to add creativity to your life today!  Have a fabulous weekend!  I know I will as Elizabeth is coming to see me!

Share:

Tuesday, November 03, 2009

Technique Tuesdays: Making Colored Fluff and freebie

Hello everyone,
I'm starting a new series on my blog called Technique Tuesdays. I will show you how to do different techniques related to paper crafting on my blog every Tuesday. This Tuesday I am featuring how to make your own "Colored Fluff". It is similar to a product currently on the market called Flower Soft. I originally got the technique from a member of the Scal-hints yahoo group. She posted a video of this technique she found on You Tube but I don't believe I'm allowed to share the video so you'll just have to do a search if interested....or better yet keep reading and I'll show you how. My son helped me to make this stuff the first time...it's very easy and inexpensive to make!


I only had 3 colors of reinkers. I did have some distress ink pads and remembered they work well with water so I used them to color the "fluff" and will show you how below.


Now I will share with you the results of each coloring method so you can see how it works.


These are just some of the options for coloring that I have tried. You can experiment with non-distress reinkers or food coloring. The styrofoam balls are very inexpensive..they are available at many department stores. You can even add glitter to your fluff. I will tell you though I tried using my homemade glimmer mist (combining distress reinker, water and perfect pearl powder)....it didn't work very well and I had to spritz the fluff with many sprays to get any color at all..so I recommend not using your homemade glimmer mist. Oh and I got the storage containers I used at the Dollar Tree. I have also seen people use the clear acrylic containers with screw on lids that stack or come in a large acrylic box. I had good luck with rubbing the styrofoam balls against each other but some have used kitchen graters with good results too. You just need to use a dryer sheet or anti-static spray to control the static.

Now I know you're wondering what to do with all this "colored fluff" you have made. I will show you the example I made for this tut below. I have to tell you though this card looked much better in the mental image I pictured in my head then it did when I actually made it. But...it is an example of how to use the "colored fluff" so...here you go!


I mixed together, yellow, red, orange and brown colored fluff to add to my card. I used the bowl and leaves from my build a turkey file. The tag is from my tags galore file. Click below if you'd like to purchase either of these files. It's hard to tell in the photo but I also added Doodlebug flocking to the leaves. Note: Michelle the owner of Paperthreads has an amazing video on how to do flocking on her blog..here. The berries were done with dimension paint. I also added some dimensional adhesive squares. Penny Duncan has an amazing tut on how to make these "pop dots" on her blog...here.


I'd also like to share with you a card I did using the Flower Soft I purchased. This stuff is a great way to dress up a store bought card if you're in a hurry. I also added some glitter after I put on the flower soft while the glue was still wet.


My membership club has officially started. If you'd like to see a peak at the first file...an explosion box...scroll down to the previous post. If you'd like to purchase the membership click on the preview below.


Thanks so much for stopping by and letting me share this FUN technique with you. As a departing gift...I will give you a set of tags. I hope you'll stop back sometime soon. Hurry the freebie will expire approximately 24 hours! The zip file will include the AI, KNK, GSD, WPC and SVG formats. Even though this file is free I please ask that you don't share it. Send them here to download it themselves instead.


Link expired.

Have fun playing with styrofoam!
Shelly
Share:

Friday, October 02, 2009

Biggest sale of the year, blog hop, file organization, freebie bow


Photobucket

Hey everyone, thanks for joining in on the Blog Hop! Did you pop over here after visiting Sam and Hailey's Designs Blog? If you did, then you are in the right place, if you didn’t, then I recommend you go back to the Paperthreads store’s main page, www.paperthreads.com/store and start from the beginning…so you get all your secret words in order!!

My secret word to give you is the word YOU, and you can find the next word along the hop by visiting Shirley Clark Designs.

But don't leave just yet! I have some goodies for you too...please read all of this post as I promise it will be worth it.


Okay admit it...sometimes you feel like pulling your hair out because you can't find that cutter file you know you have saved somewhere on that computer of yours. I am here to give you some hints that will hopefully stop your frustration. Click here to view an article on cutter file organization. I have also included category folders to easily organize your files as I have mentioned in the article. I have zipped this info...you will get a direct download to it.


I am part of the Scal-hints yahoo group. I just love all the information every one on this group shares. I learn something new every day! One of the ladies shared the link to this amazing video they found at Christmas with the Cricut's Blog on how to make a paper bow. I was so impressed with Tammy's bow I couldn't wait to make my own. I got to thinking though this would be so much easier if I had cutter file to do the measuring and punching of the holes for me. So I set about making that file. I love how my bow turned out and I want you to make one too! I am sharing the file with you. I have put all the formats in one link so you will get AI, KNK, SVG, WPC, and GSD formats in one download. I have put them on a secure server. It should download automatically. Please keep in mind I did not design this bow...Tammy from the Christmas with the Circut blog did...I only took her instructions and made some strips with holes in them for our cutters to cut.

You can download the bow file here.
You can see the video on how to make it here.

Don't leave yet. I have some blog candy for you all too!


I know it's hard to see what's in the baggies are googly eyes, dew drops and flower/snowflake irridescent sequins. The papers are all patterned paper and sized 12 x 12. I will give this away to one winner. Now for the rules.

1. In order to win you must post a comment telling me what your favorite file is in my store. You can click on my Ad at the beginning to get to my store or here. All comments must be posted before my clock at the top right of this blog hits midnight. No entries will be accepted on Sunday.

2. If you e-mail(shellysart@verizon.net)me a project using one of my files then you will get your name put in the drawing for the blog candy also. All e-mailed projects must be in my mailbox before the clock at the top right of this screen hits midnight. No entries will be accepted on Sunday. (so if you follow rules 1 and 2 then you get 2 chances to win!)

3. I will pay to ship this package to anyone in the United States. If you are outside of the US I will pay $10.00 towards shipping and you pay the rest....or you can pick which 10 of my files currently in the store you want for free and we'll pick another winner for the blog candy package.

Random.org will aid me in picking a winner and it will be announced here on my blog.

Okay before you shut you computer down for the day I do hope you head on over to my corner of the Paperthread's store for an amazing sale. I have never dropped prices this low! I am doing this because it is my 1 year anniversary with Paperthreads. I so love working there! It makes me smile soo wide and gives me a fuzzy feeling inside every time one of you buys my files. I truly appreciate all the support you've given me through this year of designing. I hope to be here for many more years. Thanks so much for purchasing my files!

Have a wonderful weekend and I hope you enjoy all the goodies you are getting during the anniversary celebration at Paperthreads!
Share: