Showing posts with label blog hop. Show all posts

Saturday, February 25, 2017

Papertrey Ink Feb 2017 blog hop challenge

It's time again for the Papertrey Ink monthly blog hop.

Once again Nicole picked such a gorgeous and inspiring photo.  I didn't have a lot of time to make a card and really wanted to preserve the elegance of the photo.  I definitely struggled with this.  I decided to try some foiling.  I got the supplies to do so for Christmas but haven't had a chance to try it.
I am not totally thrilled with the design of my card but woweee that foiling it wonderful!  It's very hard to photograph but in real life it's super shiny.   It's flat and looks soo much more professional looking than embossing.  As Jennifer McGuire has shown on her blog.  I used flitter glue and an ink blending sponge to apply glue to my sentiment stamp then stamped it using the MISTI.  I then applied the foil over the stamped image and ran it through my laminator using a piece of copy paper folded in half as my carrier sheet.     If I didn't get a good impression then I stamped again in the same spot which is really easy using the MISTI and then added the foil and ran it back through again.   I also did this for my flower centers.  I used a toner sheet to die cut PTI's nostalgic notions border (no longer available).  This worked even better than the stamping.   I used PTI's art with heart stamp set (no longer available)  for my flower decoration.  I stamped the leaves in PTI  saffron spice.  The flowers were stamped in Momento's sweet plum and PTI's raspberry fizz inks.  The sentiment is from PTI's painted petals stamp set (no longer available). 

Gotta run! Thanks for stopping by!  Please come back again!
Shelly


Share:

Wednesday, January 25, 2017

Papertrey Ink January Blog Hop Challenge

Every month at Papertrey  Ink Nicole Heady posts a photo on her blog...in which we are to use to inspire us to create a project.  This month's is phenomenal.  Check it out below:
I just love the black icing and pretty floral clusters with the cookie edge peeking through.  Nicole posted the photo in advance and the minute I saw it I couldn't wait to create!  It is so inspiring!  It was nice to have my blog hop card done early for once!

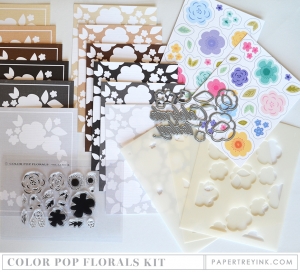
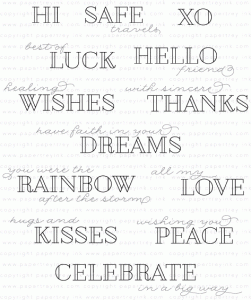
I am thrilled with how this card turned out!  It's even prettier in real life.  I used two different shades of pink (lovely lady, and sweet blush) but in the photos the pink aren't as vibrant as they are in real life for some reason.  I initially wanted to use roses but the ones I had just weren't the right size.  PTI's Color Pop Floral blossoms were perfect.  I took a technique from Nicole by drawing in little white dots around my vine and in the center of the flowers.  I love this little detail!  I once again used a sentiment from PTI's colorful words.  It is heat embossed in white.  I can't wait to try this card design with other colors and other sentiments.  This would work well for Mother's Day!
Oh and I did color over the flowers with a clear Wink of Stella glitter pen to give them some shimmer.  I also added some glossy accents to the berries.  I tried to capture this in the photo below.
Supplies are listed and linked below:
HTML Code:

Make It Market Mini Kit: Color Pop Florals

PTI Colorful Words Stamp Set

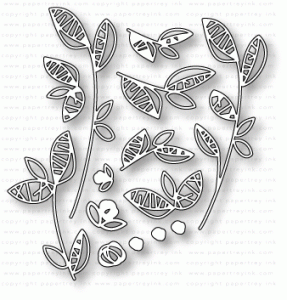
PTI Fancy Foliage Details Dies
HTML Code:

PTI Pure Poppy Dye Ink

PTILovely Lady Dye Ink
PTI Sweet Blush Dye Ink


White Gel Pen

Thanks for stopping by! Please come back as I will have some updated organizational posts for you! I have been working on organizing my inks, dies, and stamps and will share with I have done with you soon.
Share:

Sunday, November 20, 2016

Papertrey Ink November 2016 Blog Hop

Isn't that photo just gorgeous!  Tons of inspiration to pull from to make a card that is for sure!  Nicole picked a fabulous photo don't you think?!   I focused on the white fluffy tree and colorful ornaments for my card.


I started by stamping the pine boughs from PTI's Bells and Boughs in Versamark ink and heat embossed them in white.  I brushed aqua mist over the entire card doing an ombre type of blending with the darker color at the top and getting gradually lighter as you go down.  I cut the ornaments  out of PTI raspberry fizz, tropical teal, and green parakeet cardstock.    I pulled out some very old gold embossing powder to add touches of gold to the ornaments. It is soo old the price tag actually said $3.50!   It didn't melt that smoothly but in this case it made the ornaments look old which worked well for this style of card.   You can see the embossing better in the photo below.
 I suspended the ornaments from gold string.  A greeting from PTI stylized sentiments: holiday also embossed in gold finishes the card.


Supplies are listed and linked below:

PTI What the Doodle Ornament

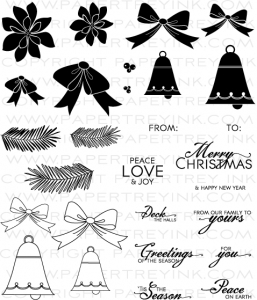
PTI Bells and Boughs Stamp Set

PTI Stylish Sentiments: Holiday

Clarity Stencil Brushes

PTI Aqua Mist Dye Ink

Metallic Gold Thread
Thanks for stopping by! Please come back again!
Share:

Tuesday, October 25, 2016

Papertrey Ink October 2016 Blog Hop Challenge

Blog Hop
Isn't the above photo just gorgeous?! That is what we are to use to inspire us to create a project for the Papertrey Ink October blog hop. I just love the colors, music sheet and that wood background. So these elements are what I chose to concentrate on when making my card. 

I printed something off of my computer to make my own "wooden" background.  To give it some interest I added a Stampin' Up texture plate which embossed the paper a bit.  I brushed some grey ink around the edges to give some depth. I cut the bottom of this paper with a very old Creative Memories circle cutter.

I stamped some rustic cream cardstock with an old Stampin' Up music note wheel.  I had cut the stamp off the wheel and applied some Aleene's tack it over and over again to the back so I can use it with my MISTI.  It stamped splotchy but I think that distress look is perfect for this card.  I added this to the bottom portion of the card beneath the grey paper. 

Next I hand drew some sketchy branches and stamped the ends of them with berries from PTI's bells and boughs.

 Third, I set about making my own Autumn inspired paper.


I applied various colors of distress ink with a round ink blending sponge.  I didn't bother blending the inks at all.  I spritzed and splattered on some water.  You can't tell in the photo very well (you can click on the photo to enlarge it)but I also splattered on some copper and gold shimmer mist.   I cut PTI's fancy foliage detail dies out of this paper and applied them in a cluster. The leaves are soo intricate that I don't think you really see much of this beautiful paper.  Originally I wanted to cut the "thanks" word die out of the paper for my sentiment but that die is too big.  I will have to make another card at some point using more of this paper. 

Lastly,  a sentiment from PTI's Think Big Favorites finishes off the card.  Does this look okay?  I felt like I still needed something else but I wasn't sure what.  But I always seem to have a problem with "white space".  

I'll be back later with the details.  Thanks for stopping by!  Please come back again!


Share:

Sunday, September 25, 2016

Papertrey Ink September 2016 Blog Hop Challenge

Today at Papertrey ink there is a blog hop going on.  We are to make a card with the above photo for inspiration.  You can check out all the wonderful cards at Nicole Heady's blog here.  As Nicole mentioned it's good when the artist keeps things simple and just sticks to the basics.  So I kept that in mind when making my card but I have to say It was very difficult for me to stop adding embellishments and such!

I also used a sketch by Amy Sheffer for inspiration.  It is from Papertrey Ink April 2016 newsletter.


I didn't have any pinecone stamps so I made due with flower stamps from PTI's Everyday Classics stamp set.  I used a white Prismacolor pencil to add the "snow" to the pinecones.  What do you think...do they look like pine cones to you?  In the sketch is says to add a variety of material to add interest and texture so I cut the tag out of burlap and the scalloped element out of felt.  I like how some of the leaves were overturned exposing the backside of the leaf in the photo.  So I cut the sprigs out of two shades of green and glued them together then I flipped some of the leaves over and glued down them down so the lighter side showed.  I colored the berries on the sprigs with a white gel pen.  A craft tag (cut using the QK special edition kit) and bow finishes the card.  I really struggled to stop here and keep things simple.  I really wanted to add some sequins or rainstones.

Supplies listed and linked below:

PTI Everyday Classics (2009 Anniversary Edition

PTI Bells and Boughs Stamp Set

PTI Tag Sale #10 Die

PTI Cocoa Bean Dye Ink

WPlus9 Under the Mistletoe Dies

White Gel Pen
Thanks for stopping by!  Enjoy the rest of your weekend!  Please come back again!


Share:

Thursday, August 25, 2016

Papertrey ink August 2016 Blog Hop Challenge

It's time again for the Papertrey ink monthly blog hop.  We are supposed to make a card using the inspiration from the photo.  Normally not long after looking at the photo I can picture in my mind what sort of card I wanted to do.  This time nada, zip...nothing!  So I sought out more inspiration.
I found the wonderful card above on Betsy's blog.  You can check out more details on her blog here.
I loved how the flowers tucked into the bold sentiment.  I also loved the artsy background.

I pulled the melon berry and berry sorbet colors from the photo and made my watercolored background.  I also took some fine linen ink and watered down white acrylic paint to produce splatters over my watercolored background.  The flowers were stamped in the same colors. I added a hint of navy as the centers of the flowers too.   The text block birthday die was cut with fun foam.  I accidentally used my white Wink of Stella glitter marker (instead of the clear) on the flowers.  However, I wasn't about to start over.  Luckily...The white maker gave the flowers a white washed look which actually worked well with my watercolored background.  A few iridescent sequins finishes the card.

Supplies listed and linked below:

PTI Text Block: Birthday Die

PTI Bitty Bouquets Stamps

PTI Bitty Bouquets Dies

PTI Berry Sorbet Dye Ink

PTI Melon Berry Dye Ink

PTI Fine Linen

Momento Nautical Blue Dye Ink

Zig Wink of Stella White Marker

White Fun Foam
Thanks for stopping by! Please come back again!
Share:

Monday, July 25, 2016

Papertrey Ink July Blog Hop Challenge


It's time once again for the monthly blog hop at Papertrey Ink.  The photo above is our inspiration photo.  I love the mix of aqua mist, berry sorbet, soft stone and gold.  However, I sought inspiration from one other person too.  Carol Steedman made a gorgeous card during last month's blog hop that I just couldn't get out of my mind.  You can see it in all it's pastel glory here.  I just loved how she clustered all her flowers at the top with a little bit of greenery hanging down and so I did the same.  I initially started out doing melon berry flowers using the clarity stencil brushes thinking I would add a berry sorbet inner layer to them but didn't like that so I skipped the darker inner layer making my colors a little softer than the photos. 

I really loved the geometric pattern on the walls.  If you look closely (click on the photo to make it large) you'll see the score lines I made to mimic that wall treatment.  It's a very subtle but I think it really adds a lot of depth to this card.  I decided to use PTI's Color Pop florals kit just as Carol did pulling the aqua mist and berry sorbet colors from the photo.  The pillow on the chair made me think of this kit.

I purchased some liquid leaf for PTI's Stamp-a-Faire (stay tuned I will be posting my projects from the event tonight) and I'm sooo glad I did!  I painted some of it on the thanks die cut and also dotted some of it on my flower centers using a stylus.  This stuff is gorgeous!  It dries almost instantly leaving behind a beautiful gold finish.  The picture doesn't do it justice.  I haven't used gold much in the past but I definitely will be using this more in the future.  A little goes a long way but it does smell similar to spray paint.  So you may want to open a window when using it!

Oh and I almost forgot I cut the thanks die cut from PTI's coasters.  This is a tip from SAF from design team member Danielle.  The coasters are cheap as you get 25 for $1.00 which will give you many die cuts.  They take up the gold leaf well and gives you the thickness similar to stacking 3 cardstock die cuts together.

I really struggled with what to use for my background with this card.  I cut the white panel using a rectangular stitching die and I knew I wanted the flowers and thanks die to over hang the white panel a bit.  I tried soft stone for the backing but there wasn't enough contrast between the white panel and the flowers.  So I pulled out some stormy sea from the sampler pack.  I was convinced I didn't like this color when it was first introduced..figuring I had other grays i liked better.  But...WOW...that stormy sea paper really made my flowers pop!  I cut the foliage die from the friendship jar flowers in stormy sea too snipping it apart to layer beneath my flowers.  I love these colors together.  I guess stormy sea will now go on my wish list!

Supplies are listed and linked below:


Make It Market Mini Kit: Color Pop Florals

PTI Friendship Jar Flowers Dies

PTI Big Basics: Thanks Die

Clarity Stencil Brushes

PTI Melon Berry Dye Ink

PTI Aqua Mist Dye Ink
Thanks for stopping by! Please come back soon as I will have my projects from Stamp-a-Faire posted later tonight!
Share: