Howdy!
I hope you are all enjoying the holiday seasons. I am listening to Christmas music and it's cold outside. I was watching a movie about Chirstmas in LA. I can't imagine being in shorts and celebrating Christmas. Just doesn't seem like Christmas without having to bundle up!
Okay on to the technique. This is a quick simple one in which you can use up some of those ribbon scraps or ribbons you have too many of! I am demonstrating it being used as a tree but any die cut can be used. Remember you can click on the photo to see it larger.

A few examples for embellishing your tree. OH Psst...I have the tree freebie for you later.

Hints and Tips:
I used plain ivory cardstock for my tree because I knew the ribbons would cover the tree completely. If you are using sheer ribbons keep in mind your base tree will show through.
Scor-Tape or Terrifically Tacky Tape (Red-Line) hold very well just about anything you want to add to your tree. Seed beads look very pretty but know that your base will show through that is why I added them on top of the red ribbon instead of the actually paper tree. You can add glitter in the same way. Just lay down the tape and sprinkle glitter on top. Flower Soft would work too...how about trying candy sprinkles!
Dew drops, pearls, brads, or dots of glitter glue can be added to the tree to act as ornaments.
It is very important you get the glue evenly dispersed on your die cut. If you don't you'll get bumps or loose unattractive ribbons.
You WILL get some fraying. You can apply some fray stop to the ends if that bothers you. Personally, I think it adds to the handmade charm and I actually considered using my scissors to make the ribbon fray and doing a rustic looking tree!
You can use any shape you'd like to as your base die cut...but keep in mind you will have to trim the ribbons off later. More intricate shapes will be harder to trim around.
This method can be used to decorate a photo frame too. Ribbon comes in such a variety of colors and style..it would be very easy to make a frame to match your decor.
You can substitute the ribbon with paper strips. Please note things look better if you vary the widths of the paper strips. This is a fabulous use of paper scraps!
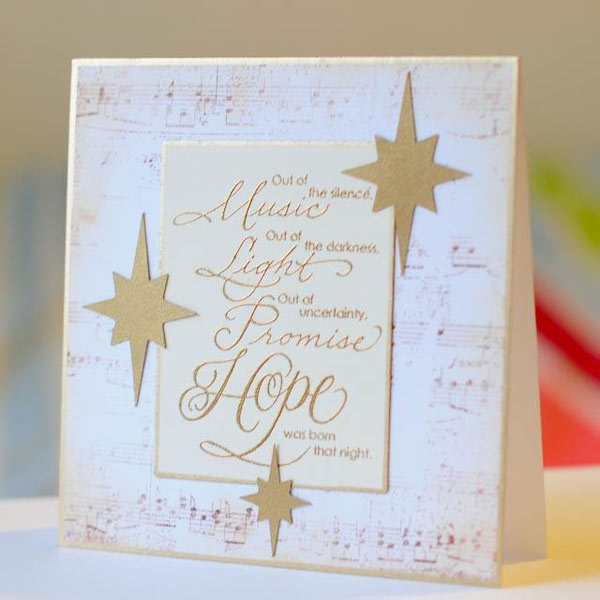
Below is my example of a rather non-traditional looking Christmas tree. I loved this paper and thought the ribbon strips went with it so well. My inking could have been done better though. Oh and sorry about the photo..I didn't have the best lighting when I took it and it was too dark to go outside.

I used my
folded photo corners for this card. I love how they fold around the corner of the paper or photo so no glue touches the photos. These are also great for placing photos onto card fronts since the recipient can remove the photo easily when they receive the card. If you'd like to purchase the file click preview below.

I'd also like to share with you another teacher's gift I recently made. My son's teacher asked for hand sanitizer to be donated throughout the year so I decorated the bottle with a penguin. Penguins are their mascots so it is great for a Winter theme for the classroom. After taking the photo so you wouldn't see the glare I applied clear contact paper to my design to protect it from Kindergarten hands! If yours is all paper then decoupage is a great sealer. I just wasn't sure how it would react with the Flower Soft I used on the scarf and hat...or the rhinestones I used on the snowflakes.

If you love this penguin and have to have it NOW! LOL! You must purchase my membership. Click the preview below to purchase it. You will be getting at least 20 files for one low price of $10.00 a grand deal! You can also purchase gift memberships. All you need to do is provide the Paperthreads forum name of the person you are buying the membership for. If you aren't a member of Paperthreads forum it's is easy and free to register.

Thanks for stopping by and letting me share a ribbonriffic technique with you! LOL! As a parting gift I am giving you the tree I used in my demo. I designed this tree with very simple straight edges making it perfect for this technique. Please be sure to grab it now if you want it. It will be gone in 24 hours. The zip file contains the AI, GSD, KNK, SVG, and WPC formats. Even though this file is free right now my TOU still applies. I ask that you DO NOT share this file but direct them here to download it themselves. Sorry freebie has expired.

Thanks for stopping by! Happy Holidays!
Shelly


 Aren't those flip flops adorable! I used the latest PTI Make it Monday technique: Debossing Stamped Images. It involves using the die cut placed over your stamped images to make the paper indented at the spot. My gibberish not making sense? Check out the wonderful video by Dawn here. I absolutely loved the look of the butterflies Dawn did but unfortunately don't own that stamp set...or any butterflies for that matter so I substituted the flip flops..not as dramatic of an effect since the dies aren't as intricate but still a nice technique none the less.
  I did a monochromatic look attempting matching the stamped flip flops with die cut straps/ flowers accented with metal studs.
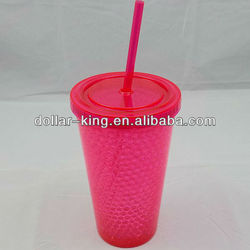
  They had them on clearance at Kmart for $2.50. (But any cup would work just fine) I put some of those packets you can add to water to flavor it inside. I did this last year too..it makes a wonderful yet inexpensive teacher gift.