Showing posts with label birthday. Show all posts

Wednesday, August 30, 2017

AF 2017 Guest: Jessica Frost-Ballas: Bronze

I have to admit I don't think about using metallics that much in my daily stamping.  However, I do love the look of it.  I should use it more often.
I used Danielle Flander's beautiful card for inspiration.  You can see it here.  I had some gorgeous pre-embossed paper in my stash which I used for my card base. I brush some watermark ink onto the flower cents and embossed them with bronze embossing powder. The doily was something I also had in my stash.  The Color Pop Autumn kit was used for the rest of the elements in the card.  The sentiment was cut from bronze paper.  Brown sequins also add a bronze element.   This card has such much texture it begs to be touched!

Thanks for looking!


Share:

SAF 2017 Guest: Rebecca Luminarias: Paper

Rebecca did a splendid job showing us how to turn simple paper that we use everyday in our card making into fabulous embellishments.  I decided to select another of the take 10 inspiration photos for my card.  I choose this one:
This was definitely outside my comfort level but I just loved the pop of yellow with all the gray/green colors.  I decided to try and mimic the great card by Nicole Heady here

I just love the way it looks like a door.  The panels are embossed with one of the Mix and Match scallop dies.   My wreath was composed of Bitty Bouquet and the sentiment is from Just Desserts.  I used Rebecca's paper strip bow technique to add to the wreath.

Thanks for looking!


Share:

Sunday, September 11, 2016

Papertrey Ink Make it Monday 260: From Black and White to Color

This week's Make it Monday over at Papertrey Ink involves using black and white plus colored images on one card.  Sound confusing?  Danielle has a wonderful video explaining exactly how to do this technique here.

I wasn't sure I was going to make the deadline for this challenge.  Coloring for me can be quite time consuming...but since the whole image didn't need to be colored I made this card in record time!  I think using colored pencils gives more precise control of where color can be put down thus increasing speed too!  More about the pencils I used later in this post.

I hardly ever practice on scrap paper before starting my cards.  However, I wasn't sure how this technique would look with the products I wanted to use so I had to practice first.

I thought I would share my practice sheet so you can see how I figure out how to layer my flowers.  I simply stamp my images overlapping then I roughly color each image in the order they get stamped in.  The top image...the one closest to you get stamped first.  So I lay this paper in my MISTI position the purple stamps upside down on top of the stamped practice sheet close the lid and viola they are in perfect placement for stamping on my card.  After stamping the purple images I apply masks over them and then position the brown #2 images in the same way....and so on.  I find this is the absolute best way to figure out how I want my stamps layered.

I used watercolor paper and some new water soluble pencils I recently received to color in my images.  (I also put a blue shadow around the floral images and leaves too)  They are made by Voyage designs and on Amazon today they are about $8.00 for a pack of 50 and they even come in a plastic case with a screw on lid.  I have used water color pencils in the past and found it was very hard to blend out the pencil lines.  Normally I just use reinkers to watercolor but I love the precise control pencils gives so I was anxious to see how these would work.    I was super impressed!  When I added water the lines just melted away and the colors blended beautifully!  See for yourself..

You can click on the photo to make it larger.  My watercolor paper had texture to it so there were much white showing through after I had colored my image.  But once a little water was added..you can't even tell I started with a colored pencil.  My small flower in the left corner wasn't as vibrant as I liked so I used my heat gun to dry the image then colored right over the same place and added more water.  The paper accept the second layer of  color very well without any peeling or the paper whatsoever.    I did the coloring and painting in the water super fast...I bet I could get even better results if I took my time.  I can't wait to play with these pencils some more.  I do have a project in the works that shows how I used them to add depth and shading to my solid stamped images...so stay tuned for that.

Oh and another fun thing you can do with these pencils is draw in little dots of color then use the water to make halos of color around them.  It almost looks like little party lights or confetti in the background of my card.  Here is a close up so you can see what I mean
 
Supplies listed and linked below:

PTI Peonies on Parade Stamps

PTI Ombre Sentiments: Birthday

PTI Center Style: Feminine Die


Voyage Designs Water Soluble Color Pencils

Thanks for stopping by! Please stop back again!
Share:

Saturday, July 02, 2016

Papertrey Ink Make It Monday #254: Stenciling with Texture Paste

This week Ashley teaches us how to use our texture paste with stencils to make a multi-colored card.  Check out her awesome video here.

I had bought some texture paste several months ago but had yet to use it so when I saw the lastest MIM I was very excited to have an excuse to finally use it!

Ashley's technique involves apply texture paste over the stencil smoothing it out and immediately adding color to the wet paste without removing the stencil.  Ashley used reinkers in her video but I dind't have reinkers in the colors I wanted to use so I just smooshed the ink pad on my craft mat and added some water to color my images.  Ashley made this whole process look very easy.  The texture paste itself was very easy to apply and smooth out.  I had some problems adding color though I kept leaving indents in the paste with my brush and in a few places the ink seeped under the stencil.  That is why I used a very bold sentiment to cover my mistakes.  The largest and medium flower have the texture pate on them.  The leaves and smallest flowers are just stenciled with ink like normal.  Once again I used my clarity stencil brushes and  I love the soft look you can achieve with these brushes.  I was pleasantly surprise at how the texture paste holds up.  I even die cut this piece with stitched rectangle die and it didn't crack or anything.  Plus it was very easy to stamp the flower details over the texture paste flowers.  I finally invested in a clear wink of stella pen and applied it to the sentiment.  I am soo impressed with the sparkle of this pen.  If you cick on the photo to make it bigger I think you can see it too.   In the past I only had a white pen which didn't seem to sparkle as much and also changed the color of your image a bit (which is some cases like my last post is good).

So since I had some seepage of ink with the above card I decided to try one more card.  My daughter wanted to make our piano teacher a card for her birthday so she suggested we try a rainbow.


This time I used reinkers but still had some seepage and managed to put more indents in the texture paste rainbow.  However, I was able to cover up the seepage with the cloud stencil.    This rainbow stencil is in two pieces.  The three bows are done first then another stencil gets layered over top to complete the rainbow. So I applied the texture paste to the first stencil let it dry then applied the second and thus the stencil rested on the previous texture pasted bow which made it higher so my last two bows are raised more than the first.  I think if I were to do this again I would tape the two rainbow stencils together and use them at the same time to apply texture paste to the full rainbow.  I used the palette knife to apply some swirly texture to the clouds.  Love this effect!  My daughter added rainbow colors to the die cut words using the stencil brushes and also some makeup brushes (since I didn't have enough stencil brushes for each color family).  She positioned everything on the page just as she wanted.  She loves her bling so she was excited to add sparkle to the bows with the Wink of Stella brush pen.    We combined several stamps to create the sentiment "Wishing you sunshine and rainbows on your birthday."  Luv, luv, luv, that sentiment.  I can't wait to try making this card again myself!

Supplies listed below:

Birthday Wishes Card:

Make It Market Mini Kit: Color Pop Florals

PTI Big Basics: Birthday Die

PTI Berry Sorbet Dye Ink

PTI Melon Berry Dye Ink

PTILovely Lady Dye Ink

PTI Mint Julep Dye Ink

I will have to check and see which reinkers I have so I can figure out which colors I used on the rainbow card. I have some errands to run so I will have to finish my supply list later. Thanks for stopping by! Please come back again!

Share:

Wednesday, May 25, 2016

Papertrey Ink May Blog Hop Challenge

The blog hop over at Papertrey Ink involves making a card based on the fun photo above.  I just love the colors and the watercolor technique!

Since I didn't have any popsicle stamps or die cuts I used ice cream cones.  In my world ice cream is far better than popsicles any day!  This was soo fun to make!  I die cut the ice cream and cones using watercolor paper. I sponged ink over the die cuts then I added some water with my water brush to mimic the watercolored look.   I stamped the sentiment overtop the ice cream cone die cuts just as they did in the photo.  I then splatter some of the same ink I used to color the die cuts over the whole card.  I should have did this before stamping my sentiment since it made the ink run a little bit.  I wasn't about to start over though.  I figure it just adds to the watercolor look.

Supplies listed and linked below:

PTI Sweet As Can Be Die

PTI Colorful Words Stamp Set

PTI Melon Berry Dye Ink

PTI Vintage Jadeite Dye Ink

PTI Smokey Shadow Dye Ink

Momento New Sprout Dye Ink

Broken China Distress Ink

Brushed Corduroy Distress Ink

Cracked Pistachio Distress Ink

Fired Brick Distress Ink

Mustard Seed Distress Ink

Spiced Marmalade Distress Ink

Worn Lipstick Distress Ink

Mini Ink Blending Tool
Thanks for stopping by! Please come back again!
Share:

Sunday, May 22, 2016

Papertrey Ink Make it Monday #249 Make It With Money and Colour Q #342

This week's challenge involves either folding money into a shape or decorating a paper wallet to give as a money holder. Lexi shares a wonderful video showing how to fold a dollar bill into a shirt.  Check it out here.   My daughter had her 9th birthday on Friday.  I knew I had to incorporate a money shape onto her card.  She loves the Papertrey Ink Color Pop Butterflies kit so I knew I had to use that in some way.  I wasn't sure what colors to use so I sought out the latest Colour Q  challenge to give me a palette to work with.

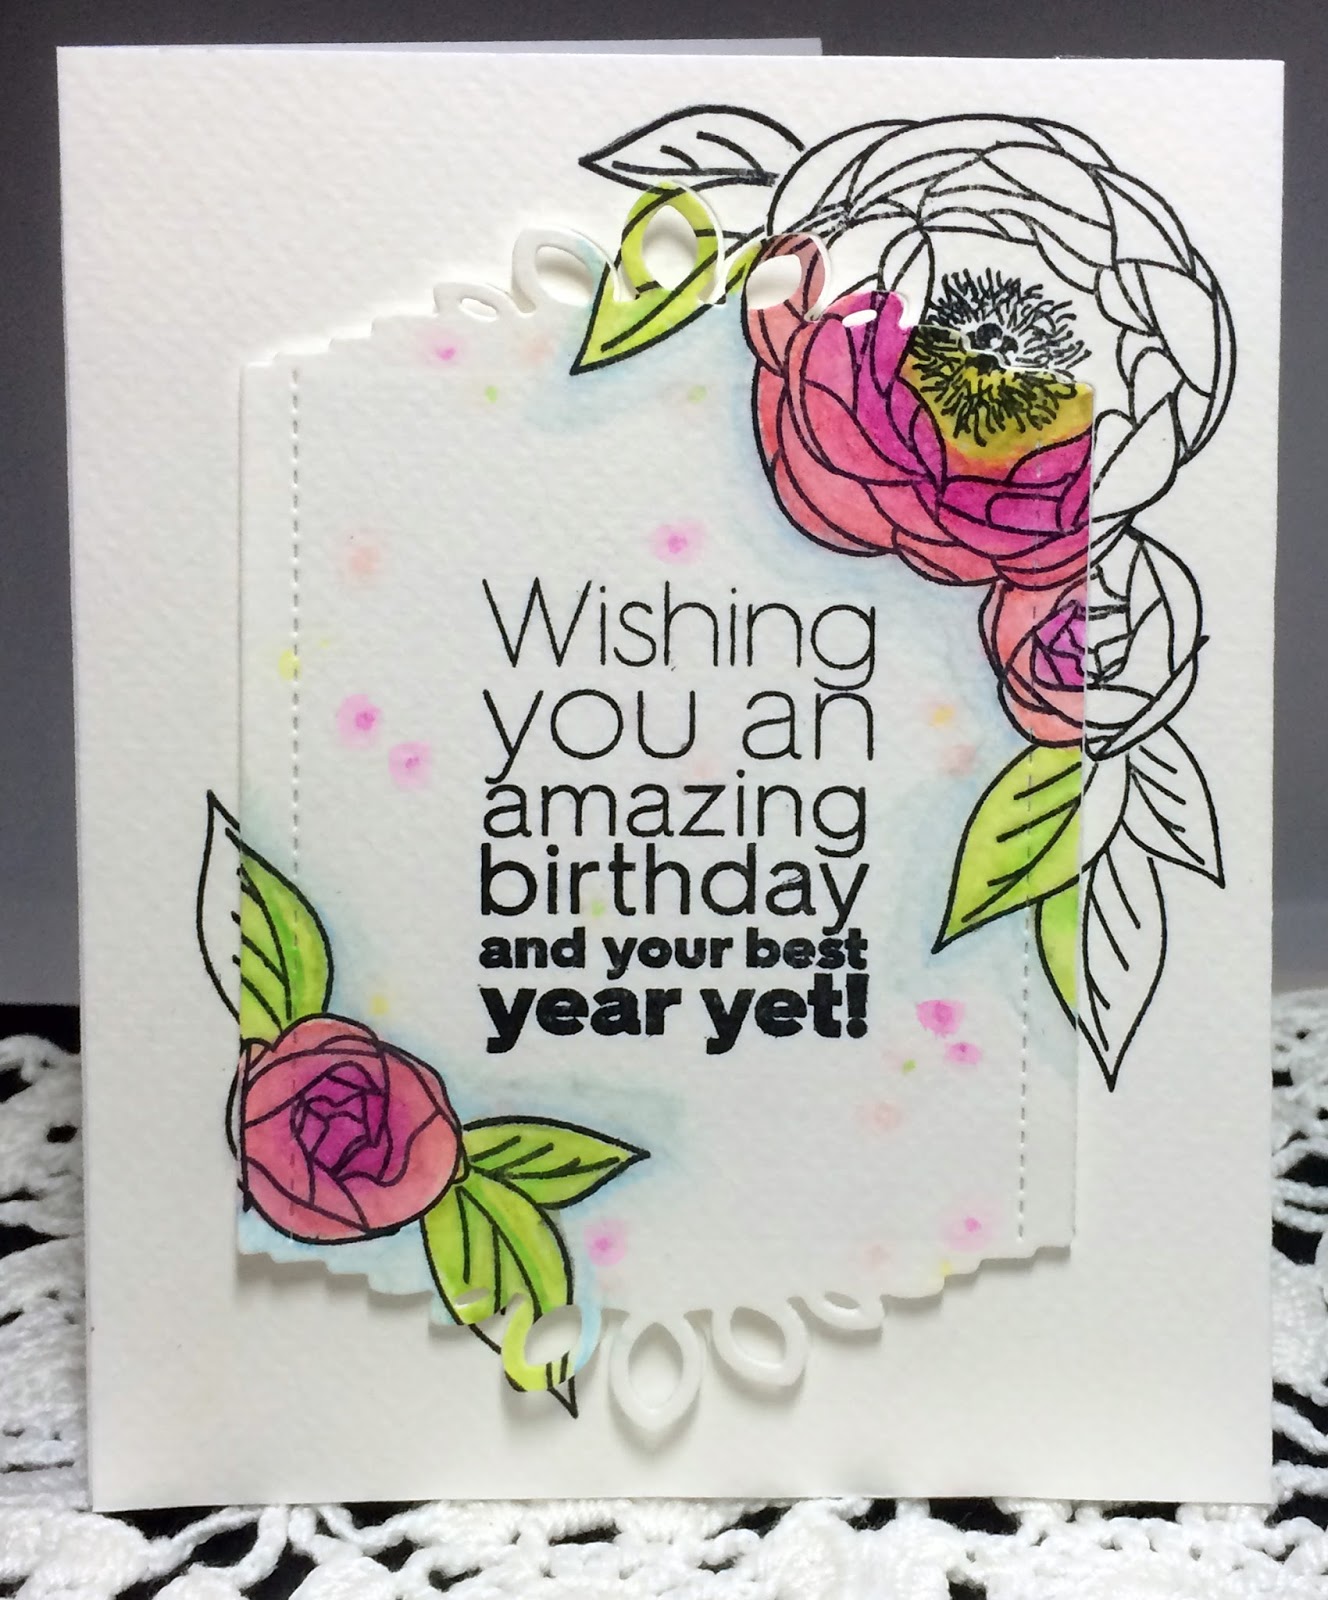
I love that dark blue paired with those bold colors.  Here is what I came up with:

Since my daughter loves butterflies I decided to make a money folded butterfly to add  as a focal point for the card.  I watched this video by Simply Debbie to make it.  I used some gold wire for the antennae.   I didn't realize the butterfly would be soo wide but I didn't have time to make another.  Fortunately, I was just able to tuck this card inside the gift bag just prior to giving it to my daughter so I didn't need an envelope  If I were to do this again I'd definitely find a smaller butterfly.

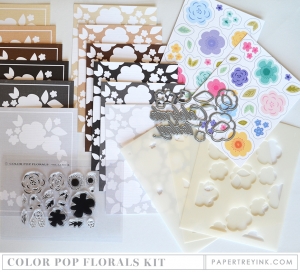
This is my first time using the Color Pop Butterflies kit and I absolutely love it!   The background of this card was soo fun to make!  You use a stencil to ink in the butterflies, flowers and leaves shapes.   Then you add details over top of that using stamps.  I actually used the same color of ink to sponge and stamp.  The sponging gives you a lighter shade of ink than directly stamping thus making it easy to add your details.   I did add a third layer of details to the organge butterflies using PTI's terra cotta tile ink but I could have easily just used the MISTI to stamp over the images a few times to make the ink dark enough to stand out.  I cut a vellum banner using Sunny Studios Banner dies to have a place rest my "happy" sentiment also from the kit.  I accidentally embossed the birthday word in white.  I actually stamped it in blue then stamped a layer of versarmark over that then added what I thought was clear embossing powder but apparently it was white!  OOOPS!

My daughter absolutely loves bling so I instead of adding the stamped details to the flower centers I added tiny holographic rhinestones to finish the card off.   The butterfly is attached to the cards with glue dots and can easily be taken off and unfolded to spend.  My daughter loved it so much though that she wanted to keep the butterfly on the card!  I am thrilled that she liked it!  I can't wait to let her use the kit and see what she can make!

I need to go eat supper.  I will be back either tonight or tomorrow with more details of the supplies I used and such.  Thanks for looking!  Please come back again!


Share:

Sunday, May 08, 2016

Papertrey Ink Make It Monday #247: Watercolored Card Set

This week's Make it Monday challenge at Papertrey Ink involved making a watercolored card set.  Melissa does an outstanding job showing how to make a wonderfuly artsy card set.  See the video HERE

I have always wanted to try watercoloring but I am the type of girl who DOES NOT color outside of the lines.  Although I loved Melissa's beautiful card set I could not bring myself to be carefree and messy and paint outside of the lines.  I was a little nervous about my first  major watercoloring project.  ( I did create some watercolored backgrounds before)   So I dug out my watercoloring pencils and my Papertrey Ink Peonies on Parade stamp set.  Stamping on bumpy watercoloring paper doesn't give you the smoothest images.  Thankfully I have the MISTI and was able to stamp each image 3 times to get good coverage. 

I do like the end result but it seemed to take forever and a day to complete this!   I tried my best to do lots of shading and try to add shadows and such to make it look more realistic.  It also took me a long time to blend out the pencil lines with water and figure out what color would add some depth to my plain pink flowers.  I really don't think this looks much like water colored flowers but more like colored pencils blended with Gamsol.

So I watched the video again and decided to try a more carefree approach to my next card.

This time I used distress ink and dye ink inkpads to achieve the watercolor looks.   I used Fantastix to get the ink sponged into the tiny areas of the stamped image then added water to blend everything out.   This took much less time but still looks artistic.  I still used the watercolor pencils to get the blue shadow around the flowers .  I also put drops of plain water on the image after I was done painting just as Melissa suggested.  I love the way it almost erases some of the ink leaving lovely color variations.   So I tried a few more dye and distress ink combos to complete two more cards to make my set.


 Sorry I don't have a photo of all the cards together in one photo.  I had to mail/give my Mom's day cards out earlier and just now finished up the last two cards in the set today. 

I am pretty happy with the way these turned out and I look forward to doing more watercoloring in the future.

I hope all the Mom's out there enjoyed this special day!  Thanks for stopping by!  Please come back again!

PS.  I have a tutorial showing how I layered these single stamps to form the bouquet above. So stay tuned for that.  Also, I haven't forgotten about the layered rose tutorial.  I took the photos with my phone in a hurry so my hand wasn't steady.  I need to start the tutorial from scratch and take better photos but hopefully I can get that done before May is over!  So stay tuned for that as well! Thanks for being patient with me!

Supplies Listed and Linked below:
PTI=Papertrey Ink

PTI Peonies on Parade Stamps

PTI Big Hugs Die Set

PTI Happy Day Stamp Set

Hero Arts Exclusive PRAYERS Stamps and Dies Set

PTI Just Desserts Stamp Set

Staedtler Ergosoft Watercolor Pencils
Watercolor pencils used for first card only:
Flowers 80 (pink), 23 (dark pink almost red)
Leaves 50, 52
Blue 30 to outline flowers

Card 2:

Abandoned Coral Distress Ink

Picked Raspberry Distress Ink

Fossilized Amber Distress Ink

PTI Green Parakeet Dye Ink

PTI New Leaf Dye Ink

Fantastix Brush Tip Ink Applicators

Card 3:

Seedless Preserves Distress Ink

Worn Lipstick Distress Ink

Scattered Straw Distress Ink
PTI Green Parakeet and New Leaf also used for the leaves...linked in Card 2 supplies

Card 4:

Broken China Distress Ink

PTI Tropical Teal Dye Ink

Scattered Straw also used linked in card 3

Peeled Paint Distress Ink

Iced Spruce Distress Ink


Share: