Showing posts with label freebie. Show all posts

Wednesday, July 03, 2013

Happy Independence Day! Sale and Freebie!

Happy 4th of July!  I am soo happy to live in a world that allows me to craft!  I hope you are too!  To celebrate this wonderful holiday I am having a 40% sale on all Shelly's Art designs now through July 7, 2013.  Click Here to go shopping!  Don't go just yet.  I have a project and a freebie to share with you.


Even though I enjoy scrapbooking immensely I don't always find time to enjoy this hobby!  So I loved sitting down and creating this layout and sharing it with you before the 4th actually gets here!  Now granted my daughter was only a few months old in this layout and she is now 6...better late than never right?!

I used several of the latest files I added to my store including:  Pleated Rosette 1and Pennant Border Set.  These files may look complicated but the cutter makes them a lot simpler than they look!  I love using my cutter to enhance layouts..so frugal..yet great looking!  Papertrey Ink's circle stars (part of the Let Freedom Ring stamp set) were the perfect addition to the center of the rosettes.  I love combining stamping with my cutter files..the best of both worlds!  Did you see the title?  This is the freebie I have for you!  I was soo tempted to add some glitter to the fireworks but the distress look of these papers just didn't lend itself to bling!  I have several years of firework photos to scrap so maybe next time!

Okay now onto that freebie I promised you!  Hurry and grab it as it won't be free forever!

  
Sorry freebie no longer available!  It contains 7 formats including AI, KNK, WPC, SVG, MTC, Studio, and GSD . Please do not share this freebie.  I ask that you please send them to this blog to download on their own.
Have a wonderful holiday!  Please come back again!

Share:

Friday, February 08, 2013

Heart Hop Day 2


Welcome to day 2 of the Heart Hop. If you missed day 1 please click here to see it. After you get done visiting my blog at the bottom of this post you will see links to the other "More Team" designers who are participating in the Heart Hop!

 I love Valentine's Day and have put my whole store on sale for a few days. Click here to find something special for your Valentine. The discount will show up when you place the items in your cart. STOP! Before you go I have a few things to share with you and a freebie too!

 First up we have some lovely projects from creative design team member Kelly Stone.


I love how Kelly enlarged the photo corner and attached it to the front of a card to hold her great little tag!  Those jewel hearts finish off the border from my Valentine Set quite nicely.

The above card  by Kelly combines my Valentine Set with Card Base 1 file and also some iris folding.  Once again Kelly blew me away with her awesome bling filled card.  Great job Kelly!  I just love iris folding!  It is a great way to not only add interest to a card but also use up some paper scraps.  A heart pattern similar to the one Kelly used alone with instructions can be found at Circle of Crafters.

If you would like to purchase either of the files Kelly used please click on the previews below.


 To finish up I have one project I made using my Valentine Set. I used my Turning Paper into Metal tut on the hearts. I embossed the background cardstock..sanded until the white core showed up then colored the embossed areas with Copic markers.


Okay now on to that freebie you have been waiting for.
Please note:  I have broken the freebie into two parts.  Today you get the card base including the frilly rectangles and tomorrow you will get the buttons and sentiment.

Freebie No Longer Available! It contains 7 formats including AI, KNK, WPC, SVG, MTC, Studio, and GSD .  Please do not share this file.  I ask that you send them here to download the file themselves.

Here are the rest of the ladies participating in the Heart Hop stop by their blogs.. 
And Lori is having a sale as well. 
VDBC & the “More” Team
Are coming together for some heartfelt inspiration…
Join us February 7th through the 9th
For our Heart Hop!
Participating Blogs:
I Scrap Designs
Chris Durnan
Shelly’s Art
Don’t forget to stop by the forum for our
And

Thanks for hoping along and staying a while at my blog.  Please do come back tomorrow to get your other freebie and more inspiration!  

Share:

Thursday, December 06, 2012

A joyful freebie and exploding gift box!

Oh my goodness can you believe it's December already!  I was hesitant to change the calendar this weekend.  Where has the year gone!  Christmas is just around the corner!  Are you ready?!  Maybe I can help!  I have several files that will make wonderful quick gifts for the special people in your life.  I will be showcasing them regularly on this blog over the next few weeks.  So please subscribe in the right hand column so you don't miss anything!

First up we have a delightfully festive way to share photographs by Kelly Stone.  (Thanks Kelly!) She used my Explosion Box, Build a Wreath, Christmas Word Charms, and Build  a Snowman files to showcase pics of her adorable son Alex!


 Here is what Kelly had to say about this wonderful present!  Scroll down to see more photos.
 
"All of the patterned papers are from a seasonal paper pad by Colorbok (Cloud 9 Design Harvest Holiday 2). The green ribbon is from Joann's. The snowflake is from the Build-a-Wreath file. Coated both sides with red Stickles. The 3D Tree was decorated with gems using my i-rock and I added yellow Stickles to the star. The green cardstock underneath the tree was embossed with a snowflake embossing folder. The Merry Christmas sentiment is from Christmas Word Charms. And the snowman is from the Build-a-Snowman file. I added Sparkly Fluff to look like a snow drift."

Below is a close up of the 3-D tree included in the Explosion Box file.   I just love the sparkle of those gems!
Below you can see how the layers all nest onto one another.  There is no need to glue them together as the lid keeps the box closed.  The layers explode open when the lid is removed.


I am working on getting files added to my new store.  Just in case you missed them check them out below.  Click on the previews to see them in my store.


Chevron seems to be a huge trend right now.  So I decided a Chevron Christmas was in order.  I think the stocking would look very cute as a gift tag..write the to and from on the brim of the stocking.  The present would work for birthday and anniversary cards too thus making this file more versatile..not just for Christmas!
These sentiments are perfect to add to those last minute cards that need to be mailed soon!

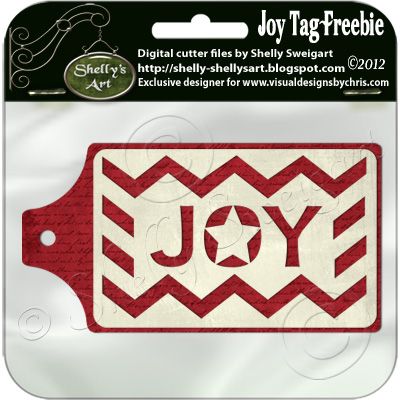
Okay now that you go through all my gabbing.  I will reward you with a Christmas freebie!  This tag is a quick accent to cards and gifts.  It matches well with my Chevron Christmas file.  It is also a nice reminder that we have sooo much to be joyful for this holiday season! 


Freebie No Longer Available!.  Keep in mind that this file though free still abides to my TOU included in the zip file.  Also, please send others to my blog to download the file.  This will motivate me to give you more freebies in the future. 

Well I've got some errands to run so I will catch up with you later!  Enjoy your weekend!  Thanks for stopping by!  Please stop again!

Share:

Sunday, October 03, 2010

50% off all my designs continues and a freebie

I have decided to have a sale to celebrate World Card Making Day and also to celebrate the official opening of the Paperthreads store in 2006.  I have many files that would work great for cards, layouts, and home decor.  I also  have digital scrapbooking products and some digital stamps too.  Please stop by my store if you get a chance by clicking here.  But before you go I have a freebie to share.  I was hoping to get it to you yesterday but I didn't get a chance to finish things up until today!  Sorry!


I will share your freebie in a minute.  First I thought I'd share with you a card I made using it.  I apologize for the bad photo.  The stickles are still wet so I didn't feel like transporting the card outside where the wind is whipping it's way around the neighborhood.  I tried to use a lot of texture on this card.  I used Sugar Plum: Witch Emma for the stamped image available at Paperthreads here.   I colored her with my Copics (still working on the whole shading and blending thing!).  I also added some Diamond Glaze to her boots to make them look more like rubber.  I added Stickles to her shirt and hat band.  I also added my the spider and bat from my Vampire Spider file.  I added flocking to the spider and Stickles to the bat.  The spider web was cut with parchment paper and then a layer of Perfect Pearls was added to give it some shimmer.  I also added Stickles to the letters.  If you would like to purchase my vampire spider file to go with your witches please click on the words above the preview.

Vampire Spider


Okay and now for your freebie.  The web fits perfectly on my card above but you could easily enlarge it to fit on a scrapbook page too.  I hope you find it useful!  Oh and the letters are included.
 
Click here to download.  The zip file contains AI, GSD, KNK, SVG, and WPC formats.
Thanks for stopping by!  I've gotta run as company is coming and the house is a wreck!
Share:

Friday, September 17, 2010

Frugal Fridays: $1.00 Dotted Fun Sentiments today only, sketch organization, and freebies.

Howdy,
 It's mid September and I think we are finally falling into a routine.  Yeah!  Both kids know that we need to catch the bus and with a few reminders they get ready and we haven't missed it yet.  Keeping our fingers crossed we don't miss it in the future.  I am a night owl and often stay up late to get my work done for the store while the kids are sleeping.  My body has faithfully woke me up every morning no matter how late I have gone to bed.  Isn't it amazing my body knows to do this!  I am always fascinated by the workings of the human body! 

For the Frugal Friday special today I am offering my dotted fun sentiments file for only $1.00.  Hurry though this price will expire at midnight EST 9/17/2010.  This font goes for just about any occasion so you'll get your money's worth by purchasing it.  Please click on the words above the preview to purchase but don't go yet as I have some awesome projects by my CDT to share.  I also will give you a peek into my sketch binder too and a freebie.

Dotted Fun Sentiments


CDT member Kelly Stone has made some awesome cards using these sentiments.  Please check them out below.

        Kelly also used my bracket fun file.  Click on the words above the preview to purchase them.

Bracket Fun
Click words above the preview if you'd like to purchase my Year Round Floral Shaped Card.

Year Round Floral Shaped Card
Click on the words above the previews to purchase the files Kelly used in this great card.

Playful Flowers, Leaves, and Branches

70's Beaded Borders

Whew!  Kelly sure was busy making some fabulous cards wasn't she?  Kelly wasn't the only one getting creative.  Aussie Caz joined in too with this great layout showcasing my hinged tabs and featuring her son Nicholas.   Caz is a pro at designing sketches and she is giving away the sketch  and KNK cutter file and layered PSD (digital scrappers)  for this layout on her blog today.  Scroll down to see the preview.   Thanks Caz!  Click here to get to her blog.  But don't leave yet I have a freebie for you too!  Oh and Caz is in Aussie Land so check back if her freebie isn't there yet...she may still be snoozing! 

Don't you just you love the photo of Nicholas from behind!?!  I absolutely love that perspective!   These hinged tabs are on sale the whole month of September.  They are sooo versatile as you can use them on cards, journals, and calendars.   It would be great to use them to hide hidden journaling or extra photos on a layout.  They actually fold over your items with a separate piece for the label that slips inside.  Click the words above the preview to purchase the tabs before they go off of sale. 

Hinged Tabs


I'd like to thank all of you who left wonderful comments about my scrappin' desk.  I thought it was a pretty cool space but it's great when others think so too.  I am not an organizational expert by any means but I am happy to share with you what works for me in hopes it will give you some inspiration in finding a system that works for you.  To continue with the organizational theme I will share with you the way I store my sketches below.

I fell in love with using sketches when designing my layouts when I first was introduced to them about 7 years ago I think.   I have been collecting them every since.  I soon needed a way to store them so I could find what I needed.,  I discovered it was easiest for me to sort my sketch by the number of photos so I developed a system based on that.  I will share my system with you as crude as it may be in hopes you might get some inspiration from it.

This is a photo of my sketch binder open.  I don't need to show you the front cover because I haven't decorated or marked it in any way.  I figured it's the only pink binder I have so there is no need to label it yet!  I took inexpensive sheets of white 8.5 x 11 pieces and covered them with scrapbooking patterned paper.  Then attached my hinged tabs on the sides in coordinating colors.  I used all the different shapes since I liked the variety.  I labeled each tab with the numbers 1-13+.  This represents how many photos the sketch is indented for.  I hand drew them in but you could use your pen tool before cutting.  Okay now to show you what is behind each divider.
Behind each tabbed divider is a colored sheet of copy paper.  I print out the PDF of  Becky Fleck's Page Maps.  (I just love this site they have the most awesome sketches and they are all FREE...thanks Becky for sharing your talent!) I cut the PDF apart sorting the layouts by the number of photos.  If you click on the photo you will see this page will go behind the 4 tab since each of these sketches are meant to work with 4 photos layouts.  I also like to write in the date the sketch was posted so I can give credit and refer people to the website so they can print it themselves.  I do occasionally put sketches by other authors on these pages but I make sure to note where I got the sketch from. 


My favorite magazines are Creating Keepsakes and Scrapbooks ETC because they provide an insert with sketches.  I simply rip out the page in the magazine that contains the layout I like then I snip the sketch and use plain paper paste to attach it to the magazine page.  I three hole punch these pages and they go into my binder after the appropriate tab.  This page is filed under my #5 tab.  Look they even tell you what size to cut some of the embellishments and papers in this great sketch! 

Okay so sometimes the layouts you like aren't going to fill the whole magazine page.  I simply cut out the layout and the sketch in the same manner but I glue it on the back of the magazine page still filed under the appropriate tab.  See on the back of some of the whole magazine pages you have filed will be ADs or layouts you don't like so I just cover these up.  I am careful to still make a note of the magazine issue these sketches came out of.

This isn't an exact science as I said it is crude.  But it works for me!  All I have to do is see how many photos I want to scrap and turn to that tab.  If you are bothered by the jagged torn edges when you rip the pages out you could use a paper trimmer to cut the edges.  You also don't have to use the back of magazines pages if you find it distracting you can just use copy paper for these sketches as well.   Sometimes you will run into a magazine page that has layouts on both sides you like...I am fortunate in that my printer also copies so I just copy the one side and file it away in the same manner.  Most of my pages in this binder have a sketch to go with them but not all of them do.  I file layouts that don't have sketches by counting the number of photos and filing it in the same manner too.  It really saves on thumbing through a million magazines and also there isn't a need to store countless magazines with this system either.  I have another binder for techniques I like some of which came from magazines so I very rarely save a magazine in tact!  So I hope this helps someone organize their layout ideas.  If you can think of any ideas on how I can improve my system I am all ears!

Wow!  Could this blog post be any longer?  Well thanks for hanging in there.  Your eyes must be sore after reading all that!  So to make it up to you I am giving away this freebie.  A lady from the Scal hints group needed something to go with a pedicure layout.  I remembered this file I created a long time ago and thought it would be perfect.  .  I dug it out and now it's better than ever.  I hope you enjoy it!


Click here to download.  Included in the zip are AI, GSD, KNK, SVG, and WPC format along with instructions. 

Oh and I  haven't forgotten about the blog candy I promised you.  I am attending a retreat next week and am trying to get ready for that.  I'm afraid I haven't had a chance to get any blog candy together.  I am hoping when I return from the retreat I will have some time to get new files into the store for you.  So.....when I reach 200 files (I'm currently at 185) I will give away a blog candy that I promise will be worth waiting for! 

Thanks so much for stopping by and visiting with me today!  I hope you have a grand weekend!


Share:

Friday, June 18, 2010

Happy Father's Day..40% off all my designs,freebie,Kindergarten Graduate


In honor of those the great guys in our lives I am having a 40% off sale on all my designs.  Click here to visit   my store.  Before you leave check out some of the amazing stuff my design team has done and there is a freebie too.   I have a few of Tyler's graduation photos at the end of this post.


As promised here is the amazing card CDT member Lisa created using my newest file Card Base 2.  Talent runs in the family as Lisa's Mom sent her this beautiful glittery butterfly.  Lisa added a flourish stamp, sentiment, a flower, and a few gems to create this stunning card in no time.  Click words below if you want to purchase this card base and make some quick cards of your own. 

Card Base 2


Next up we have some wonderful digi layouts by CDT Aussie Caz.  She created wonderful pages using my newest digital kit Wedding Bliss


I like how Caz flip the patterned paper to make an interesting patten in the middle.  Caz also used my silver charms on this fab layout. 


Caz did another layout of her great family using my kit.  The layered border she used at the bottom is one of my favorite elements from the kit.  I like how Caz titled the champagne glasses....I'm a linear kind of gal and sometimes forget that things look better angled. 

I have one more item to share with you using the Wedding Bliss Kit.   It's a card that uses the digital version of the card base coming soon to the store.


If you'd like to purchase any of the items used in the digital projects please click on the words below.  Keep checking back for the digi card template 2 as it should be in the store soon.  Oh and remember this kit can work for more than weddings too as there are many flowers and ribbons that would work great for non-wedding projects.

Wedding Bliss

Silver Charms


In today's busy life we are all about quickly doing scrapbooking pages.  Digital scrapbooking is definitely a quicker way to scrapbook.  Caz has made things even quicker for you though by providing you with a quick page you can just drop your photos into and have a splendid page in literally minutes.  Wasn't that nice of her to save you sooo much time. 


Click here to download the quick page and be sure to leave Caz some love either in my chat box to the right or in the comments to this post. 

Okay so now I promised to share with you some photos of Tyler's Kindergarten graduation.  I'm afraid I don't have many good ones as the lighting was poor and I was crying a lot!  Tyler's teacher is leaving the school district and Tyler loves her soo much so he is quite sad she is leaving.  We were sooo lucky to have a great teacher like her teach Tyler his very important first year.


Tyler wanted me to show you all the pot only so thus the picture above.  I tied my hands and let him do most of the work.  He used my Lollipop Boquet file so I had to cut that for him but everything else he did himself.  The tag says "I love you bunches". 

Okay it's getting super late!  I am watching another child today and they all want chocolate chip pancakes or waffles so I'd better go feed them!  Have a wonderful weekend and thanks for stopping by.

Shelly
Share: