

This week's Make it Monday challenge at Papertrey Ink involved making a watercolored card set. Melissa does an outstanding job showing how to make a wonderfuly artsy card set. See the video HERE
I have always wanted to try watercoloring but I am the type of girl who DOES NOT color outside of the lines. Although I loved Melissa's beautiful card set I could not bring myself to be carefree and messy and paint outside of the lines. I was a little nervous about my first major watercoloring project. ( I did create some watercolored backgrounds before) So I dug out my watercoloring pencils and my Papertrey Ink Peonies on Parade stamp set. Stamping on bumpy watercoloring paper doesn't give you the smoothest images. Thankfully I have the MISTI and was able to stamp each image 3 times to get good coverage.
 I do like the end result but it seemed to take forever and a day to complete this! I tried my best to do lots of shading and try to add shadows and such to make it look more realistic. It also took me a long time to blend out the pencil lines with water and figure out what color would add some depth to my plain pink flowers. I really don't think this looks much like water colored flowers but more like colored pencils blended with Gamsol.
So I watched the video again and decided to try a more carefree approach to my next card.
 This time I used distress ink and dye ink inkpads to achieve the watercolor looks. I used Fantastix to get the ink sponged into the tiny areas of the stamped image then added water to blend everything out. This took much less time but still looks artistic. I still used the watercolor pencils to get the blue shadow around the flowers . I also put drops of plain water on the image after I was done painting just as Melissa suggested. I love the way it almost erases some of the ink leaving lovely color variations. So I tried a few more dye and distress ink combos to complete two more cards to make my set.


Sorry I don't have a photo of all the cards together in one photo. I had to mail/give my Mom's day cards out earlier and just now finished up the last two cards in the set today.
I am pretty happy with the way these turned out and I look forward to doing more watercoloring in the future.
I hope all the Mom's out there enjoyed this special day! Thanks for stopping by! Please come back again!
PS. I have a tutorial showing how I layered these single stamps to form the bouquet above. So stay tuned for that. Also, I haven't forgotten about the layered rose tutorial. I took the photos with my phone in a hurry so my hand wasn't steady. I need to start the tutorial from scratch and take better photos but hopefully I can get that done before May is over! So stay tuned for that as well! Thanks for being patient with me!
Supplies Listed and Linked below:
PTI=Papertrey Ink
Watercolor pencils used for first card only:
Flowers 80 (pink), 23 (dark pink almost red)
Leaves 50, 52
Blue 30 to outline flowers
Card 2:
Card 3:
PTI Green Parakeet and New Leaf also used for the leaves...linked in Card 2 supplies
Card 4:
Scattered Straw also used linked in card 3

I have always wanted to try watercoloring but I am the type of girl who DOES NOT color outside of the lines. Although I loved Melissa's beautiful card set I could not bring myself to be carefree and messy and paint outside of the lines. I was a little nervous about my first major watercoloring project. ( I did create some watercolored backgrounds before) So I dug out my watercoloring pencils and my Papertrey Ink Peonies on Parade stamp set. Stamping on bumpy watercoloring paper doesn't give you the smoothest images. Thankfully I have the MISTI and was able to stamp each image 3 times to get good coverage.

So I watched the video again and decided to try a more carefree approach to my next card.


Sorry I don't have a photo of all the cards together in one photo. I had to mail/give my Mom's day cards out earlier and just now finished up the last two cards in the set today.
I am pretty happy with the way these turned out and I look forward to doing more watercoloring in the future.
I hope all the Mom's out there enjoyed this special day! Thanks for stopping by! Please come back again!
PS. I have a tutorial showing how I layered these single stamps to form the bouquet above. So stay tuned for that. Also, I haven't forgotten about the layered rose tutorial. I took the photos with my phone in a hurry so my hand wasn't steady. I need to start the tutorial from scratch and take better photos but hopefully I can get that done before May is over! So stay tuned for that as well! Thanks for being patient with me!
Supplies Listed and Linked below:
PTI=Papertrey Ink
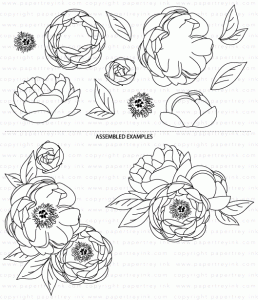 PTI Peonies on Parade Stamps |
 PTI Big Hugs Die Set |
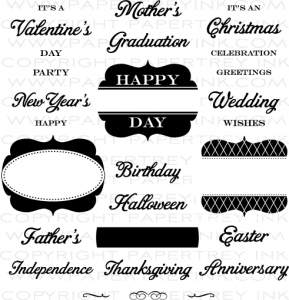 PTI Happy Day Stamp Set |
 Hero Arts Exclusive PRAYERS Stamps and Dies Set |
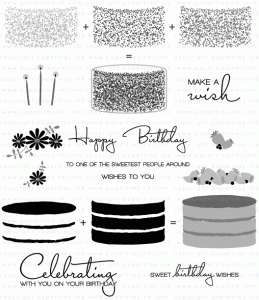 PTI Just Desserts Stamp Set |
 Staedtler Ergosoft Watercolor Pencils |
Flowers 80 (pink), 23 (dark pink almost red)
Leaves 50, 52
Blue 30 to outline flowers
Card 2:
 Abandoned Coral Distress Ink |
 Picked Raspberry Distress Ink |
 Fossilized Amber Distress Ink |
 PTI Green Parakeet Dye Ink |
 PTI New Leaf Dye Ink |
 Fantastix Brush Tip Ink Applicators |
Card 3:
 Seedless Preserves Distress Ink |
 Worn Lipstick Distress Ink |
 Scattered Straw Distress Ink |
Card 4:
 Broken China Distress Ink |
 PTI Tropical Teal Dye Ink |
Scattered Straw also used linked in card 3
 Peeled Paint Distress Ink |
 Iced Spruce Distress Ink |


