Thursday, January 30, 2014

Card A Day Blog: Thank You, Color Throwdown #277 and Case this Sketch #61

Hello!  I am here!  Just haven't had as a much a chance to create as I did last week.  I was thankful it is my turn to design for Card A Day blog this week.  Ha..I didn't even realize I said thankful in the last sentence...kinda fitting since the theme this week is Thank You cards.   I'm sad to say I don't send these type of cards very often.  I must make more of an effort to do so in the future.

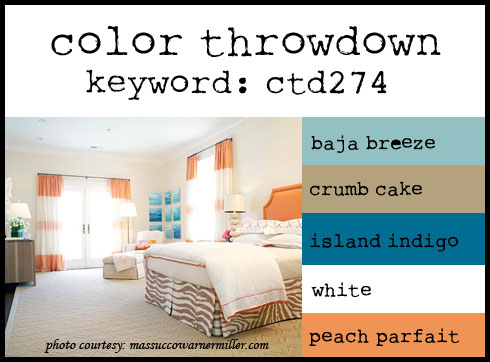
So once again I sought out challenges to point me in the right direction when starting this card.  First the wonderfully romantic color scheme came from Color Throwdown latest challenge #277.

I found this paper in my stash that basically contained all the colors in the challenge although the blue is a little different but they say substitutes are okay.  Next I sought out the latest Case This Sketch #61

I absolutely loved the white tree in the photo so I used my Stampin' Up Season of Friendship stamp and heat embossed it plus the leaves in white.  I placed the tree behind a rolling hill.  I freehand cut the hill and added a slight texture to it using a Stampin' Up texture plate. I added some punched flowers with pearl centers to the tree/hill some baker's twine finished off the hill.  Oh and the sentiment stamp came from Papertrey Ink's everyday classics anniversary set.   A friend of mine gave me that ruffled trim...I keep pulling it out to try to use on cards but it never looked right..but this time I think the ruffle is a perfect accent..what do you think?

Thanks for stopping by.  Please come back again!

Share:

Saturday, January 25, 2014

PTI's Jan 2014 blog hop

That pinkalicious photo above is the inspiration for the Papertrey Ink blog hop this month.  So many inspiring things in that photo it took me a while to figure out what I wanted to do.  Plus I was a little intimidated being restricted the use the pink and neutrals only.  I know I have seen many gorgeous monochromatic cards but I myself never thought to go that route.

I decided to seek out the latest Deconstructed sketch #134 as my base.
This is such a great sketch which uses up scraps of paper too.   I hate to waste scraps!  Throwing little pieces of pretty patterned paper is soo hard for me!   I know I will be using this sketch again in the future.  Hmm..I should take some measurements before I give my card away.

I used a Valentine themed embossing folder for the background.  The sentiment comes from PTI's Signature Series:  Dress Form stamp set.  I love that it can be paired with Valentine themed elements to create a birthday card.  I used pearlized puff paint to make the little hearts beside the sentiment.  I added Distress Crackle paint (Rock Candy) on the hearts and then once dry rubbed them with a little craft ink to bring out the cracks more.

I don't think this crackle look would work for all projects but I think it adds great texture to this style of card.  i finished with some silver bead caps dotted with more pearl paint. 

Thanks for stopping by!  Hope warmer weather returns to our part of the world soon.  Today started out decent but now it's snowing and the wind is blowing.  Guess those Christmas lights will stay up another week!  Oh well they are snowflakes and icicles so they are still appropriate!  LOL!  Stay warm!


Share:

Friday, January 24, 2014

PTI's Make it Monday #149

Glitter, glitter and more glitter.  That is what Papertrey Ink's latest Make It Monday challenge is all about this week.  Heather shows us how to make fabulous glitter embellishments.  Check out her video here.

I am a very messy crafter..sooo..even though I love the look of glitter I end up getting it all over the place.  (Don't ask hubby the massive glitter incident that happened several years ago!) Sure enough when making this card I definitely had glitter covering not only the embellishments but my craft table as well.  I did find that a disposable sticky lint roller does a good job capturing the loose glitter.  The heart file is one of my creation (coming soon to my store).  I glittered one heart from the file and then layered a white glittered heart from PTI's flipping out die collection.  The "I" is from those cheap dollar stamps I got for my kids at Wal-mart  The "you" comes from PTI's vintage picnic stamp set.   I added a scalloped border and the glittered (PTI) rickrack border layered on top of that.   A sheer bow and heart brad finished out this Valentine. 

Gosh it sure is cold here!  Hubby never wears sweaters until this Winter.  He is on blood thinners and I have been told that makes people colder too.  These cold temps can't help though!  We went to the cosignment and got some great bargains on warm clothes to survive this winter.  Woo...hooo!  Tomorrow we are suppose to climb out of the teens..heat wave!

Thanks for stopping by!  Please come back tomorrow to see my card for Papertrey Ink's blog hop.
Share:

Thursday, January 23, 2014

Color Q #225 and Case This Sketch #60 challenges

Hello again!  This is my second post for today so if you are looking for the card a day blog or fusion challenges please see previous post.

I absolutely adore sketches.  The hardest part of creating cards is figuring out where to put my elements so when I found the Case This Sketch challenge I just had to join in.  Here is the sketch:


Here is what I came up with using the sketch:

I figured why not make things even easier (or so I thought) and seek out the latest Colour Q challenge for my color inspiration.

Aren't these colors gorgeous together and the sketch is pretty simple too...should make for fast card creating.  NOT!  Do you ever have a project where you keep changing and adding things and still it doesn't look right?  Well this was one of those projects.  It started off simple enough but I made it complicated.  Let's see First I stamped the image from Stampin Up's just believe and heat embossed it in white.  I wanted to use the PTI's MIM #45 coloring embossed Images with copics to incorporate the challenge colors.  I love this technique to add multiple colors to non layering stamps!


This technique worked pretty well even on the very textured card stock.  I added a heat embossed sentiment from PTI's Year of Flowers collection stamp set.  I mimicked the stitching in the sketch by using my Sew Easy and the circle pattern.  The image still seemed to need something so I added the tiny pearls and yes I kept fussing with the image still and ended up adding the twine bow.  I put everything together modeling the sketch and still wasn't happy with the background.  I ended up stamping it with script background using distress inks and then sponging distress inks around the edge.  Then I ran it through the Grand Calibur with my favorite texture plate.  Would you believe the card still looked too plain to me.  So I stamped the burgundy strip with PTI's Fancy Flourishes.  Then I added some scallops to the side of the burgundy strip.  Whew!  Now I'm restraining myself from adding anything else!  I really thought this card was going to be simple!  It is a simple sketch..I should try it with a scrap patterned paper strip and a simple focal image sometime. 

Thanks for stopping by!  Please come back again!  Stay warm!

Share:

Card A Day Blog: Get Well and Fusion #2

It's my turn again to continue the Get Well theme at the Card A Day blog.  This is a theme card that should be always in one's stash.  But guess what it's never in mine!  I needed two cards for two friends who recently had surgery.  So this one will be used immediately and I may just duplicate it for the other friend.  Note to self:  make more Get Well cards!

I decided to use the Fusion Challenge #2 for the inspiration of my card.

When I saw this photo I immediately thought of bees!  Weird huh!  Well it works because I have an adorable bee stamp set that I was dying to use.  Let me show you my card then I'll explain more of how it came about.

I wanted to use hexagons with the bees and since the fusion sketch didn't have any hexagon shapes I sought inspiration elsewhere.  I had pinned this card by Sheri Feypel.  I loved her use of hexagons..embossing..and butterflies.  I figured bees would work just as well as butterflies so I got to creating.  I punched the hexagons using the 1 1/4 inch size.  I used Papertrey Ink's honey bees stamps and embossed the bees.  Does embossing powder get old?  I tried various inks and two different embossing powders plus different papers but the surface failed to get raised and shiny.  Eventually I ended up using Versamark ink stamping...heat embossing then stamping image over the embossing before then heat embossing again getting the raised image I wanted.  Thank goodness I was using clear stamps or that would have been impossible!  I used some fun flock on the the largest bees yellow body to make it nice and fuzzy.  The sentiment is from PTI's honey bee sentiments.  I embossed the background with a wood grain embossing folder to mimic the fusion photo then rubbed some grey ink over the embossing to bring out the details more.  I added some white sequins to mimic the flight of the bees and add movement to the card. 

Thanks for stopping by!  Please come back again..I'll have another challenge card to share soon.  It's freezing here..hope it's warm where you are!  I think I need to buy more sweaters!  Brrr!

Share:

Sunday, January 19, 2014

ColourQ #224 challenge card

I am was very happy to be able to participate in the latest Colour Q challenge.  Take a look at these colors:

I have to admit..I wasn't too sure about these colors.  I would never put them together in an outfit myself but it does look good together on that shirt in the inspiration photo.  So...I was anxious to see how they would look on a card.  Here is my end result. 

Sorry about the bad photo...these color really do look quite nice in real life!  I know you are thinking...what a Mother's Day card...too early for that..Valentine's day is next...right?!  Well you see those hearts there..this was supposed to be a Valentine's card.  I used a file coming soon to my store.  It was fun cutting the outline and placing the hearts randomly in the overlay.  I love this Happy Day stamp set from Papertrey ink.  I knew I wanted to use it for the sentiment on the card.  The only problem is I had purchased a partial set and Valentine's wasn't included in the set I received (duh..should have checked first!).  So I figured Mother's day would be the next best thing to use with the hearts.  I have to say normally I'm rushing to put together a Mother's day card a day before the holiday so it will be nice to have this in my stash.  Let's see the hearts were stamped with various patterns using the Happy Hexagons stamp set from Papertrey Ink.  The stamps just so covered the hearts so if I didn't get them lined up exactly I had some white spots but that didn't really bother me too much..I just stamped the white spot again to cover it.     I loved having another use for this well loved stamp set.  After piecing the hearts in I ran the entire card front through my Grand Calibur using a Stampin' Up texture plate. Love how it integrated the hearts into the card while giving it a store bought texture.  Some space beads, rhinestones and twine finish up the card.

Thanks for stopping by!  Please come back again!  Enjoy your week!


Share:

Friday, January 17, 2014

Card A Day: Valentine

Hello! It's my turn to design a card for the Card A Day blog. The theme this week is Valentine's.  This is one of those holidays I let go pass without too much fuss.  So I was very happy to have an excuse to make a Valentine.  In fact I got a little carried away and made 4 different Valentines.  So I'll be sharing them in the future.  (I even have a garland and candle holder planned for Valentine decorating!).   Anyway, on to the card of the day:

I used all files I designed myself for this card.  (The files will be coming soon to my new store so if you are interested in them..stay tuned..I will post here when they are ready)  I actually cut all bordered squares in vanilla cardstock and colored them with various shades of Copic markers to get this gorgeous ombre effect.  I can't wait to try this in other monochromatic color schemes.  I'm not totally loving the red card stock base...in hindsight it would look better on white.  I added some black fun flock to the I love U sentiment to give a little elegance  and texture to the card.  The buttons were actually die cuts too. I used my 3-D paper button technique except I only did one layer of paper.  I know it's hard to tell in the photo but they are glittery and super shiny!  Baker's twine accents the buttons.

Thanks for stopping by!  Come back again!  I'll be posting my entry for the Colour Q challenge soon.

Have a fabulous weekend!
Share:

Monday, January 13, 2014

Fusion Card Challenge #1

I'm back again as promised.  I have another challenge card to share.  I stumbled upon the Fusion Card Challenge last week.
It's an interesting concept....you can use just the sketch or just the photo for inspiration...or go for it all and use both!  I really loved the orange/grey/white color combo but unfortunately I used most of my grey cardstock up for the previous challenge so instead I used a piece of pattern paper and pulled my colors from there.  Hmm..guess it would be best just to show you my card before I explain any more huh!

I absolutely adored design team member Betty J's card example so I decided to case hers.  I used one of my card base files to add some decorative border strips to the sides.  The butterflies are from my 3-D butterflies file.  (Both files are coming soon to my new store!).   I actually made two cards one with the embossed butterflies and one with plain butterflies.  I definitely like the texture the embossed butterflies add to the card.  The sentiment is from Papertrey Ink's. Happy Hexagons mini stamp set.  I was very happy to dig out my dusty/forgotten fiber to wrap around the bottom of the card.  It is hard to see in the photo but it's tiny pom poms on a string...adds a fun element to this card.  Oh and some more of those gems designed for jeans was added to the center of the butterflies.  The wings were attached with a tiny piece of foam tape allowing them to be folded slightly in the middle to give a 3-D effect.

Time to get the kids ready for bed.  I'll see you back here on the 17th for my Card a Day blog post.  Thanks for stopping by!  Enjoy the rest of your week!
Share:

Sunday, January 12, 2014

Papertrey Ink's Make it Monday Challenge

Woo Hoo!  I'm off to a grand start...for my New Year's resolution ...day two of blogging!  Hope I can continue this trend and I hope you are all doing well with your goals too!

One of my favorite challenge is Papertrey Ink's Make it Monday challenge.   As of right now there are 147 technique videos (you can see them by clicking the highlighted words ...Make it Monday).  I'm a total technique junkie and absolutely love when someone shows me a new technique so it's a thrill to come to this website and see a new one every Monday.  Hmm...maybe I should make it a New Year Resolution to try one of these techniques at least once a month in addition to participating in the challenge.

Anyway..on to my cards.  I grabbed the color scheme from Curtain Call's Smitten challenge.   Unfortunately, I didn't get the photos taken in time to enter the challenge.  Drat!  Well I'll just have to remember to participate in their new challenge on Jan. 15th.


The newest PTI MIM challenge involves stamping one stamp in multiple colors and cutting them apart and layering them for a multi-colored single image.  Love this!  Check out the video here.  I'm not positive I like these colors together but they did look great on the mitten in the curtain call inspiration photo.  I do like how the focal image turned out though..and may jusy try this in different colors sometime.  I used PTI's Mehndi Medallion mini stamp set along with some circle die cuts and some fussy cutting.  I think the bling is a great finishing touch to the medallion.  It's funny I bought these gems when JoAnn Fabrics was going out of business.  They were designed to be attached to jeans...I have not put one on my jeans but I have used a ton on cards!  I used Deconstructed sketch # 129.  It's a great sketch for making multiple cards fast.  I also stamped the background paper with stamps from the medallion set too..and added a little embossing to the strip.  It just seemed too plain without these added features.   The sentiment is from PTI's Wishes Come True stamp set.  I figured I'll stamp the sentiment on the other card when I need it...it could easily be a thank you or anniversary card too.

I have one more challenge card to share with you so come back tomorrow to see that!  Right now it's snuggle time!  Thanks for stopping by!


Share:

Saturday, January 11, 2014

Color Throwdown and Mojo Monday Challenge

Yikes!  Has it really been since the beginning of November since I posted?!  I'm sooo sorry about that!  The end of the year just flew by not only because of dealing with birthdays and Christmas but we also did some painting too.  I can't believe 2014 is actually here!!  One of my resolutions this year is to definitely blog more.  So...to encourage me to blog more I have decided to try and participate in lots of challenges.  Not only does this spruce up my mojo but also challenges have deadlines for entry and so I must blog to meet those deadlines.  So wish me luck!  I hope you all do well with your New Year resolutions too.

Okay so I decided to make a card combining two challenges.  I love it when others choose color combos.  I have found soo many amazing combos when looking at color combo challenges.  This time was no exception...I never would have put these colors together on my own but they really do look great together!
 Find more info about the color throwdown challenge here.  There is still time to enter! 

So I had my color combo but I mentioned another challenge.  I sought out Mojo Monday's latest sketch to figure out where to place my elements.  You can find more info about this challenge here.

I fell in love with Wanda Cullen's example.  You can see her elegant card here.  Isn't that sentiment terrific.  I found it on Pinterest but it doesn't give a website.  You can find the printable sentiment here.  I copied it into word and printed 4 to a page so I can make similar cards quickly.  Aren't those butterflies adorable!  I just love the pearl beads on the body.  They actually are made using my KNK cutter and my 3-D butterflies file.  (Psst...I'm opening up a new store soon so these will be available there shortly).
Here is a close up.  Simply lay the one butterfly down flat then layer the embellished one on top with a little foam pop tape just in the middle and bend the wings forward a bit.  Instant depth!


I stamped the background with a Filagree Stamping up stamp using a Memento ink a shade darker than my cardstock.  The trim was from a bag I got at the Good Will store. 

The kids are in bed and it is so peaceful and quiet here!  Time to chill..watch some Dexter (a show we just started watching..but I feeling we're going to be hooked!) and snuggle with my hubby!  I will be back tomorrow with another challenge card post!  Please come back and visit me!

Enjoy the rest of your weekend!


Share: