Hi everyone,
As promised I have a winner of my blog candy. Thanks for entering. Those of you that shared photos of your projects using the CAD freebie flower got your name into the drawing 3 times. These projects turned out great and I can't wait to share them with you below. But first....I will not make you wait any longer to see the winner.
Thanks to random.org...the winner of my blog candy is....a lady who isn't a stranger around here and I think has my store memorized! LOL!
 Congrats Sue! I will get the blog candy sent off to you hopefully this weekend. I know you will put it to good use. I expect to see some projects using my files with it the minute you get it. Hint..hint! LOL!
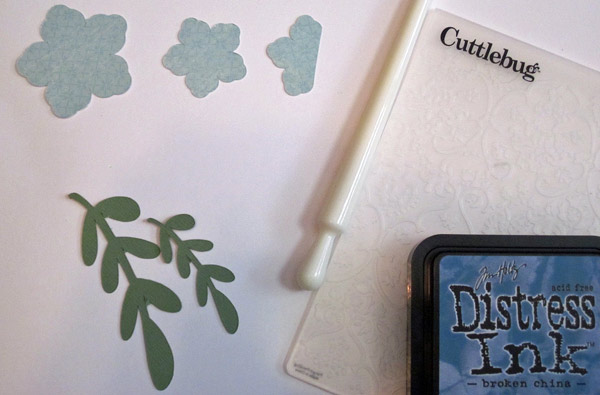
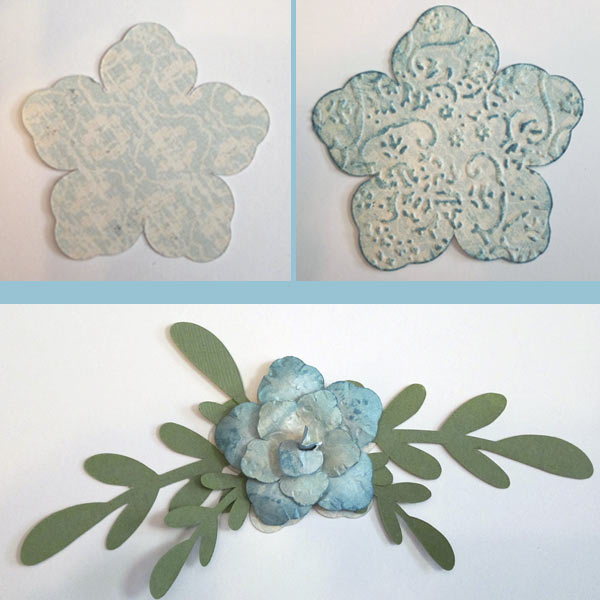
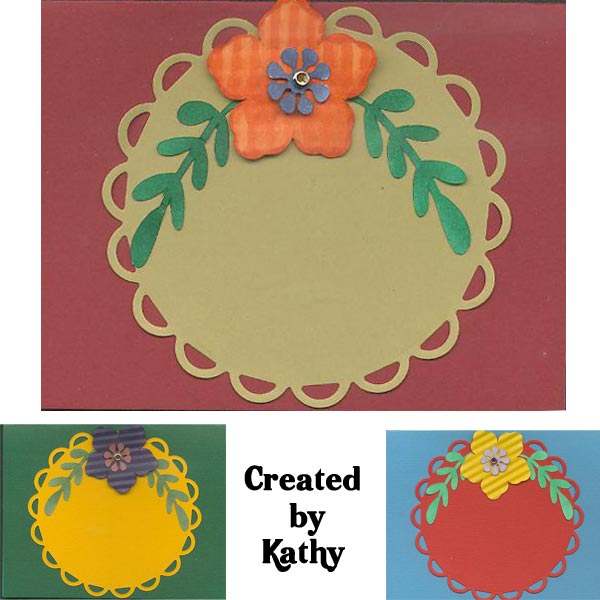
Sue, Kathy and Becky sent me some awesome projects using my CAD freebie flower. Check them out below.


 See I told you they were fab. Yet again each project is totally different from anything my team displayed over the past few days. Who knew playing with paper could be sooo fun!
I mentioned Adoree getting a hair cut so I want to share with you her photos. But first I wanted to answer some of the comments made on Monday.
Thanks everyone who gave me compliments...I appreciate them greatly..you guys sure do know how to make a girl smile!
Ginger- Adoree does still twists her hair but I guess since she stopped sucking her thumb she is more aware of how hard she is twisting and can stop before she pulls it out.
Gina-I think shoelaces are a brilliant idea for a belt. I remember growing up I had several belts but we always had to add a hole with a hammer and nail because the existing ones never were in the right place. The shoelaces however are perfect each and every time! Brilliant son you have there Gina!
momof5-Congrats on your son going State in wrestling! You must be very proud. I'll see what I can do for wresting files. I don't know a lot about the sport but I'll do some research. Do you have any specific titles I could use?
Lisa-sorry your baby was sick. Thanks for taking the time to stop by my blog. It's just terrible when our kids are sick isn't it! I often wish I could wave a magic wand and poof they would feel all better. I do hope your baby is feeling better now.
Adoree started sucking her thumb within a week or so of being born. When she was a young infant it was great because that thumb would comfort while we were getting her bottle ready or when she was sad or mad about something. But then she started pulling her hair out while she continued to suck her thumb. So we were at a loss of what to do. Finally I made a plea here and Danny posted that he had some gloves for sale that would help me. So I we went ahead and ordered them. Adoree absolutely loved them. You can see the website at endthumbsucking.com or by clicking here.

 The glove picture was taken not long after getting the gloves. It is dated 7/30/2010. We wore them on her for 24 hours a day and almost immediately noticed she wasn't sucking her thumb or pulling hair much at all. After a month or so we just wore them on her at night. Then one day...wish I would have wrote down the day...I noticed a hole had developed in the gloves. So I told Adoree we had to throw the gloves away and she agreed. I'd say it took about 2 or 3 months for her to stop the thumb sucking and hair pulling completely. I highly recommend these gloves for everyone. They are made of a swimsuit type material and come in fabulous colors. Plus there are two buttons allowing you to adjust for the size of the wrist. I recommend two pairs so you have one to wash.
So here is Adoree at a little over 3.5 years old before getting her hair cut.
 It amazes me how much older she looks as compared to that glove photo!
Now here she is after getting her hair cut. Why it is all kids go through that "cheesy" smile stage? I wish I would have taken a head shot only after we got home. I may have to fake it and dress her up in these clothes again and take one.
 Hooray Adoree can see again! Okay I've got a dishwasher to load and supper to make. So Goodbye! Thanks for stopping by! Enjoy the rest of your week!

As promised I have a winner of my blog candy. Thanks for entering. Those of you that shared photos of your projects using the CAD freebie flower got your name into the drawing 3 times. These projects turned out great and I can't wait to share them with you below. But first....I will not make you wait any longer to see the winner.
Thanks to random.org...the winner of my blog candy is....a lady who isn't a stranger around here and I think has my store memorized! LOL!

Sue, Kathy and Becky sent me some awesome projects using my CAD freebie flower. Check them out below.


I mentioned Adoree getting a hair cut so I want to share with you her photos. But first I wanted to answer some of the comments made on Monday.
Thanks everyone who gave me compliments...I appreciate them greatly..you guys sure do know how to make a girl smile!
Ginger- Adoree does still twists her hair but I guess since she stopped sucking her thumb she is more aware of how hard she is twisting and can stop before she pulls it out.
Gina-I think shoelaces are a brilliant idea for a belt. I remember growing up I had several belts but we always had to add a hole with a hammer and nail because the existing ones never were in the right place. The shoelaces however are perfect each and every time! Brilliant son you have there Gina!
momof5-Congrats on your son going State in wrestling! You must be very proud. I'll see what I can do for wresting files. I don't know a lot about the sport but I'll do some research. Do you have any specific titles I could use?
Lisa-sorry your baby was sick. Thanks for taking the time to stop by my blog. It's just terrible when our kids are sick isn't it! I often wish I could wave a magic wand and poof they would feel all better. I do hope your baby is feeling better now.
Adoree started sucking her thumb within a week or so of being born. When she was a young infant it was great because that thumb would comfort while we were getting her bottle ready or when she was sad or mad about something. But then she started pulling her hair out while she continued to suck her thumb. So we were at a loss of what to do. Finally I made a plea here and Danny posted that he had some gloves for sale that would help me. So I we went ahead and ordered them. Adoree absolutely loved them. You can see the website at endthumbsucking.com or by clicking here.

 The glove picture was taken not long after getting the gloves. It is dated 7/30/2010. We wore them on her for 24 hours a day and almost immediately noticed she wasn't sucking her thumb or pulling hair much at all. After a month or so we just wore them on her at night. Then one day...wish I would have wrote down the day...I noticed a hole had developed in the gloves. So I told Adoree we had to throw the gloves away and she agreed. I'd say it took about 2 or 3 months for her to stop the thumb sucking and hair pulling completely. I highly recommend these gloves for everyone. They are made of a swimsuit type material and come in fabulous colors. Plus there are two buttons allowing you to adjust for the size of the wrist. I recommend two pairs so you have one to wash.
So here is Adoree at a little over 3.5 years old before getting her hair cut.

Now here she is after getting her hair cut. Why it is all kids go through that "cheesy" smile stage? I wish I would have taken a head shot only after we got home. I may have to fake it and dress her up in these clothes again and take one.